custom cakes/cookies

Monday, December 28, 2009

Holiday Cheer: Part 4 (Candy Cane Gelato)

I happen to enjoy creamy frozen desserts the most in the winter time. I'm guessing most people would prefer huge scoops of ice cream during the hot summer months, but not me. I seem to find it more refreshing when the outside temp matches that of the inside of my freezer. Not wanting to let food go to waste, I started this after-Christmas tradition of making mint-flavored gelato a few years ago as a way to use up extra candy canes. This year, I also happened to have a lot of egg yolks left over from making royal icing for the gingerbread house. Perfect timing!

My favorite things about this recipe are that (1) all of the mint flavor is derived from the candy cane itself, and (2) the red candy cane stripes dissolve into a pretty pink-hued custard. This year I added a couple of spearmint candy canes, which appear as lovely green splotches amid the pink. Adding the crushed candy to the custard while still hot ensures that the candy will melt into the mixture, imparting both flavor and color. If you like a bit of crunch to your gelato, reserve a portion of the crushed candy canes to mix in during the last few churns of the ice cream machine.

Candy Cane Gelato

7 large egg yolks, at room temperature
⅔ cup sugar
2½ cups whole milk
⅔ cup heavy cream
¼ tsp sea salt
1 cup crushed candy canes, divided

1. Beat eggs yolks and sugar in the bowl of an electric mixer at medium speed, until thick and lemon colored (about 2 minutes). Set aside.
2. Heat milk and cream in a medium saucepan set over medium heat until small bubbles appear around the edges of the pan. Do not let this boil.
3. Whisk about ⅓ of the heated milk and cream into the egg yolk mixture, then whisk this combined mixture back into the pan with the remaining milk and cream. Reduce heat to low. Cook slowly stirring constantly, until the mixture thickens a bit and appears smooth, like a very wet custard, and can coat the back of a wooden spoon (about 5 minutes). Strain through a fine mesh sieve into a heat-proof, air-tight container. Stir in the salt and about ⅔ cup of the crushed candy canes. Allow to cool completely, then stir in the remaining candy cane pieces. Cover and refrigerate until very cold (~8 hours).
4. Freeze in your ice cream machine according to the manufacturer’s instructions.

Saturday, December 26, 2009

Holiday Cheer: Part 3 (gingerbread house)


This year, thanks to the Daring Kitchen, a new tradition may have been born. I was challenged to make a gingerbread house from scratch. Wanting to share the fun (and work load) with others, I invited friends over to help build my dream bakery...out of dough. We created not just a place that sold sugary baked treats. This is a shop where the artisan skills of my talented friends can be showcased in the form of breads and smoked charcuterie. Yep, cookies, candies, cakes, breads and BACON!

A few details, such as the shutters and front door were piped on using royal icing.

Once the icing details were dry, we could determine the lay of the "land". The walls and the roof were sealed together by piping royal icing along the seams.

The front window display has sweet treats ready to be eaten.

Shannon created these using royal icing and sprinkles.

Peering closely into the window display reveals their intricacy. Shannon wanted the treats to appear whimsical rather than realistic.

The Bakery-Smokery is outfitted with a stone-paved fireplace.

Garin did the mason work.

The stones are actually edible chocolate rocks. They taste very similar to M&Ms.

An extreme close-up reveals just how realistic these chocolate rocks appear.

While Garin finished laying the stones for the chimney. Matt and I shingled the roof with Cascadian Farms multi-grain squares. Yes, our roof is organic!

Here's a side view of the attached smoke house.

It's nestled among a small forest of snowy-boughed trees.

The separate entrance for the smoke house is a classic (two-part) dutch door. A sign prominently announces its purpose.

Shannon was responsible for landscaping. The trees were cut in half longitudinally (before baking) and painted (after baking) on both sides using a flooded icing technique.

Once the icing was dry, four tree halves were held together in 3D by piping a stiff royal icing along the inner seams.

The house is living underneath my Christmas tree. A light from the tree is fed in through the back window to illuminate it.

Gingerbread dough rolled flat. Ready to cut out patterns.

Once baked, the pattern pieces were matched up to the gingerbread counterparts again. This helped to ensure a good fit and to indicate placement.


The December 2009 Daring Bakers’ challenge was hosted by Anna of Very Small Anna and Y of Lemonpi. They chose to challenge Daring Bakers’ everywhere to bake and assemble a gingerbread house from scratch. They chose recipes from Good Housekeeping and from The Great Scandinavian Baking Book as the challenge recipes. I also consulted Gingerbread for All Seasons by Teresa Layman for patterns and ideas. Here are the recipes that I used.

Spicy Gingerbread Dough (from Good Housekeeping)
2½ cups (500g) packed dark brown sugar
1½ cups (360mL) heavy cream
1¼ cups (425g) molasses
9½ cups (1663g) all-purpose flour
2 TBS baking soda
1 TBS ground ginger

Directions
1. In very large bowl of an electric mixer, beat brown sugar, cream, and molasses until sugar lumps dissolve and mixture is smooth. In medium bowl, combine flour, baking soda, and ginger. With spoon, stir flour mixture into cream mixture in 3 additions until dough is too stiff to stir, then knead with hands until flour is incorporated and dough is smooth.

2. Divide dough into 4 equal portions; flatten each into a disk to speed chilling. Wrap each disk well with plastic wrap and refrigerate at least 4 hours or overnight, until dough is firm enough to roll.

3. Grease and flour several large cookie sheets

4. Roll out dough, 1 disk at a time on each cookie sheet to about 3/16-inch thickness. (Placing 3/16-inch dowels or rulers on either side of dough to use as a guide will help roll dough to uniform thickness.)

5. Trim excess dough from cookie sheet; wrap and reserve in refrigerator. Chill rolled dough on cookie sheet in refrigerator or freezer at least 10 minutes or until firm enough to cut easily.

6. Preheat oven to 300° F.

7. Use chilled rolled dough, floured poster board patterns, and sharp paring knife to cut all house pieces on cookie sheet, making sure to leave at least 1¼ inches between pieces because dough will expand slightly during baking. Wrap and reserve trimmings in refrigerator. Combine and use trimmings as necessary to complete house and other decorative pieces. Cut and bake large pieces and small pieces separately.

8. Chill for 10 minutes before baking if the dough seems really soft after you cut it. This will discourage too much spreading/warping of the shapes you cut.

9. Bake 25 to 30 minutes, until pieces are firm to the touch. Do not overbake; pieces will be too crisp to trim to proper size.

10. Remove cookie sheet from oven. While house pieces are still warm, place poster-board patterns on top and use them as guides to trim shapes to match if necessary. Cool pieces completely before attempting to assemble the house.

Royal Icing
3 large egg whites
1 lb powdered sugar
tsp cream of tartar

Beat all ingredients with electric mixer until smooth and glossy white (5-7 minutes). Portion icing into smaller bowls and tint with food coloring. I used AmeriColor. For flooding technique on trees and shudders, add water to tinted icing until you achieve a runny yogurt-like consistency. Pipe on pieces and allow to dry before assembling. If you aren't using it all at once you can keep the icing in a small bowl, loosely covered with a damp towel for a few hours until ready to use. You may have to beat it slightly to get it an even consistency if the top sets up a bit. Piped on the house, this will set up hard over time.

Sunday, December 20, 2009

Holiday Cheer: Part 2 (favorite recipes: smoked caramels and chai tea scones)

This year I've been adapting and developing recipes to incorporate organic loose leaf tea sold by my friends at Arbor Teas. If you didn't already catch the postings in the Cooking with Tea segment of Arbor Teas' blog, I thought I might share two of my favorite (and often requested) recipes here. With families gathering and gift giving upon us, I'm hoping you might find a way to incorporate these elegant treats into your holiday celebrations. Sending a little holiday cheer from my kitchen to yours...

Smoked Caramels
Adapted from Pure Dessert by Alice Medrich
- makes 40 (1-inch) caramels


2 TBS lapsang souchong black tea
1 cup heavy cream
½ cup Lyle’s golden syrup
1 cup sugar
rounded ¼ tsp fine sea salt
2 tsp pure vanilla extract
1½ TBS unsalted butter, cut into chunks, softened
Smoked sea salt to garnish


Line the bottom and sides of an 8-inch loaf pan with parchment and butter the parchment.

Combine the cream and organic lapsang souchong black tea in a small saucepan and heat until tiny bubbles form around the edges of the pan. Turn off the heat and cover the pan to keep the cream hot. Allow the tea to steep while proceeding to the next step.

Combine the golden syrup, sugar, and salt in a heavy 3-quart saucepan and cook over medium heat, stirring with a silicone spatula, until the mixture begins to simmer around the edges. Wash the sugar and syrup from the sides of the pan with a pastry brush dipped in water. Cover and cook for about 3 minutes. (Meanwhile, rinse the spatula or spoon before using it again later.) Uncover the pan and wash down the sides once more. Attach the candy thermometer to the pan, without letting it touch the bottom of the pan, and cook, uncovered (without stirring) until the mixture reaches 305°F.

When the sugar mixture reaches 305°F, turn off the heat and stir in the butter chunks. Place a fine mesh sieve over the pan (to catch tea leaves) and gradually pour in the hot cream, stirring slowly; it will bubble up and steam dramatically, so be careful. Turn the burner back on and adjust it so that the mixture boils energetically but not violently. Stir until any thickened syrup at the bottom of the pan is dissolved and the mixture is smooth. Continue to cook, stirring occasionally, to about 245°F. Then cook, stirring constantly, to 260°F for soft, chewy caramels or 265°F, for firmer, chewy caramels.

Remove the pan from the heat and stir in the vanilla extract. Pour the caramel into the lined pan. Let set for 4 to 5 hours, or overnight until firm. After an hour or so of cooling, sprinkle with garnish of sea salt and press crystals lightly into the caramel.

When completely set, lift the pan liner from the pan and peel off the parchment. Cut the caramels with a sharp knife. Wrap each caramel individually in wax paper.

Masala Chai Tea Scones
Makes about 16 scones

1¼ cups heavy cream, divided
6 TBS Masala Chai Black Tea
4 cups cake flour (sifted if clumpy)
½ cup sugar, plus more for sprinkling on top
1 TBS baking powder
1 tsp salt
1½ sticks unsalted butter, cut into ½ -inch pieces and chilled
1 cup dried currants
1 large egg

Combine heavy cream and masala chai tea in an airtight container and refrigerate overnight or up to 24 hours.

When ready to make scones, preheat oven to 375°F.

Strain the cream to remove the tea, pressing with a wooden spoon to recover as much as possible.

Whisk together flour, sugar, baking powder, and salt in a large bowl. Toss butter pieces into flour, blending with your fingertips until the mixture resembles a coarse meal. (A few pulses in a large capacity food processor will make short work of this.) Stir in dried currents.

In a separate bowl, mix together egg and 1 cup masala chai-infused cream, then gently fold this into flour mixture until the dough just comes together. (It will be quite delicate.) Turn dough out on a lightly floured surface, and with floured hands shape into a 1-inch thick rectangle. Use a knife to cut out small triangles of dough and arrange 2 inches apart on a parchment-lined baking sheet. Brush tops of scones with remaining cream and sprinkle lightly with sugar. Bake scones until tops are golden, 25-30 minutes. Cool slightly before serving.

Tuesday, December 15, 2009

Holiday Cheer: Part 1 (iced sugar cookies)


I’ve been in an extra festive mood this holiday season, and I know exactly the reasons why. Reflecting back on my life a year ago, things are quite different today. Most notably, beautiful new friendships have formed, and I’m beginning to find more creative outlets for my talents and passions. Happiness and contentment seem to place me in a satiable Christmas spirit, so I’ve been finding ways to celebrate as much as possible. One Christmas tradition long held in my family is to make and decorate sugar cookies. Each year they get a little prettier as our icing techniques improve. This year, the bar on aesthetics was not only raised, it was literally blown away. I happen to have become friends with a talented local cake artist. Heather let me help her with a fun cake project for the Shadow Art Fair. Now it was her turn to play in my kitchen. Armed with a Kitchen Notebook page that I clipped from the 2006 edition of Gourmet Magazine (RIP), Heather and I played with a fun royal icing, flooding technique. It was new to both of us and really very easy to do. Please believe me on how simple this is to do. All you need is a few piping bags of colored royal icing, a wooden skewer (or equivalent), and bit of imagination.

Iced Sugar Cookies
Makes about 6 dozen cookies

3 cups flour
1 ½ tsp baking powder
½ tsp salt
2 sticks plus 3 TBS unsalted butter, softened
1 scant cup of sugar
1 egg
1 TBS milk
2 ½ tsp vanilla
¼ tsp lemon zest

Whisk together flour, baking powder, and salt in a large bowl. In a separate bowl, beat together butter and sugar until fluffy and well blended. Add egg and mix until combined. Mix in milk, vanilla, and lemon zest. Gradually stir in flour mixture until well blended. Refrigerate dough until cold (at least one hour or up to several days).

Preheat oven to 375° F.
Roll out dough on floured surface to ⅛-in thickness . Cut out desired shapes and place on parchment-lined baking sheets. Chill cut cookies for ~10 minutes in the refrigerator and then transfer baking sheet to the oven. Bake 8 minutes or until edges are golden. Allow cookies to cool completely before icing.


For recipes, tips, and more ideas on using royal icing visit Sweetopia, a truly talented and creative cookie decorator.


Flooding Technique
Trace the border of cookie with icing and then “flood” the entire area with icing, staying within the marked edges. Using a contrasting color, pipe vertical lines, dots, or concentric circles over the flooded surface. Form design by lightly pulling a skewer through the contrasting icing at various intervals. Wipe skewer clean between each pull.


technique image from Gourmet, December 2006

Monday, December 14, 2009

Comfort en Croute

The December 2009 Daring Cooks challenge was hosted by Simone of Junglefrog Cooking. Simone chose Salmon en Croute (or alternative recipes for Beef Wellington or Vegetable en Croute) from Good Food Online.

For this challenge, I decided to go the vegetable route partly because of my lack of enthusiasm for cooking salmon (or beef for that matter) and partly because I had recently acquired a host of harvest vegetables through Tantre Farms CSA Thanksgiving share. This is the time of year when one looks to tuck into savory warmth and hearty fare. And thus, I envisioned individual puffed pastry pockets filled with a vegetable stew, kale and a bit of leftover roasted turkey from the Thanksgiving feast. For the stew, I adapted Deborah Madison’s recipe for Winter Vegetable Pot Pie from her cookbook Vegetarian Cooking for Everyone to suit the ingredients I had on hand. For the puff pastry, I used a recipe from a previous post, but swapped out a cup of all-purpose flour for whole-wheat pastry flour. Perhaps this makes it a tinge more healthful? Although hopeful, I realize with the amount of butter involved this is doubtful. Once baked, the veggie pockets ended up looking a bit like flying saucers, but no matter, the comfort provided with each bite surely satisfied.

Harvest Vegetable and Turkey Hand Pies
Makes about 2 dozen 3-in diameter pies
After filling the pies, there will be plenty of leftover stew to freeze and enjoy later!

2 TBS olive oil
2 TBS butter
1 ½ lbs butternut squash (peeled and diced into 1-in cubes)
2 onions, diced
1 parsnip, peeled and diced
2 carrots, peeled and diced
1 kohlrabi, peeled and diced
½ head of romanesco chopped
2 handfuls of brussel sprouts quartered
3 kale leaves, torn to small shreds
1 cup cooked turkey breast, chopped
2 TBS fresh sage, chopped
mushroom stock (see below)
1 recipe puff pastry
1 egg, beaten and mixed with a bit of warm water to create an egg wash

Quick Mushroom Stock
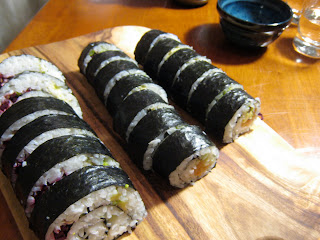
Makes about 1 ½ cups

¼ cup dried shitake mushrooms
2 tsp olive oil
1 red onion quartered
1 turnip roughly chopped
1 carrot cut into 3 pieces
1 large clove of garlic, crushed
one handful oyster mushrooms, chopped2 tsp tomato paste
1 TBS sage, chopped
½ cup champagne (it’s what was open, red or white wine works too)
1 TBS flour
salt and pepper to taste

Pour 2 cups hot water over dried mushrooms, cover and set aside. Heat oil in saucepan over high heat. Add onion, turnip, carrot, garlic and oyster mushrooms. Sauté stirring occasionally, until well browned (about 10 minutes). Reduce heat to medium. Stir in tomato paste, sage, and champagne. Deglaze pan by scraping up any browned bits. Sprinkle flour in pan, cover, and cook until the champagne is reduced to a syrup consistency (about 3 minutes). Add the shitake and their soaking liquid, ½ tsp salt, dash of pepper and simmer for 20 minutes. Strain.

Preheat oven to 425° F. In a dutch oven heat oil and butter, add onions and butternut squash and sauté over medium heat until crisp tender (about 15 minutes). Add remaining vegetables to the dish and mix in with the mushroom stock, adding water if more liquid is necessary. Season with salt and pepper. Cover with lid and transfer to oven. Bake for 25-30 minutes until vegetables are slightly tender.

Meanwhile roll out pastry dough to ⅛-in thick and cut out round shapes using a large cookie cutter or a small bowl. Place circles on parchment-lined baking tray and refrigerate (at least 15 minutes) while assembling fillings. See tips for working with puff pastry from previous post.

Preheat oven to 400° F. Remove pastry circles from refrigerator and carefully stack a dollop of vegetable stew, shredded kale, and turkey on top of half of the circles. Be sure to leave a border around the edges to create a good seal. Brush border with egg wash and place another circle over the top of the filling. Crimp edges with a fork to seal and, if needed, trim excess with a knife. Brush outside of pastry with egg wash. Bake for 25 minutes or until golden brown. Cool slightly before serving.

Friday, November 27, 2009

Take the cannoli, please! I have way too many…

I’m often asked if my mother taught me how to bake. I’ve always been stumped as to how to answer this. Yes, my mother bakes too and enjoys it greatly, but she doesn’t really make things quite like the projects I’ve been posting. Usually, it’s me sharing recipes and tips with her instead of the other way around. We respectfully diverge on the best way to make a chocolate chip cookie or a piecrust. I’ve realized that it’s OK to admit that no my mother didn’t teach me to bake, but growing up with her example, she inspired, encouraged, and influenced me to appreciate things made from scratch. I think we have a similar curious spirit for wanting to make things ourselves and a generous heart for gifting treats away to any willing recipient.

A year or so ago, my mom decided to learn to make cannoli. She found a recipe, purchased the needed tools (cannoli forms—1 set each for my sister, herself, and me), and gathered the ingredients. Lots of fun phone calls between us ensued. I remember helping find a source for mascarpone down where she lives in Florida. But unfortunately, the cannoli just didn’t turn out to her liking. If she told you the reasons why it would sound like quite a disaster. The main turnoff probably was the fried smell that permeated her kitchen for several subsequent days. After hearing her disappointment, when I received my set of cannoli forms from her in the mail, I just tucked them toward the back of my baking drawer and didn't give it much more thought.

That is, until this month when…

The November 2009 Daring Bakers Challenge was hosted by Lisa Michele of Parsley, Sage, Desserts and Line Drives. She chose the Italian Pastry, Cannolo (Cannoli is plural), using the cookbooks Lidia’s Italian-American Kitchen by Lidia Matticchio Bastianich and The Sopranos Family Cookbook by Allen Rucker; recipes by Michelle Scicolone, as ingredient/direction guides. She added her own modifications/changes, so the recipe is not 100% verbatim from either book.

I was excited to try my hand at finally making cannoli myself. Already my kitchen was diffuse with a fried food smell—I’ve been on a homemade doughnut kick lately, and I had all the tools I needed thanks to my Mom’s previous endeavor. Using a stand mixer and a pasta roller made short work of the dough component of the whole process. I cut smallish circles of dough to fit the narrow diameter of my cannoli forms. This yielded tiny, two-bite-sized pastries, about 60 if you counted. That’s a lot of dough to fry and a lot of cannoli to eat! For the filling, I made two slightly different batches. I opted to make my own mascarpone (a first!) for the first batch and my own ricotta (also a first!) for the second. For texture and taste, I hands down preferred the mascarpone. After each cannoli was filled and the photos were taken, I was left with a most pleasant predicament. How to distribute them to appreciating mouths? A better part of my week was spent delivering cannoli to friends (a cannoli fairy of sorts), and in the process I even happened to make a few new grateful acquaintances. Openhandedness is a trait, I will always absolutely attribute to receiving from my mother.

CANNOLI SHELLS

Makes 50-60 2” long cannoli

2 cups all-purpose flour

2 TBS sugar

1 tsp unsweetened baking cocoa powder

½ tsp ground cinnamon

½ tsp salt

3 TBS vegetable oil
1 tsp white wine vinegar

Approximately ½ cup sweet Marsala or any white or red wine you have on hand

1 large egg, separated (you will need the egg white but not the yolk)
canola oil for frying – about 2 quarts
½ cup toasted, chopped pistachio nuts
½ cup shaved chocolate

CANNOLI FILLING

2 lbs mascarpone (or ricotta) cheese, drained

1⅔ cups cup confectioner’s sugar, sifted

½ tsp ground cinnamon
seeds scraped from one vanilla bean

grated zest of one small to medium orange


DIRECTIONS FOR SHELLS:
1. In the bowl of an electric stand mixer or food processor, combine the flour, sugar, cocoa, cinnamon, and salt. Stir in the oil, vinegar, and enough of the wine to make a soft dough. Turn the dough out onto a lightly floured surface and knead until smooth and well blended, about 2 minutes. Shape the dough into a ball. Cover with plastic wrap and let rest in the fridge from 2 hours to overnight.
2. Divide the dough into 4 equal pieces. Starting at the middle setting, run one of the pieces of dough through the rollers of a pasta machine. Lightly dust the dough with flour as needed to keep it from sticking. Pass the dough through the machine repeatedly, until you reach the highest or second highest setting. The dough should be about 4 inches wide and thin enough to see your hand through
3. Continue rolling out the remaining dough. If you do not have enough cannoli tubes for all of
the dough, lay the pieces of dough on sheets of plastic wrap and keep them covered until you are ready to use them.
4. Cut out 3 to 5-inch circles (3-inch – small/medium; 4-inch – medium/large; 5-inch;- large. Mine are ~3 inches). Roll the cut out circle into an oval, rolling it larger and thinner if it’s shrunk a little.
5 Oil the outside of the cannoli tubes. Roll a dough oval from the long side around each tube/form and dab a little egg white on the dough where the edges overlap. (Avoid getting egg white on the tube, or the pastry will stick to it.) Press well to seal. Set aside to let the egg white seal dry a little.
6. In a deep heavy saucepan, pour enough oil to reach a depth of 3 inches. Heat the oil to 375°F, or until a small piece of the dough or bread cube placed in the oil sizzles and browns in 1 minute. Have ready a tray or sheet pan lined with paper towels or paper bags.
7. Carefully lower a few of the cannoli tubes into the hot oil. Do not crowd the pan. Fry the shells until golden, about 2 minutes, turning them so that they brown evenly.
8. Lift a cannoli tube with a wire skimmer or large slotted spoon, out of the oil. Using tongs, grasp the cannoli tube at one end. Very carefully remove the cannoli tube with the open sides straight up and down so that the oil flows back into the pan. Place the tube on paper towels or bags to drain. Repeat with the remaining tubes. While they are still hot, grasp the tubes with a potholder and pull the cannoli shells off the tubes with a pair of tongs, or with your hand protected by an oven mitt or towel. Let the shells cool completely on the paper towels. Place shells on cooling rack until ready to fill.
9. Repeat making and frying the shells with the remaining dough. If you are reusing the cannoli tubes, let them cool before wrapping them in the dough.

DIRECTIONS FOR FILLING:
1. Line a strainer with cheesecloth. Place the mascarpone (or ricotta) in the strainer over a bowl, and cover with plastic wrap and a towel. Weight it down with a heavy jar, and let the mascarpone drain in the refrigerator for several hours to overnight.
2. In a bowl of an electric mixer, beat mascarpone until smooth and creamy. Beat in confectioner’s sugar, cinnamon, vanilla beans, and orange zest and blend until smooth. Transfer to pastry bag fitted with a decorative tip. Chill until firm. (The filling can be made up to 24 hours prior to filling the shells. Just keep refrigerated in an air tight container).

ASSEMBLE THE CANNOLI JUST BEFORE SERVING:
1. Insert the tip of the filled pastry bag in the cannoli shell and squeeze gently until the shell is half filled. Turn the shell and fill the other side.
3. Press or dip each end of the filled cannoli into the chopped pistachios and chocolate shavings.

Sunday, November 22, 2009

Spencer's Banana Jungle Cupcakes


Recently, I've begun taking custom baking orders from my friends. Small, small steps towards my ultimate dream--a bakery of my very own, but it's a start and a good way to network. Here are some pictures from my first order: cupcakes for Spencer's 1st birthday.


Spencer's mom Anne-Lise approached me a few months ago about the idea of baking the cupcakes. Spencer loves bananas, and I've been hanging on to these adorable lion, tiger, elephant, and zebra picks for more than a few years now, so I decided to do a Banana Jungle theme. (Though sadly not an option, monkey picks would have put it over the top.)


The actual flavor of the cupcakes is banana chocolate chip with vanilla bean cream cheese frosting. The recipe came from a beautiful blog that I follow, Not without Salt. People always ask me about my resources for cupcake wrappers and related flair. I mostly purchase from Bake it Pretty and Fancy Flours. I also frequent a more local store, the Baker's Nook.


The happy birthday boy, a very satisfied customer!


Thanks to my ever supportive friends, more custom projects are in the works (a dessert tray for a dissertation defense, holiday care packages, and *gasp* a wedding!!!) Things are getting quite busy in my kitchen lately, but I wouldn't have it any other way. Making people smile is one of the best reasons I can think of to get flour all over the kitchen.

Saturday, November 14, 2009

鮨 (sushi) with a little help from my friends

The November 2009 Daring Cooks challenge was hosted by Audax of Audax Artifex and Rose of The Bite Me Kitchen. They chose sushi as the challenge. This challenge required making proper sushi rice to be used to form three types of sushi: a dragon sushi roll – an avocado and sea urchin roe covered inside-out rice roll filled with BBQ eel; a spiral sushi roll – a nori-coated rice roll filled with local veggies from the farmers market that reveals a decorative, spiral pattern when cut; and nigiri sushi – hand-shaped rice balls topped with sashimi-grade yellow tail, ahi or salmon.

Oh, my. A challenge indeed for a flexitarian (that’s me) with squeamish tendencies towards raw meats (or in this case fishes). I usually order my sushi with just veggies. I know, not too exciting. So wanting to step it up for this challenge, I did what any sensible person in my predicament might do, I enlisted help from my friends. How does the saying go? Sometimes it’s not what you know, but rather who you know.

First, a stop to the local fish market, Monahan’s for sashimi-grade fish. Discussing my options (eel, ahi, yellow fin, fluke, salmon) with the fishmonger was actually quite fun. I ended up purchasing a bit of each (minus the fluke) along with a lobe of sea urchin roe. Mmhmm, that’s right, I even splurged on a bit of roe!

Then, a quick pop over to the neighbors to borrow their fancy “fuzzy neuro” rice cooker. Admittedly, the challenge wasn’t written for this option, but I cheated. My friends sing high praises for their rice cookers. You know they can be programmed to make you breakfast? Imagine, oatmeal ready first thing in the morning without dirtying a pot. I’ve never used one. This was just the excuse I was looking for to try it myself.

Finally, an invitation to a friend with superb julienning skills to bring a bottle of good drinking sake, a bamboo rolling mat, and a hearty appetite. Absolute brilliance on my part! I didn’t touch the fish at all. I was in charge of rice. Don’t think I got off too easy, though. Proper sushi rice definitely has its own nuances (mainly all the rinsing) before pressing the cook button on the machine. And of course, there was the fun of filling and rolling the nori and forming the nigiri.

I’m sure you are wondering, so yes, after it was prepared, I did eat the sushi, raw fishes and all. It was actually quite amazing! I think both quality ingredients and the pride that goes into preparing something yourself make all the difference in your perception of a meal. For me, the satisfaction from both these factors plus the gratitude from friendships made this dinner especially meaningful.


SUSHI RICE (makes about 7 cups of cooked sushi rice)
2½ cups uncooked short grain sushi rice
2½ cups water
3 inch square dashi konbu (or kombu) (dried kelp seaweed) wipe with a damp cloth to remove white powder & cut a few slits in the sides of the kelp to help release its flavors
2½ tsp quality drinking sake

Sushi vinegar dressing
5 Tbs rice vinegar
5 tsp sugar
1¼ tsp salt
Swirl rice gently in a bowl of water, drain, repeat 3-4 times until water is nearly clear. Gently place the rice into the bowl of a rice cooker and add 2½ cups of water and the dashi konbu. Add sake to the rice. Follow the instructions on the rice cooker to activate the cooking process.

Meanwhile, prepare the rice vinegar dressing by combining the rice vinegar, sugar and salt in a small bowl. Heat on low setting and stir until the mixture goes clear and the sugar and salt have dissolved. Set aside at room temperature until the rice is cooked.

When the rice has finished cooking, turn it out into a slightly moistened large shallow flat-bottomed non-metallic (plastic, glass or wood) bowl. (Do not use metallic objects since the vinegar will react with it and produce sour and bitter sushi rice.) Use a moistened spatula to loosen gently the rice and invert the rice pot over the bowl, gently causing the cooked rice to fall into the bowl in one central heap. Do this gently so as not to cause the rice grains to become damaged. Remove the dashi konbu (kelp) from the cooked rice.

Slowly pour the cooled sushi vinegar over the spatula onto the hot rice. Using the spatula gently spread the rice into a thin, even layer using a 45° cutting action to break up any lumps and to separate the rice. Don't stir or mash rice. After the rice is spread out, start turning it over gently, in small portions, using a cutting action, allowing steam to escape, for about a minute. Continue to gently slice, lift and turn the rice occasionally, for 10 minutes or until all the vinegar dressing has been adsorbed and the rice is shiny. Cover with a damp, lint free cloth to prevent the rice from drying out while preparing your fillings and toppings.

DRAGON ROLLS (also called Caterpillar Rolls)
Yield: 2 inside-out (uramaki) sushi rolls

INGREDIENTS:
1 sheet 7”x8” of toasted nori
half of Japanese cucumber
2 cups of prepared sushi rice Glazed Barbecued Eel (ungai)
1 Avocado
Vinegared Water – ½ cup of water combined with a dash of rice vinegar
2 TBS Fish Roe

DIRECTIONS:
1. Cut cucumber into strips ¼ inch x 7” long, then salt, rinse and dry the strips.
2. Broil the eel for about 2-5 minutes until bubbling. Cut into two lengthwise strips.
3. Halve, pit and peel the avocado. Cut the avocado halves into thin even 1/8 inch slices. Fan out the cut avocado into a 7 inch overlapping pattern.
4. Cover bamboo mat with plastic wrap. Place a sheet of nori shiny side down, lengthwise, on the edge the mat.
5. Moisten lightly your hands in the bowl of vinegared water.
6.Place one cup of rice on the nori and gently rake your fingertips across grains to spread rice evenly. Do not mash or squash the rice onto the nori, the rice should appear loosely packed and be evenly distributed over the entire sheet, you should be able to see the nori sheet in a few places. 
7. Flip the rice-covered nori over (so the bare nori is now on top) and place on the edge of the mat closest to you.
8. Arrange one of the eel strips across the length of the nori, not quite centred on it but a little closer to you. Place half the cucumber sticks next to the eel.
9. Lift the edge of the mat closest to you with both hands, keeping your fingertips over the fillings, and roll the mat and its contents until the edge of the mat touches straight down on the nori, enclosing the fillings completely. Lift up the edge of the mat you're holding, and continue rolling the inside-out roll away from you until it's sealed. Tug at the mat to tighten the seal. If the rice doesn't quite close the roll add more rice in the gap and re-roll using the mat to completely cover the inside-out roll. Place the roll on a damp, clean smooth surface.
10. Spread about 1 tablespoon of the optional fish roe along the entire top of the rice-covered roll. Using the plastic covered mat gently press the fish roe so it adheres to the rice.
11. Slide a knife under one fan of avocado and transfer it onto the top of an inside-out roll. Gently spread out the avocado layer to cover the entire roll. Lay the plastic wrapped mat over the avocado-covered roll. Squeeze very gently to shape the roll.
12. Lay a sheet of plastic wrap over the roll. Slice the roll into 6-8 equal, bite-sized pieces, wiping your knife with a damp towel before each slice. Discard the plastic wrap. Repeat the above to make one more roll.
13. Arrange the cut pieces on a serving plate with the sauces so the finished dish appears as a dragon breathing fire and flames (or a caterpillar with many legs).

SPIRAL SUSHI ROLL
Yield: One Roll, cut into 8 pieces

INGREDIENTS:
2½ cups prepared sushi rice
2 sheets of toasted nori, each sized 7”x8”
Six assorted fillings, each filling should be the size of a pencil

DIRECTIONS:
1. Join 2 sheets of nori by moistening the adjacent edges and overlapping them about ½ inch.
2. Place this double sheet shiny side down on a rolling mat, part of the nori will extend beyond the mat.
3. Using moist fingers place 2½ cups of rice on the nori and gently rake your fingertips across grains to spread rice evenly, leaving ¼ inch nori showing on the both ends of the sheet. Do not mash or squash the rice onto the nori, the rice should appear loosely packed and be evenly distributed over the entire sheet, you should be able to see the nori sheet in a few places.
4. Using your fingers form six grooves (in the same direction that you will be rolling the mat) at even intervals across the bed of rice. Make the first groove about 2 inches from the edge of the nori sheet. Form the grooves by pushing the rice away, do not mash or squash the rice, leave a loose one grain layer of rice in the bottom of the grooves. Level the areas between the grooves where you have pushed the rice.
5. Place your fillings in the grooves. Fill the grooves a little higher than the surrounding rice bed.
6. Then roll the sushi up from the edge closest to you, this will form a spiral pattern of nori, rice and fillings inside the roll.
7. Slice into 8 pieces with a very sharp wet knife, wiping the blade with a damp cloth after each cut.
8. Place the pieces on a platter and garnish.

NIGIRI SUSHI
Yield: 14-16 pieces of sushi

INGREDIENTS:
2 cups prepared sushi rice
8 pairs of assorted toppings, 7 ozs total of fish
1 TBS Wasabi to adhere topping to rice

DIRECTIONS:
1. When handling sushi rice, make certain your hands are very clean. To keep the rice from sticking to our hands moisten your hands with vinegared water.
2. Form nigiri sushi by scooping up a small amount (about 2 tablespoons) of rice with your forefinger and second finger of your right hand and placing it in your cupped left palm.
3. Use the fingers and thumb of your right hand to form it into a long, narrow mound (about 2 inches x 1 inch wide) in your cupped palm.
4. Press enough to make the rice hold firmly together. Place the nigiri on a damp cutting board flat side down. Don't let sushi touch or they'll stick to each other. At this point, you can cover the sushi with plastic wrap, and they'll keep at room temperature (not the refrigerator) for several hours.
5. Smear a thin line of wasabi on top of the rice and place the topping piece on it. You may need to press the topping down lightly with your fingers and adjust the shape of the rice accordingly to form an attractive piece of nigiri sushi.

Sunday, November 1, 2009

Jam-of-the-Month Club: obtain your membership and get set to jam


All summer long and well into the fall, I've been making jam. It started with a baking challenge for the Daring Baker's and was further fueled by my friend Karin's voracious interest in learning how to make jam. Then, I got this crazy idea for a jam-of-the-month club/pin-up girl calendar-style blog post, and it took on a life of its own. I was determined to create 12 jams/butters/chutneys with the seasonal fruits locally available to me. Obsessed with flavor pairings and photo shoots, it's been a rewarding, creative outlet to say the least. Of course, I "dressed" each jar with ruffles and ribbons befitting of its contents.

Living in Michigan, I am fortunate to have in my community great local farms and orchards that grow a wide variety of berries and other fruits. Compared to our long, cold winters, however, the growing season always seems so short. Along the way to achieving my goal, my efforts took on new meaning: I began to realize as each new fruit came into season that I was preserving a portion of the harvest in anticipation of the winter to come. Popping open a fresh jar on a dull, gray winter’s morning to spread on toast or spoon into oatmeal should do just the trick to brighten my spirits, encouraging memories of summer. Also, as the giving season approaches, I can't think of a better present to bestow on loved ones. But, being who I am, beyond the typical uses of jams or preserves or butters, I like to get a bit more inventive. A lot of potential is sealed away in those little glass jars! Here is what I've done so far... Ready to meet the "girls"?

Oh, I should note that all of these jams were made with very little sugar with recipes improvised to taste (most weren't written down). While it may compromise shelf stability (sugar is a great preservative), I couldn't bear to drown such lovely, naturally sweet fruits in a sucrose bath. The following are an honest and pure representation of the flavors of their namesake.

Alright. Let's jam!

Strawberry-Ginger-Lemonade Jam
This is the jam that started it all this summer. It was created as a filling for a Bakewell Tartserved at my friend Dara's I-handed-in-my-tenure-package celebration. I called it lemonade because it was quite heavy on the tart end of the lemon to sugar ratio. As you'll start to notice, crystalized ginger finds it way into many things that I make.


Raspberry-Peach Preserves
There seemed to be an abundance of raspberries available this year. With a cooler than normal summer, the raspberry season just never seemed to quit. These came from the Ypsilanti Farmers Market, just when peaches were first ripening.

Black Raspberry Preserves
At first, I mistook these as black berries. Silly me. Black raspberries have such a deep, gorgeous color and flavor to match! Unfortunately, I waited to long past the growing season to photograph them and ended up using red berries for the shoot.

Apricot-Amaretto Jam
These apricots came from Lesser Farms. From a tip about the freshly picked fruit, I drove through a rain storm one evening to purchase these. Apricots were on the tart side this year, but I still didn't want to add a lot of sugar to the jam. Instead I flavored it with amaretto, because I had this jam in mind for use in the Apricot-Almond Shortbread Bars my family most requests for me to make for their birthdays.

Blueberry-Lavender Jam
This jam has a slight lavender herbal quality, but the sweet blueberry flavor completely predominates. Karin picked the berries, and then we headed over to our friend Tracy's house to make the jam and meet her new born daughter. I was so proud to be apart of this little girl's first jam making experience!

Blueberry Marmalade
Karin picked a lot of blueberries that day! Enough to make a batch of bright, citrusy marmalade. With generous slices of lemons and oranges, this is absolutely delicious spread on toast.

Justify FullPeach Jam
My neighbor Stefanie and her daughters joined Tracy, Karin and me to make this batch. All these able hands to peel, pit and chop peaches made quick work of the two pecks of dripping-ly ripe peaches I'd purchased for an incredibly good price at my wednesday morning farmers market. I decided to keep the flavor of this jam pure and simple, knowing eventually I would turn it into a vanilla bean-gingered sauce for crepes made while guest chef-ing for SELMA, a local foods community breakfast joint at which I volunteer.

Vanilla Bean-Flecked Pear Butter
The provenance of the pears for this butter was "deep" local. They came from a tree in the field behind my house and were a source of much joy (free pears) and strife (achieving the perfect moment of ripeness). I picked the pears, and then fretted for a weeks about getting them all to ripen around the same time. Pears are climacteric--they ripen off the tree. I'm sure you've heard someone bemoan the pear ripening process before. Even Emerson noted the futility:

There are only ten minutes in the life of a pear when it is perfect to eat. —Ralph Waldo Emerson

Nonetheless, on the day I deemed most to be ripe enough, I made this butter. Pears were cored and chopped and then cooked in white wine until soft and then passed through a food mill and into the pan to simmer with orange slices, cinnamon sticks and vanilla beans. Probably the most time-consuming to make compared to the other jams and also the most worth-the-effort in terms of flavor. I decided charging $100/jar for this one would be appropriate compensation of my efforts.

Vanilla Bean Black Tea Plum Butter
This butter was created for a side blogging project for my friends at Arbor Teas. Infused with a black tea blended with real vanilla beans, the flavor of the tea really comes forward and pairs nicely with the sweet-tart Sweet Vision Plums. The jewel-like hue of this butter is really stunning. It makes an excellent dipping sauce for spring rolls.

Concord Grape-Macoun Apple-Quince Chutney
This chutney was inspired by a trip to the farmer's market, as I wasn't entirely decided on what fruits I would use before I arrived. I wanted to make something befitting (and of course seasonal) of the vols-au-vent pastry and braised pork shoulder I made for the Daring Baker'schallenge. The Macoun apples were particularly tasty, and I was very lucky to come by them as their availability this year was brief. Onions and fresh ginger root are also in this chutney to give it a more savory edge.

Maple-Gingered Apple Sauce
On a tip (tweet) from The Farmer's Marketer, I headed out to Lutz Orchard (again in the rain) to pick up a few pecks of heirloom apples. Mr. Lutz is such a charming fellow. I told him my intentions for his apples, and he excitedly handed me two quince, saying lots of people like to use them in jams. The quince were perfectly ripe and unblemished. I used them to make a cardamom and cinnamon-laced, flaky double-crusted, apple-quince pie. The apple sauce was made with Wolf River and Snow Apples, two antique varieties of sweet baking apples, and sweetened with pure maple syrup and crystalized ginger.

Brandied Heirloom Apple Preserves with Cardamom and Ginger
A mixture of Rhode Island Greenings and Northern Spy, also purchased from Lutz Orchard, were finely diced for these preserves. Black Star Farms pear brandy, cardamom and ginger add a bit a elegance. I used the preserves to embellish a homemade flaky cracker topped with Regal Raisin, a soft, triple creJustify Fullam cow's milk cheese. Made in Burgundy, this sweet, dense cheese is covered with raisins soaked in Marc de Bourgogne (a grape distillate). It tastes very similar to (but even better than) a New York-style cheesecake. Pure decadence!

So how might you obtain membership to my jam club to recieve a jar of your very own?

Consider attending the Slow Food Huron Valley Local Harvest Cook-off on Sunday, November 8th from 3-5 PM at the Chelsea Fairgrounds Community Building. Folks who make a monetary donation to Food Gatherers will be entered into a raffle drawing to win a jar of jam.

Cook-off Details:

Old Pine Farm and Tantré Farm have helped organize a fun and delicious Slow Food community potluck and recipe swap. There will be music, prizes and local chefs on hand to judge our best Local Harvest dishes. You could go home a blue ribbon winner by putting together a dish with as many local ingredients as possible in the following categories:

- Soup/stew

- Meat main dish

- Vegetarian main dish

- Vegetable side dish/salad

- Dessert/bread

Bring: your dish to pass, your own place settings, and 30 copies of your recipe to swap. This is also an opportunity to benefit Food Gatherers - so please consider bringing nutritious non-perishable food or a check for Food Gatherers (which will be eligible for a Michigan Tax Credit and entry into the jam raffle).