custom cakes/cookies

Showing posts with label vegan. Show all posts

Tuesday, March 1, 2011

Vegan Papas Rellenas

A few weeks ago I had a pot luck brunch with friends. The agenda was to plan a community garden in my backyard. There was still snow on the ground, but I was thinking warmer thoughts of digging up dirt and pushing in seeds. My contribution to the meal were these fried Peruvian potato thingys over mixed salad greens. While a more traditional version would be filled with spiced beef, I chose the vegan route and filled them with quinoa, beans, raisins and kale. Sounds like a weird combination, but it works. A dash of hot sauce and a topping of pickled onions (salsa criolla) add a whole lot more flavor.

Not sure how many to feed, I doubled the recipe. I don't recommend this unless you enjoy potato ricing or have an army of kitchen help. Though after peeling and ricing (gives the best texture, so worth it) 10 pounds of potatoes the night before, I learned how to finally use my ricer properly, it's a bit of a struggle if you overstuff it.

Vegan Papas Rellenas
Makes about 1½ dozen

For the dough:
5 pounds russet potatoes
½ cup cornstarch
1 teaspoon salt
fresh ground pepper

For the filling:
olive oil for sautéing
1 large onion, diced
4 cloves garlic
½ chili pepper
1 teaspoon ground cumin
½ teaspoon sweet paprika
1 cup cremini mushrooms, small dice
2 cups cooked cooked beans
½ cup raisins, soaked in 1 cup boiling water for 10 minutes, then minced
1 handful kale, roughly chopped
1 cup cooked quinoa
¼ cup white wine
Salt and pepper to taste

For the final preparation:
1 tablespoon ground flax seed
3 tablespoons water
1 cup all-purpose flour
Dash cayenne pepper
Dash salt
1 cup bread crumbs

Canola oil for frying

For the dough:

1. Boil unpeeled potatoes whole until tender when stuck with a fork. Let potatoes cool.
2. When potatoes are cooled, peel them and either mash them with a potato masher or force them through a potato ricer.
3. Add cornstarch, salt and pepper and knead “dough” thoroughly to ensure that ingredients are well combined and uniformly distributed.

While potatoes are cooling, make filling:

1. Cook onions in olive oil for about 5 minutes, until soft.
2. Add the garlic and chili pepper and cook several minutes more.
3. Add the cumin and paprika and cook briefly.
4. Add the mushrooms and cook until soft.
5. Add beans and raisins.
6. Deglaze the pan with white wine. Add kale and wilt.
7. Add the quinoa and season with salt and pepper.
8. Allow filling to cool before forming “papas.”

Finishing the dough and forming the papas:

1. Using a food processor or blender, emulsify the ground flax seed with the water. Allow the mixture to stand for a few minutes before using.
2.Use three small bowls (or other shallow containers) to prepare the papas. In one, combine flour, cayenne and salt. In the second, combine the flax seed emulsification and a bit more water to thin the solution. Put bread crumbs in the third
2. Flour your hands and scoop up a fistful of the dough about the size of a baseball. Make a round pancake with your hands. Then make a slight indentation in the middle for the filling.
3. Spoon a generous amount of filling into the center and then roll the potato closed, forming a smooth, potato-shaped casing around the filling. Repeat will all dough.
4. Heat 1½ - 2 inches of oil in a pan to about 350 – 375° F.
5. Dip each papa in the three bowls to coat: first roll in flour, then dip in flax seed emulsion, then roll in bread crumbs.
6. Fry the papas in batches about 2-3 minutes until golden brown. Flip once in the middle of frying to get both sides.
7. Drain on paper towel and store in a cool oven 200°F until ready to serve.
8. Serve with salsa criolla (see recipe below) and your favorite hot sauce.

Salsa Criolla

2 medium red onions, cut in half length-wise and very thinly slice.
1/2 chili pepper
1 tablespoon vinegar
Juice from 1 lime
Salt and pepper to taste

1. Soak the onions in cold salt water for about 10 minutes to remove bitterness. Drain.
2. In a medium bowl, combine the onions with the rest of the ingredients, season with salt and pepper.
3. Cover and refrigerate for at least 30 minutes for the onions to macerate and the flavors to combine.

Kathlyn of Bake Like a Ninja was our Daring Cooks’ March 2011 hostess. Kathlyn challenges us to make two classic Peruvian dishes: Ceviche de Pescado from “Peruvian Cooking – Basic Recipes” by Annik Franco Barreau. And Papas Rellenas adapted from a home recipe by Kathlyn’s Spanish teacher, Mayra.

Wednesday, July 14, 2010

Nuts & Notions

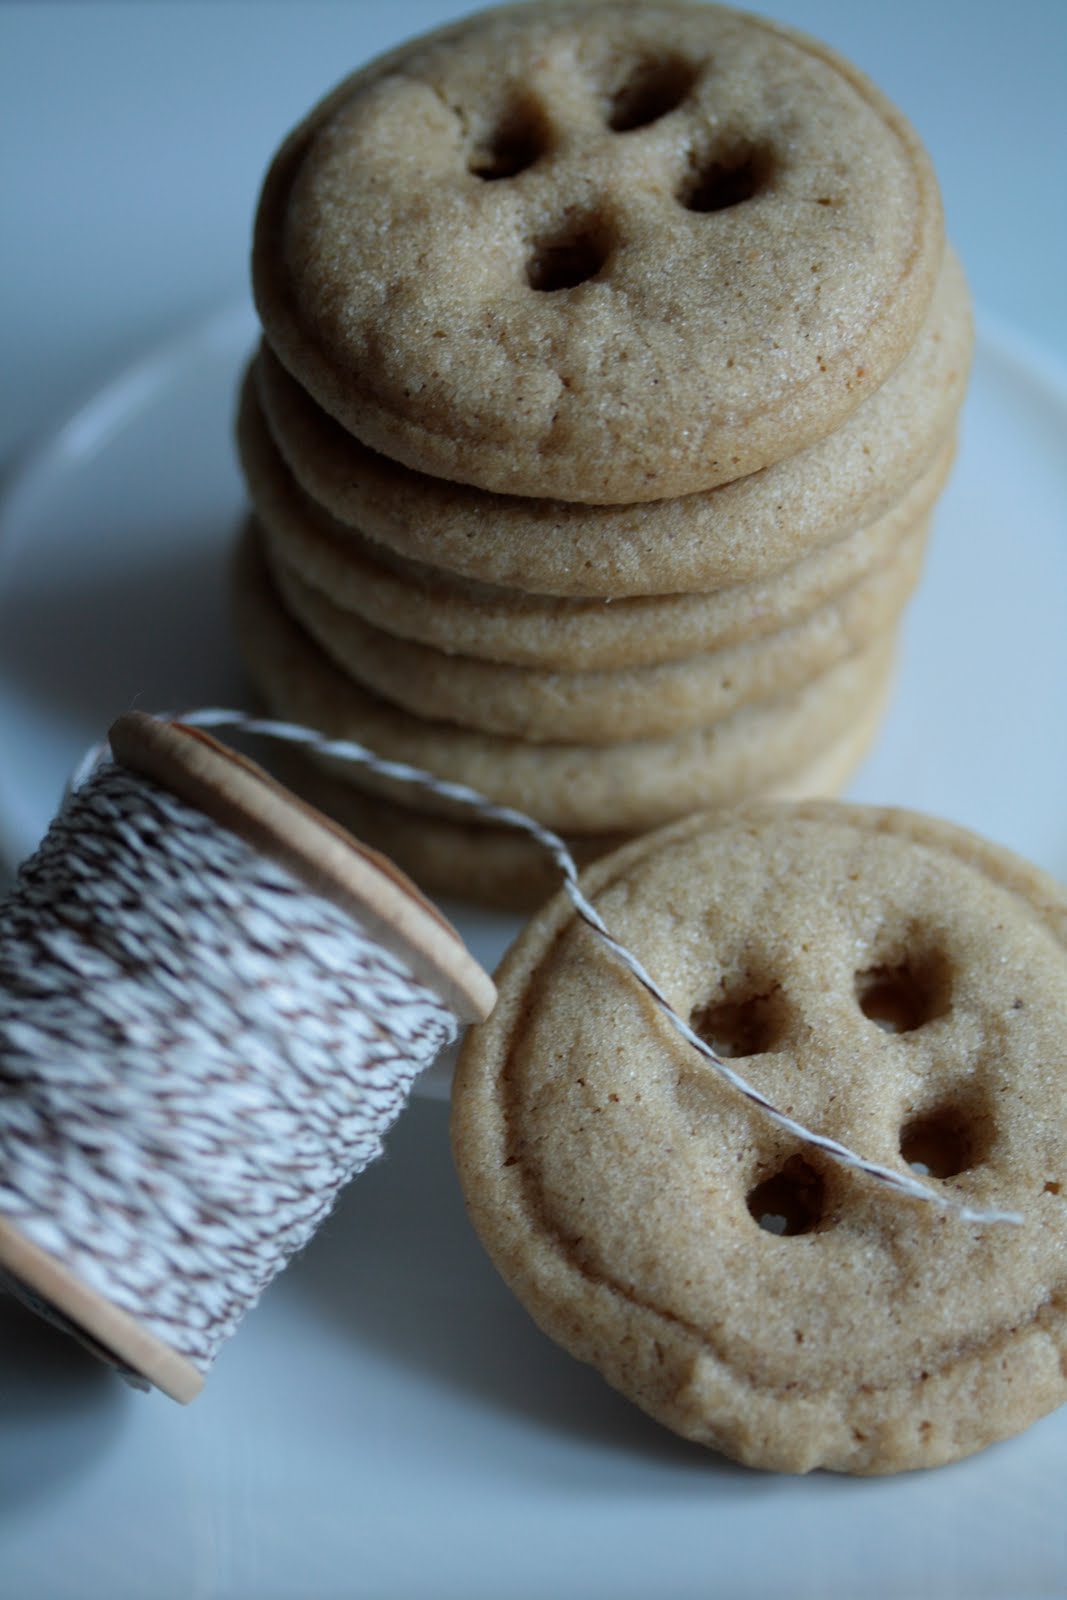
For awhile I had a fascination with Coraline. She was my Halloween costume last year (yep, I submitted a pic to Evil Buttons) and the reason I now own a blue wig and yellow wellies. When I came across an idea awhile ago for Coraline-inspired button cookies, I tucked it away in my memory. I thought it'd be a welcome change from the usual criss-cross pattern used to decorate classic peanut butter cookies, and maybe an adorable idea for a cute-as-a-button-themed baby shower. Then last week my friend Lisa showed me another pretty blog with shortbread button cookies. With a directive from the Daring Kitchen to make something with self-ground nut butter, I decided this would be my chance to try out the button technique. My rendition, however, is made a little differently with hazelnuts that I toasted and then ground into a buttery paste. If I'd a had any cacao nibs in my pantry, I'd have tossed those into the food processor as well to make something akin to a chocolate-hazelnut spread. Nutella buttons! Maybe next time...

To tell you the truth, though, the nut butter cooking challenge wasn't supposed to involve something sweet. Dessert was an optional bonus I just couldn't resist. So with the extra credit out of the way, I did make something savory with ground nuts. Before washing the bowl of the food processor completely clean of the hazelnut butter, I tossed in more hazelnuts and roasted almonds and toasted bread and garlic. To that I added piquant spices, fresh basil leaves, a roasted red pepper, and fresh tomatoes from the farmer's market. What resulted was a Catalan-style Romesco sauce. This version is a great healthy and versatile (and vegan!) accompaniment to grilled or broiled vegetables, especially potatoes, as well as smeared on grilled polenta (as I did in the picture down below) or meats or fish. My plan is to freeze it in batches, to use all summer (or however long it lasts) as a fancy alternative to ketchup.

The July 2010 Daring Cooks’ Challenge was hosted by Margie of More Please and Natashya of Living in the Kitchen with Puppies. They chose to challenge Daring Cooks to make their own nut butter from scratch, and use the nut butter in a recipe. Their sources include Better with Nut Butter by Cooking Light Magazine, Asian Noodles by Nina Simonds, and Food Network online.

Hazelnut Buttons
makes ~11 dozen

3 cups hazelnuts
5½ cups flour
1½ tsp baking powder
1 tsp baking soda
1 tsp salt
12 ounces unsalted butter, softened
⅔ cup granulated sugar, plus extra for flattening into rounds
2¼ cup dark brown sugar, packed
⅓ cup vegetable oil
3 large eggs plus 2 yolks
2 TBS vanilla extract

Preheat oven to 375°.

Toast hazelnuts for 12-15 minutes until golden. When cool enough to touch, rub off as much of the skin as possible with a clean dishtowel. Process in a food processor until a firm, thick and grainy butter forms, stopping the machine to scrape down the sides as needed. This should take 2-3 minutes.

Reduce oven temperature to 350°.

Whisk together the flour, baking powder, baking soda, and salt in a large bowl. In the bowl of a standing mixer, combine 1⅓ cups hazelnut butter, butter, sugar, and oil. Beat at high speed until pale and creamy, about 2 minutes. Add eggs, yolks, and vanilla and beat until just incorporated. Reduce speed to low, then add the flour mixture in three portions, mixing until well incorporated.

Scoop scant tablespoons of dough onto parchment-lined baking sheets. If the dough is very soft, chilling it for an hour or 2 will make this easier. Roll into balls and space about 1½ inches apart. Dip a small drinking glass into sugar and flatten each mound evenly to about ⅓ of an inch high. Use the non-business end of large diameter piping tip and the business end of a small tip to press button details into each round.

Bake until slightly puffed and golden around the edges, about 10 minutes. Before cookies cool completely, use the small piping tip to reopen the button holes that closed during baking.


Romesco Sauce
from Deborah Madison's Vegetarian Cooking for Everyone
makes ~3 cups

1 slice country-style white bread
Olive oil for frying
¼ cup almonds, roasted
¼ cup hazelnuts, roasted and peeled
4 garlic cloves
2 tsp red pepper flakes
4 Roma tomatoes
1 TBS fresh basil leaves
salt and fresh ground pepper
1 tsp sweet paprika
1 red bell pepper, roasted
¼ cup sherry vinegar
½ cup plus 2 TBS extra virgin olive oil

Fry the bread in a little olive oil until golden and crisp. When cool, grind the bread, nuts, garlic, and red pepper flakes in a food processor. Add everything but the vinegar and oil and process until smooth. With the machine running, gradually pour in the vinegar, then the oil. Taste and adjust seasonings as necessary.

Sunday, February 14, 2010

*Vegan* Citrusy, Raspberry Triple Chocolate Layer Cake


Finally, I am posting a layer cake. I adore making layer cakes, as my profile states, but I've yet to actually put one on this blog. Layer cakes are quite celebratory in nature, kinda necessitating a reason to make them. There's been plenty to celebrate of late, I've just been down other avenues with cupcakes and macarons and cutout cookies. I was starting to think about updating my profile, removing the mention of layer cake, when my friend Karin's mom contacted me about making a cake to surprise Karin on her first wedding anniversary. Oh boy was I delighted and honored!


Immediately my head starting spinning with flavor combinations. Because Karin was my faithful canning partner last summer, I knew I wanted to do something with jam. This idea has been in the works since before Christmas! Karin's mom was really cute about pinning down the details: "It has to be vegan, I'm afraid." No problems here, I'm no stranger to vegan baking; I've got a handful of vegan friends to lean on for taste testing! While personally I prefer whole cream and real butter in my desserts, vegan baked goods are usually a snap to whip together--often less finicky in the details (although not always the case).


This is a rich, moist chocolate cake layered with homemade citrus-raspberry jam and decadent tofu-based chocolate amaretto mousse and finished with a poured chocolate ganache. All accomplished without the use of dairy (or much refined sugar for that matter). The chemistry of vegan baking really is fascinating. An early version of this cake was going to incorporate DIY vegan white chocolate as an elegant decoration, but that's a trick I've yet to master; test trials did not turn out favorably. So I assessed my strengths and looked to my friend Heather for help with fondant. The love bird decorations were inspired by a spool of ribbon used to decorate the cake board. I'm hoping it's the perfect touch of whimsy befitting a first wedding anniversary celebration.


Congratulations, Karin and Jes! And thank you, Marcia for trusting me with such an important task!

Triple Chocolate Cake
adapted from New Vegetarian
makes two 8-inch cakes

2½ cups all-purpose flour
½ cup cocoa powder
2 tsp baking powder
2 tsp baking soda
1 tsp salt
2 oz. dark chocolate chips, melted
½ cup canola oil, plus more for greasing cake pans
½ cup raw organic agave nectar
½ cup maple syrup
2 cups chocolate soy milk
2 tsp vanilla extract
2 tsp rice vinegar
2 TBS Amaretto

Preheat oven to 350 F. Lightly grease two 8-inch cake pans with oil and line each bottom with a round of greased parchment.

In a large bowl, whisk together the flour, cocoa, baking powder, baking soda and salt. In a separate bowl combine melted chocolate and ½ cup canola oil. Add the agave and maple syrups to the chocolate mixture, stirring to combine. In a third bowl, preferably one fitted to a stand mixer, mix together chocolate soy milk, vanilla, vinegar and Amaretto. Add the chocolate syrup mixture to the mixing bowl and stir to combine. Next add the dry ingredients to this and mix on medium speed for 2-3 minutes, until a thicker batter forms.

Divide batter between prepared cake pans and bake for about 30-35 minutes until the cake begins to pull away from the sides of the pan and springs back when gently prodded. Allow cakes to cool in their pans for about 20 minutes and then turn out onto a cooling rack. Remove parchment rounds. Let cakes cool completely before frosting.

Citrusy Raspberry Jam
makes 1 pint

10 oz. raspberries, fresh or frozen
¼ cup candied kumquats in syrup with candied citrus zest, puréed

Combine raspberries and citrus purée in a saucepan over medium-high heat. Allow fruit to boil until thickened and liquid has cooked down. Consistency looser than typical jam is helpful for spreading.

Amaretto-Spiked Chocolate Mousse
straight from 101 Cookbooks
makes enough to completely frost a 4-layer, 8-inch round cake


½ cup chocolate soy milk, room temperature
10 oz. dark chocolate chips
12 oz. soft, silken tofu, drained and at room temperature
¼ cup Amaretto
¼ tsp almond extract

Melt chocolate chips in a double boiler over barely simmering water. Stir occasionally until completely melted. Remove from heat. Process tofu and chocolate soy milk in a food processor until smooth. Add the melted chocolate chips and process again to fully incorporate. Stir in the Amaretto and almond extract. Taste and adjust for flavor, adding a bit more extract if needed. Keep at room temperature to frost cake or refrigerate in individual cups for several hours until firm to serve as a separate dessert.

Chocolate Ganache Glaze
adapted from Post Punk Kitchen
makes enough to glaze a 4-layer, 8-inch round cake


¾ cups soy creamer
6 TBS nonhydrogenated margarine (such as Earth Balance buttery sticks)
10 oz dark chocolate chips

Place chocolate chips in a large bowl. Heat soy creamer on medium high until it comes to an active simmer. Add the margarine to melt. Remove from heat and immediately pour cream over chocolate and stir until completely mixed and glossy. Allow ganache to cool before pouring over cake as a glaze. The longer you allow the ganache to cool, the thicker it will set. For piping consistency, allow the ganache to completely cool and set up. Once cooled completely, the ganache can also be whipped with a mixer for several minutes at high speed to give it a more airy, spreadable texture.

“Butter”cream Frosting
adapted from Vegan Cupcakes Take over the World
makes about 4 cups


½ cup nonhydrogenated shortening
½ cup nonhydrogenated margarine (such as Earth Balance buttery sticks)
3½ cups confectioners sugar
1½ tsp vanilla extract
½ tsp rum extract
½ tsp almond extract
½ tsp maple extract
¼ cup plain soy creamer

Beat the shortening and margarine together until well combined and fluffy. Add the sugar and beat until fully incorporated. Add extracts and soy creamer, and beat until smooth (5-7 minutes). Tint with food colorings and use to decorate.

Friday, February 12, 2010

I’ve never…

You know that party game, right? It’s about honesty, supposedly, or perhaps more aptly, it’s about daring and prowess. Well, I find myself “playing” it in the kitchen all the time—albeit with a different set of “rules” and definitely minus the binge drinking. In my relative adolescence as a cook and a baker, there’s a huge list of things I’ve never eaten and techniques I’ve never tried. Some of which are deceptively simple and others, understandably complicated. I’d like to do it all…eventually…and without paying tuition to a culinary school. But there is that notion of time and interest and duty, all of which take precedence in some sort of amalgamation to determine what challenge I tackle next. I consider it my personal adventure, that, yes, is often influenced by food trends and seasonal availability, but not swayed by other’s opinions. At least I’m trying not to be influenced by other’s opinions. When you blog about what you are doing in the kitchen, it’s really rather hard to ignore an imposed set of expectations. When so many others also blog about what they are doing in their kitchens, it’s even harder to set yourself apart from what’s “already been done”.

Take for instance this month’s Daring Cooks challenge….

The 2010 February Daring Cooks challenge was hosted by Michele of Veggie Num Nums. Michele chose to challenge everyone to make mezze based on various recipes from Claudia Roden, Jeffrey Alford and Naomi Dugid.

The mandatory recipes for this challenge were to make pita bread and hummus. Additional options, including recipes for cucumber raita, falafel, and preserved lemons, were also given. My mezze consisted of pita, hummus, falafel, baked kale chips, and preserved lemon.

Seemingly simple, made-from-scratch pita bread and hummus. Sure, lots of home cooks have done this already, but actually, I’ve never. Years ago I clipped a magazine recipe to make homemade pita, but I’ve never gotten around to making it. Sure, I make hummus all time, usually per request of my sister at family gatherings, but I’ve never made it using dried beans; always, they come from a can. Finally, I’ve never, ever tasted a preserved lemon, let alone preserved one myself. Until now. Thanks to this challenge, I can check a few more “I never’s” off the list. I'm actually kinda proud of my ingenuous naïveté. For if I’ve done it all (in the kitchen and in other aspects of life), then I'll no longer be adventuresome and youthful. And THAT (in spite of my calendar age) is surely something I plan to hang on to for quite some time.


Pita Bread
adapted from Flatbreads & Flavors by Jeffrey Alford and Naomi Duguid

2 tsp regular dry yeast, not instant
2½ cups lukewarm water
5-6 cups all-purpose flour
1 TBS table salt
2 TBS olive oil

Directions:
1. In a large bread bowl, sprinkle the yeast over the warm water. Stir to dissolve. Stir in 3 cups flour, a cup at a time, and then stir 100 times, about 1 minute, in the same direction to activate the gluten. Let this sponge rest for at least 10 minutes, or as long as 2 hours.
2. Sprinkle the salt over the sponge and stir in the olive oil. Mix well. Add more flour, a cup at a time, until the dough is too stiff to stir. Turn it out onto a lightly floured surface and knead for 8 to 10 minutes, until smooth and elastic. Rinse out the bowl, dry, and lightly oil. Return the dough to the bowl and cover with plastic wrap. Let rise until at least doubled in size, approximately 1½ hours.
3. Place a pizza stone, or two small baking sheets, on the bottom rack of your oven, leaving a 1-inch gap all around between the stone or sheets and the oven walls to allow heat to circulate. Preheat the oven to 450F.
4. Gently punch down the dough. Divide the dough in half, and then set half aside, covered, while you work with the rest. Divide the other half into 8 equal pieces and flatten each piece with lightly floured hands. Roll out each piece to a circle 8 to 9 inches in diameter and less than ¼-inch thick. Keep the rolled-out breads covered until ready to bake, but do not stack.
5. Place 2 breads, or more if your oven is large enough, on the stone or baking sheets, and bake for 2 to 3 minutes, or until each bread has gone into a full balloon. If for some reason your bread doesn't puff up, don't worry it should still taste delicious. Wrap the baked breads together in a large kitchen towel to keep them warm and soft while you bake the remaining rolled-out breads. Then repeat with the rest of the dough.

Hummus
adapted from The New Book of Middle Eastern Food by Claudia Roden

1½ cups dried chickpeas, soaked in cold water overnight (or substitute well drained canned chickpeas and omit the cooking)
2 lemons, juiced
2-3 garlic cloves, peeled and crushed
a big pinch of salt
4 TBS tahini (sesame paste)
1 TBS cumin
¼ cup olive oil

Directions:
1. Drain and boil the soaked chickpeas in fresh water for about 1½ hours, or until tender. Drain, but reserve the cooking liquid.
2. Puree the beans in a food processor (or you can use a potato masher) adding the cooking water as needed until you have a smooth paste.
3. Add the rest of the ingredients and mix well. Adjust the seasonings to taste.

Falafel
from Joan Nathan and Epicurious.com

1 cup dried chickpeas, soaked in cold water overnight
½ large onion (roughly chopped, about 1 cup)
2 TBS fresh parsley, chopped
2 TBS fresh cilantro, chopped
1 tsp salt
1 tsp cayenne pepper
4 whole garlic cloves, peeled
1 tsp cumin
1 tsp baking powder
4 TBS all-purpose flour

tasteless oil for frying (vegetable, canola, peanut, soybean, etc.), you will need enough so that the oil is three inches deep in whatever pan you are using for frying

Directions:
1. Put the chickpeas in a large bowl and add enough cold water to cover them by at least 2 inches. Let soak overnight, and then drain.
2. Place the drained, uncooked chickpeas and the onions in the bowl of a food processor fitted with a steel blade. Add the parsley, cilantro, salt, hot pepper, garlic, and cumin. Process until blended but not pureed. If you don’t have a food processor, then feel free to mash this up as smooth as possible by hand.
3. Sprinkle in the baking powder and 4 tablespoons of the flour, and pulse. You want to add enough flour so that the dough forms a small ball and no longer sticks to your hands. Turn into a bowl and refrigerate, covered, for several hours.
4. Form the chickpea mixture into balls about the size of walnuts.
5. Heat 3 inches of oil to 375 degrees F in a deep pot or wok and fry 1 ball to test. If it falls apart, add a little flour. Then fry about 6 balls at once for a few minutes on each side, or until golden brown.
6. Drain on paper towels.

Note: You can bake these on a nonstick pad (silpat or the like) at 325 F, just until they’re firm, about 20 minutes.

Preserved Lemons
from Paula Wolfert and Epicurious

5 lemons
¼ cup salt

Safi Mixture:
1 cinnamon stick
3 whole cloves
5 to 6 coriander seeds
3 to 4 black peppercorns
1 bay leaf
freshly squeezed lemon juice, if needed for volume

Directions:
1. Special Equipment: 1 pint Mason Jar – Sterilized
2. If you wish to soften the peel, soak the lemons in lukewarm water for 3 days, changing the water daily.
3. Quarter the lemons from the top to within ½ inch of the bottom, sprinkle salt on the exposed flesh, then reshape the fruit.
4. Place 1 tablespoon salt on the bottom of the mason jar. Pack in the lemons and push them down, adding more salt, and the optional spices between layers. Press the lemons down to release their juices and to make room for the remaining lemons. (If the juice released from the squashed fruit does not cover them, add freshly squeezed lemon juice — not chemically produced lemon juice and not water.) Leave some air space before sealing the jar.
5. Let the lemons ripen in a warm place, shaking the jar each day to distribute the salt and juice. Let ripen for 30 days.
6. To use, rinse the lemons, as needed, under running water, removing and discarding the pulp, if desired — and there is no need to refrigerate after opening. Preserved lemons will keep up to a year, and the pickling juice can be used two or three times over the course of a year.

Notes from Epicurious:
• According to the late Michael Field, the best way to extract the maximum amount of juice from a lemon is to boil it in water for 2 or 3 minutes and allow it to cool before squeezing.

Notes from Paula Wolfert:
• Located on Morocco's Atlantic coast, south of Casablanca and north of Essaouira, the city of Safi is known for its seafood specialties.
• To most closely approximate the flavor of Moroccan lemons, Wolfert recommends Meyer lemons for this recipe. This lemon/mandarin orange hybrid, in season in January and February, has yellow-orange flesh, a smooth rind, and a sweeter flavor than other lemons.

Monday, September 14, 2009

Vegan Indian Dosas

The September Daring Cooks challenge was hosted by Debyi from Healthy Vegan Kitchen. Inspired by a visit to one of the Fresh Restaurants in Toronto, she choose Indian Dosas from the Refresh cookbook by Ruth Tal. If you take a peek at Debyi’s blog you’ll notice that she takes healthy cooking quite seriously and uses almost no added fats in her techniques.

Pulling this dish together requires three components, the dosas (a thin crepe-like pancake), the filling (which is curry and bean based) and the sauce (a satisfying coconut milk and tomato concoction). I suggest starting backwards from this list by making the sauce first, then filling and finishing with the dosas. That way everything will be ready at about the same time. A few weeks ago my volunteer gig afforded me (along with my friend Kate) the opportunity to turn out roughly 200 crepes for a hungry breakfast crowd. Some crepes were vegan and some were egg and butter laden—all helped hone my technique. I offer these words of advice for the vegan version: ain’t nothin’ beats a non-stick pan. Yes, the first few crepes are always sacrificial until you get the heat just right, but without the Teflon coating you’ll blow through the entire batter with nary a dosa to show for it. I learned this the hard way trying to use my beautiful cast iron crepe pan, which has since intimated to me that in order to cooperate consistently it prefers butter. So Julia!

I was excited to receive this challenge as I adore Indian food and have acquired quite a handful of vegan friends of late. I present the recipe here as I received it with only minor ingredient substitutions noted. If I were to make it again, I most definitely would make my own curry or if in a pinch, use a curry paste. Curry powders have always tasted flat to me, so I try to avoid using them and should have done so with this recipe. You should know, though, that this dish tastes even better the next day. Just reheat gently if going this route so as not to cause the sauce to separate. Oh, and I served this with steamed kale and okra. It’s a great time of year to be eating okra. I highly recommend the "O is for Okra" recipe from the abecedarian tribute in this month's Gourmet magazine. [Can't seem to find link.] Not only because of my preference for the letter "O", it truly is delicious!

Indian Dosas
Serves 4

Coconut Curry Sauce

1 onion, peeled and chopped

2 cloves garlic

½ tsp ground cumin
¾ tsp coarse sea salt
3 TBS curry powder

3 TBS spelt flour (or all-purpose GF flour)

3 cups vegetable broth

2 cups coconut milk

3 large tomatoes, diced

1.Heat a saucepan over medium heat, add the onion and garlic, cooking for 5 minutes, or until soft.
2.Add the spices, cooking for 1 minutes more. Add the flour and cook for 1 additional minute.
3.Gradually stir in the vegetable broth to prevent lumps. Once the flour has been incorporated, add the coconut milk and tomatoes, stirring occasionally.
4.Let simmer for half an hour.

Curried Garbanzo Filling

5 cloves garlic

1 onion, peeled and finely diced

1 carrot, peeled and finely diced

1 green pepper, finely diced (red, yellow or orange are fine too)

2 medium hot banana chilies, minced

2 TBS ground cumin
1 TBS oregano

1 TBS coarse sea salt
1 TBS turmeric

4 cups cooked (or about 2 cans) chick peas
(I used Borlotti beans from my favorite heirloom legume purveyor)
½ cup tomato paste

1.Heat a large saucepan over medium to low heat. Add the garlic, vegetables, and spices, cooking until soft, stirring occasionally. Add a bit of water if vegetables begin sticking to pan. 2.Mash the beans and add along with the tomato paste to the saucepan, stirring until heated through.

Dosa Pancakes
 (I suggest doubling this to ensure extra batter for practicing your technique)
1 cup spelt flour (or all-purpose, gluten free flour)

½ tsp salt

½ tsp baking powder

½ tsp curry powder

½ cup almond milk (or soy, or rice…)

¾ cup water

cooking spray, as needed

1.Combine the dry ingredients in a blender, slowly add the liquids, blending until smooth.
2.Heat a nonstick skillet over medium heat. Spray your pan with a thin layer of cooking spray, as needed.
3.Ladle 2 tablespoons of batter into the center of your pan in a circular motion until it is a thin, round pancake. When bubbles appear on the surface and it no longer looks wet, flip it over and cook for a few seconds. Remove from heat and repeat with remaining batter. Makes 8 pancakes.

Friday, August 14, 2009

Paella, My Way

The August Daring Cooks Challenge was hosted by Olga from Las Cosas de Olga and Olga’s Recipes. She chose a dish from José Andrés, a renowned Spanish chef who trained under Ferran Adria at his three Michelin star restaurant El Bulli. José now lives in Washington DC where he owns several restaurants. I’ve been most fortunate to dine at Jaleo, Zaytinya and Oyamel, and at each had a satisfyingly memorable and unique meal.

The paella-like recipe Olga selected is from José’s TV show Made in Spain. Of course, being the cook that I am, I made my own modifications. Namely, I eliminated the cuttlefish. I made paella my way…finally. This was a long time coming. More than several years ago, fresh off the plane on my first trip to Europe, sitting in an outdoor café in Madrid, I ordered paella. Be it youthful naivete or general stupid-Americanism, I tried to customize my order with the waiter in horribly broken Spanish. Really all I wanted was yellow rice, vegetables and beans, with NO fish! (Still working through this: I am squeamish about the fishy things of which traditional paella abounds.) He nodded in what I thought was understanding and promptly brought me the unedited version. Chagrinned and not knowing enough Spanish to protest, I picked around the shells and fishy bits and swallowed politely. Oh well, I was hungry.

For my version, cuttlefish was substituted with potatoes that I purchased from a particularly proud farmer at the market. He gave me his recommendation on (in his opinion) the prettiest, brilliant red-skinned spuds. The gorgeous mushrooms in this dish were grown at Tantré Farms. As another ingredient note, I used Calasparra rice, a short-grain variety that is particularly suited for use in paella due to its capacity to absorb large amounts of broth while remaining firm. It really cooks up beautifully like plump little toothsome sponges brimming with saffron flavor! Unlike risotto, which also uses short-grain rice as a foundation, the preparation of paella requires minimal stirring and fretting. Try making it yourself. It really takes very little effort to prepare.

Ingredients (serves 4):

4 Artichokes (because of the season, I used a canned variety)

12 Mushrooms (button or Portobello)

1 or 2 Bay leaves

1 glass of white wine

4-6 red-skinned potatoes, medium-size dice

Sofregit (see recipe below)

2 cups short grain rice (Calasparra or Montsant are preferred, but you can choose any other short grain.

6 cups vegetable stock

1 pinch of saffron threads, crushed

Allioli (see recipe below)


  1. Add 1 or 2 tablespoon of olive oil in a large pan on medium heat. Add the potatoes and cook stirring occasionally to prevent sticking to pan.
  2. Cut artichoke hearts into eighths. Clean the mushrooms and cut them into fourths. Add a bay leaf, artichokes, and mushrooms to the potatoes and sauté until potatoes are golden. Next pour in enough white wine to deglaze the pan and then add several tablespoons of sofregit, stirring to incorporate.
  3. Add the vegetable stock and bring it to boil. Stir in the rice. Let boil for about 5 minutes on heavy heat. Add saffron and stir once or twice to incorporate. Reduce heat to low and boil for another 8 minutes (or until rice is a little softer than “al dente”). Remove the pan from heat and let the rice stand a couple of minutes before serving with allioli.

Sofregit is a fragrant sauce made of olive oil, tomatoes, garlic and onions, and also sometimes includes different vegetables such as peppers or mushrooms.

Ingredients:

2 Tbs of olive oil

5 big red ripe tomatoes, chopped

2 small onions, chopped

1 green pepper, chopped

5 garlic cloves, chopped

1 Bay leaf

1 tsp fresh oregano, chopped

Salt

Touch of ground cumin


Put all the ingredients together in a large swallow pan and sauté slowly for about an hour until all vegetables are soft. Taste and salt as needed.


Allioli (Traditional recipe)


Ingredients:

4 garlic cloves, peeled

Pinch of salt

Fresh lemon juice (several drops)

Extra-virgin Spanish olive oil


Finely mince the garlic along with the salt using the flat side of your knife to mash into a smooth paste. Add the lemon juice to the garlic and drop by drop slowly pour in the olive oil as you continue to crush the paste with your knife. It takes time—around 20 minutes— and a bit of patience to create a dense, rich sauce the consistency of a very thick mayonnaise.