custom cakes/cookies

Friday, August 27, 2010

Baked Alaska from the Soul of the Earth


Toasted marshmallow. Fresh peaches. Honey. A butter-rich cake that hints at caramel due to a heap of brown butter. These are the flavors of my first Baked Alaska. It's preparation wasn't the disaster (i.e., torching ice cream) I always assumed it would be. But maybe my kitchen confidence has improved a bit since the first time I heard what's involved in making a Baked Alaska.

Having no disastrous stories with which to regale you, let's move topics to the world news. Did you hear the price of wheat is rising? Bad news for the state of our global climate and for everyone not abstaining from gluten. But good impetus if, like me, you want to explore alternative grains in their whole form. After reading Good to the Grain cover to cover, I'm ready to nearly wholly commit back to this way of baking. Though, it's not purely from a health or economic perspective. Really, it's driven by wanting to learn new flavors and new textures. Spelt and buckwheat have been my mainstays when I wander past the bin of all-purpose. I'm ready to push the boundaries a little further.

So in that vein...

Today's new-to-me flour is brought to you by the whole grain: kamut [pronounced ka MOOT]. When ground to a fine powder to be used as flour, the amber-colored grain has a buttery flavor and lends a crumbly, sandy texture. This makes it well-suited for baked goods and an especially perfect complement to those rich in butter. Compared to standard wheat, kamut is higher in protein, lipids, selenium, zinc and magnesium, making it a high energy food source that is rich in antioxidants.

Kamut's ancestry can be traced as far back as the wild grains that grew in the Fertile Crescent of Mesopotamia and are claimed to have traveled on Noah's ark. According to legend, 36 kernels of khorasan wheat found in an Egyptian tomb made their way into the capable hands of an organic farmer in Montana. He named the seeds "Kamut" after the ancient Egyptian name for wheat, a word that also meant "soul of the earth". The name was trademarked and an organization was founded to promote research and production worldwide. Still to this day, the organization has protected kamut from being altered by modern plant-breeding practices. Any wheat sold under the name Kamut is guaranteed to be produced organically, free of GMOs. To me, that fact alone is a beautiful reason to incorporate kamut into your baking repertoire.

The cake recipe I'm sharing here is a simple way to showcase its flavor. Using browned butter goes even further to intensify the richness. Read the recipe at least once through before starting to mix the ingredients. The order of additions is quite unique compared to standard pound cake recipes. Also, care should be taken to disturb the batter as little as possible when mixing.

To complete the dessert, I'm sharing my favorite method to make meringue. I learned the technique from Martha Stewart. Like the pound cake, it too is less conventional in preparation as the egg whites are heated over a pan of simmering water just long enough to coax the sugar to melt. Standard meringue recipes skip this step, and as a result, at least to my palate, have a metallic taste. This method produces something more akin to the texture of a marshmallow without the stiffness from added gelatin.

The August 2010 Daring Bakers’ challenge was hosted by Elissa of 17 and Baking. For the first time, The Daring Bakers partnered with Sugar High Fridays for a co-event and Elissa was the gracious hostess of both. Using the theme of beurre noisette, or browned butter, Elissa chose to challenge Daring Bakers to make a pound cake to be used in either a Baked Alaska or in Ice Cream Petit Fours. The sources for Elissa’s challenge were Gourmet magazine and David Lebovitz’s “The Perfect Scoop”. Though both are excellent resources, I didn't use either for the following recipes.


Honey-Peach Ice Cream
from ezrapoundcake.com
who adapted from Dorie Greenspan’s “Baking: From My Home to Yours”


Makes about 1 quart

2 pounds ripe peaches, peeled and pitted
1/4 cup honey
1 cup whole milk
1 cup heavy cream
3 large egg yolks
1/2 cup sugar
2 tsp vanilla extract

Coarsely chop half the peaches into 1/2-inch chunks, and combine with the honey in a small saucepan. Bring to a boil, then lower the heat, cover and cook, stirring occasionally, until the peaches are soft, about 10 minutes. Puree the mixture using a blender, food processor or immersion blender. Set aside.

In a medium saucepan, bring the milk and cream to a boil.

Meanwhile, in a medium bowl, whisk the yolks and sugar together. While whisking, slowly pour in about one third of the milk-cream mixture – this will temper the eggs so they won’t curdle. Pour the custard back into the pan, whisking continuously. Cook over medium heat, stirring without stopping, until the custard thickens slightly and coats the back of a spoon. The custard should reach at least 170° F, but no more than 180° F.

Remove the pan from the heat and stir in the vanilla and peach puree. Refrigerate the custard until chilled (preferably overnight).

When sufficiently chilled, scrape the custard into the bowl of an ice cream maker, and churn according to manufacturer’s directions. While the ice cream is churning, finely dice the remaining 2 peaches, then, just before the ice cream is thickened and ready, add the peaches and churn to blend. Pack the ice cream into a container and freeze for at least 2 hours, until it is firm enough to scoop.

Brown Butter Kamut Pound Cake
adapted from Alice Medrich’s Pure Dessert

16 TBS unsalted butter
3 TBS whole milk, at room temp
3 large eggs, at room temp
1 1/2 tsp vanilla extract
1 cup cake flour (sift before measuring)
1/3 cup plus 1 TBS whole-grain kamut flour
3/4 cup sugar
3/4 tsp baking powder
1/4 tsp salt

Position a rack in the lower 1/3 of the oven and preheat to 350°F. Line a 8 x 4-in loaf pan with parchment.

Place the butter in a large skillet over medium heat. Brown the butter until the milk solids are a dark toasty brown and the butter smells nutty. Pour into a shallow bowl and chill in the freezer until just congealed but still soft, 15-30 minutes.

In a medium bowl, combine the milk, eggs, and vanilla by whisking together.

Mix together and then sift the flours, sugar, baking powder, and salt into the bowl of a standing mixer. In tablespoon portions, scoop 13 TBS of brown butter into the mixing bowl as well. To this add half of the egg mixture. Beat on low speed just until the dry ingredients are moistened. Increase the speed to medium and beat for just 1 minute longer. Scrape down the sides of the bowl and add half of the remaining egg mixture. Beat for 20 seconds. Scrape the sides of the bowl again and add the final remaining portion of the egg mixture. Beat for 20 seconds.

Scrape the batter into the prepared loaf pan. Smooth the surface before transferring to the oven. Bake about 55-65 minutes, until golden brown and when a toothpick inserted into the center comes out clean. If excess browning occurs, tent the pan loosely with foil, after the first 30 minutes into baking.

Cool in the pan 10 minutes. Use the parchment overhang to transfer right-side-up onto a cooling rack. Allow to cool completely.

Meringue

4 egg whites
1 cups plus 2 TBS sugar
1/2 teaspoon pure vanilla extract
1/4 teaspoon cream of tartar
salt

Just before serving, combine whites and sugar in a mixer bowl. Set over a saucepan of simmering water. Whisk until sugar dissolves and mixture is warm, about 3 minutes. Transfer bowl to a mixer, and add vanilla, cream of tartar, and a pinch of salt. Whisk on medium-high speed until shiny, stiff peaks form, about 7 minutes.


Assembly Instructions

Line a bowl with plastic wrap, so that plastic wrap covers all the sides and hangs over the edge. Fill to the top with ice cream. Cover the top with the overhanging plastic wrap and freeze for several hours, or until solid.

Level the top of the brown butter pound cake with a serrated knife. Cut out a circle of cake equal to the diameter of the rim of the bowl. Eat the scraps as a reward for your labor.

Make the meringue.

Unmold the ice cream and invert on top of a cake round. Trim any excess cake if necessary.

Pipe the meringue over the ice cream and cake, or smooth it over with a spatula, so that none of the ice cream or cake is exposed. Freeze for one hour or up to a day.

Toast the tips of the meringue with a culinary torch. Or, bake the meringue-topped Baked Alaska on a rimmed baking sheet under a broiler until lightly golden.

Serve immediately.

Friday, August 13, 2010

Local Ingredients meet Culture Fusion

The August 2010 Daring Cooks’ Challenge was hosted by LizG of Bits n’ Bites and Anula of Anula’s Kitchen. They chose to challenge Daring Cooks to make pierogi from scratch and an optional challenge to provide one filling that best represents their locale.

My choice for representing my locale: kimchi.

Nope, I don't live in Korea. There just so happens to be a new food vendor at my farmer's market, and I've taken it upon myself to get acquainted. For those of you who don't know, kimchi is an ancient Korean food made of various salted, lacto fermented vegetables (the bulk of which usually includes cabbage), hot peppers, and fish oil. It's a natural superfood that's high in dietary fiber, low in calories, rich in vitamins and minerals, and is full of probiotics. Because of its wonderful digestive properties, Koreans use it as sort of a palate cleanser during just about every meal. Due to it's distinctive flavor, Americans typically use it as a condiment. So much better on a hot dog instead of ketchup!

Since kimchi is mostly cabbage, it doesn't seem a far stretch to swap it into any recipe where cabbage or perhaps sauerkraut usually is involved. That's why kimchi on a hot dog is a good idea. That's also why it ended up as the filling in my pierogi. Pierogies often are filled with potatoes and cabbage. There seems to be a very fine line dividing the definition of a pierogi and a dumpling. It may have a lot to do with the filling ingredients (which reflects regional/cultural differences) and also a bit to do with the preparation. Do you steam? Pan fry? Deep fry? A quick poll of those I know with Polish heritage resoundingly said sauté in butter and onions. So that's where I began to play, replacing butter with sesame oil and keeping the onions. Lots of onions! While I was at it, I tweaked the dough recipe to include whole grains like spelt and buckwheat and whole wheat. At this point, I'm sure traditionalists might abandon calling this a pierogi, but I'm pretty sure, whatever the name, they'd still call it delicious.


Kimchi Pierogi Potstickers

makes 4-5 servings, around 40 dumplings

Dough:
1 cup all-purpose flour, plus more for rolling
½ cup whole wheat flour
¼ cup buckwheat four
¼ cup spelt flour
1 teaspoon salt
1 large egg
up to 1 cup lukewarm water (you won't use all of it)

Filling:
12 oz prepared kimchi, drained (reserve liquid) and chopped

In exchange for this jar below, I bartered half a batch of pierogi with The Brinery CFO, David Klingenberger. Thank you, David!


To cook:
1 white onion, sliced into super thin rounds
2 cups water
2 TBS sesame oil
1 tsp (or less depending on taste) salt
fresh parsley to garnish

Dipping sauce:
reserved liquid from kimchi mixed with an equal portion of shoyu (my preference) or soy sauce and a few drops of sesame oil

Method

Combine the flours and salt in a large bowl (or on a work surface) and make a well in the center. Break the egg into the well and add a little lukewarm water at a time (½ cup was sufficient for me). Bring the dough together, kneading well and adding more flour or water as necessary, but keeping in mind that you are aiming for soft dough. Cover the dough with a bowl or towel. Let rest 20 minutes.

On a floured work surface, roll the dough out thinly (about ⅛-inch thick) cut with a 2-inch round cutter. Spoon about 1 teaspoon of the filling into the middle of each circle. Fold dough in half and pinch edges with the tines of a floured fork to seal. Gather scraps, re-roll and fill. Repeat with the remainder of the dough.


At this point you can freeze the pierogi for later use. Freeze in a single layer on a sheet pan for at least 30 minutes. When completely frozen transfer to a freezer-rated zip-top plastic bag and store up to 3 months.


When ready to cook:

In a wok (or large skillet) over high heat, bring water, sesame oil, sliced onions, and salt to a boil. Add pierogies in a single layer. Reduce heat to med-high. Cook, uncovered, until all the liquid is absorbed and the pierogies begin to sizzle, about 15-20 minutes.

Continue to cook 3-5 minutes more, shaking the pan often without turning pierogies, until golden and crisp on the bottom. You may find you need to rearrange the pierogies for even browning, but resist the urge to turn them over.

Carefully pry the potsickers from the pan with a thin spatula. Serve with the kimchi-soy dipping sauce.

Friday, August 6, 2010

Tea-Flavored Frozen Fruit Pops

I often contribute recipes to the blog of my friends' tea company, Arbor Teas. Here is the latest recipe I developed using a few of their teas.

Summer is in full swing now, bringing with it plenty of sweltering heat and an outcropping of icy treats on a stick for relief. With all the press they're getting lately, frozen pops appear to be the latest trend. It's peculiar how life cycles; everything once old and nostalgic is eventually new and hip again. This is fantastic news for the home cook who doesn't have the patience or the dedicated appliance needed to whip up a batch of gelato or semifreddo or ice cream. Making popsicles is easy and requires no special equipment!

The recipe guide below calls for just five simple ingredients. And adding Arbor Teas organic loose-leaf tea provides a whole new flavor dimension and an extra level of refreshment. Upon freezing, the tea flavor truly comes forward of the fruit. This is achieved by first making a tea-infused simple syrup. You could stop here and use the chilled syrup in cocktails or more casual summertime beverages, or you could forge on by adding fruit and freezing it on a stick. Wide grins are your guaranteed reward for just these few extra measures.

The flavors of pops pictured here include: Peppermint-Blueberry, Crimson Berry Fruit Tisane-Cherry, Pineapple Passion Green Tea-Strawberry, and Raspberry Green Tea-Peach. Purposefully, though, the recipe below is specific with regard to ratios but vague on flavors. I'm leaving it to you to peruse the Arbor Teas selection and be inspired by what's available at your local fruit stands. And don't be deterred if you don't own frozen pop molds. Try the tricks outlined here for a simple substitute.


Tea-Flavored Frozen Fruit Pops
makes about a dozen

2 cups water
8 TBS organic loose-leaf tea
2 cups sugar
3⅔ cups fresh or frozen fruit
1 tsp lemon juice

In a medium saucepan, heat the water to boiling. Remove from heat, add the tealeaves, cover the pan, and allow the tea to steep for 5 minutes.

Strain to remove the leaves. Return the freshly brewed tea to the saucepan and bring to a slow boil. Add the sugar, stirring constantly until it completely dissolves, about 2 minutes.

Add the fruit to the tea-infused syrup. Gently boil the mixture until the fruit is soft, stirring occasionally, about 5-8 minutes depending on the type of fruit. Remove from heat and pass the mixture through a food mill (or strain through a mesh sieve) set over a bowl, pressing on the solids to extract as much fruit as possible. Add the lemon juice to the fruit puree mixture and stir to thoroughly combine.

Cool to room temperature and then divide the mixture among the ice pop molds. Freeze until semi-firm (~2 hours), insert popsicle sticks, then continue freezing until completely solid, at least 8 hours or overnight.

To release pops for serving, dip the bottoms of the molds in warm water for 10-15 seconds.

Tuesday, July 27, 2010

Swiss Roll Ice Cream Bombe

Confessions from my middle school lunch box: Little Debbie Swiss Rolls were my fav! And they tasted even better straight from the freezer. Oh how my leanings in consuming preservatives and packaged foods has changed nowadays. This doesn't completely rule out a place for Swiss rolls in my diet. It just means I'd make them myself now...from scratch...if I had a hankering.

Making this Swiss roll was the first time I've ever baked a rolled cake. Well, to be honest, this was my second time baking a rolled cake--the first attempt at this recipe was a crumbly, cracked mess. But the second time around, from those mistakes, I adapted a rolling technique that was much better (or one could argue was obsessive and constantly fidgety). Now I'm all set to put my skills to the test come yule log season or jelly roll craving.

To complete the bombe, two layers of ice cream separated by a layer of fudge lie beneath the cake. I wanted the ice creams to appear as swirled as the Swiss rolls, so I chose to mix in black currant curd to the vanilla-thyme layer and fudge ripple to the dark chocolate layer.

Homemade ice cream was a perfect way to use the 18 egg yolks I had leftover after taking their companion whites to make an exceptionally large batch of buttercream for my friends' wedding cake/cupcakes. Also, this was a great opportunity to try recipes from two of my newest cookbooks: Lola's Ice Creams & Sundaes and Perfect Scoop.

The July 2010 Daring Bakers’ challenge was hosted by Sunita of Sunita’s world – life and food. Sunita challenged everyone to make an ice-cream filled Swiss roll that’s then used to make a bombe with hot fudge. Her recipe is based on an ice cream cake recipe from Taste of Home.

Swiss Roll Ice Cream Bombe

Vanilla-Thyme Ice Cream Swirled with Black Currant Curd
from Lola's Ice Creams & Sundaes

1 vanilla pod
fresh thyme sprigs, tied in a bundle
750 ml whole milk
450 ml whipping cream
12 egg yolks
240 g sugar

Put the milk and cream in a large sauce pan. Halve the vanilla pod and scrape out the seeds. Add both the pod and the seeds and the thyme to the milk and cream. Heat to just below boiling. Cover, take off heat and set aside to steep. After 20 minutes of steeping, remove the vanilla pod and thyme bundle, but do not discard. Re-warm the mixture to just below boiling again.

Beat the egg yolks with the sugar. Add a third of the warm milk-cream to the egg-sugar mixture, whisking constantly. While continuously stirring, return this custard mix to the pan with the rest of the milk-cream. Slowly heat the custard stirring constantly until the temperature reaches 80° C. Maintain this temperature for 15 seconds. Do not allow the mix to boil or it will scramble.

Turn off the heat and continue whisking the custard for a few minutes to reduce the heat. Transfer the mixture to a container, add in the reserved thyme and vanilla pod. Chill in the fridge for at least 4 hours or ideally overnight.

Before churning in your ice cream machine, remove the vanilla pod and thyme.

Black Currant Curd
makes about 2 cups

1 pint black currants, rinsed
2 TBS water
½ cup sugar
2 TBS unsalted butter
2 large eggs
1 large egg yolk

Place the black currants and the water in a non-corroding saucepan. Cover and cook on a low-medium heat, stirring occasionally for 20 minutes or until the currants are mushy. Pass the currants through a food mill to produce about 1¼ cups puree. Stir the sugar and butter into the warm puree and heat, stirring constantly. Whisk the eggs and the egg yolk just until mixed, then whisk in a little of the hot currant mixture to heat the eggs. Return to the pan and cook over low heat, stirring constantly, until the mixture is well thickened and has reached 170° F. Pour into a container, cover and chill.

Mixing it in: The curd should be throughly chilled before using. Just before you remove the ice cream from the machine, spoon some on the bottom of the storage container. As you remove the ice cream from the machine, layer generous spoonfuls of the curd between layers of ice cream. Avoid stirring it in as it will make the ice cream muddy looking.

Deep Dark Chocolate Ice Cream with Fudge Ripple
from Lola's Ice Creams & Sundaes

500 ml whole milk
500 ml whipping cream
40 g cocoa powder
250 g dark chocolate (70% cacao)
3-4 fresh coffee beans (optional)
6 egg yolks
150 g sugar

Heat the milk and cream in a pan to just below boiling, then remove from heat. Make a paste with the cocoa powder by mixing it with a little heated milk and cream. Add the paste to the warm milk-cream and whisk continuously over a very low heat for 4-5 minutes in order to cook out the powdery taste of the cocoa.

Break up the chocolate into small pieces and place it in a bowl set over a pan of simmering water. Stir from time to time until the chocolate melts. Add the melted chocolate and coffee beans to the milk and cream. Stir until everything is combined.

Beat the egg yolks with the sugar. Add the warm milk to the egg-sugar mix and return the mixture to the pan. Heat the custard, stirring constantly, to 80° C. Maintain this temperature for 15 seconds. Do not allow the mix to boil or it will scramble.

Turn off the heat and continue whisking the mix for a few minutes to reduce the temperature.
Transfer the mixture to a container. Chill in the fridge for at least 4 hours or ideally overnight.

Churn in your ice cream machine.

Fudge Ripple
from David Lebovitz's Perfect Scoop
makes 1 cup

100 g sugar
80 ml light corn syrup
125 ml water
50 g cocoa powder
½ tsp vanilla extract

Whisk together the sugar, corn syrup, water and cocoa powder in a medium saucepan. Heat over medium heat, whisking constantly, until the mixture begins to bubble at the edges. Continue to whisk until it just comes to a low boil. Cook for 1 minute, whisking frequently. Remove from the heat, stir in the vanilla, and let cool. Chill in the refrigerator before using.

Mixing it in: The fudge ripple should be throughly chilled before using. Just before you remove the ice cream from the machine, spoon some on the bottom of the storage container. As you remove the ice cream from the machine, layer generous spoonfuls of the sauce between layers of ice cream. Avoid stirring the fudge ripple into the ice cream, as it will make it muddy looking.

Swiss Rolls

For the cake:
5 large eggs, at room temperature
1 cup (225 grams) sugar, plus extra for rolling
6 TBS (45 grams) all purpose flour
5 TBS (40 grams) cocoa powder
2 TBS (30 ml) boiling water

For the filling:
2 cups (500 mls) whipping cream
1 vanilla pod, cut into ½ cm pieces (or 1 tsp vanilla extract)
5 TBS (70 grams) sugar


Preheat the oven to 400° F. Brush a half sheet pan with a neutral-flavored oil and line with parchment paper.

In a large mixing bowl, add the eggs and sugar and beat until very thick; when the beaters are lifted, they should leave a trail on the surface for at least 10 seconds. Sift together the flour and cocoa powder and gently fold into the egg mixture with a spatula. Then, fold in the boiling water.

Pour the batter into the prepared sheet pan, spreading it evenly into the corners. Place the pan in the center of the oven and bake for about 10-12 minutes or till the cake is springy to the touch.

Spread a kitchen towel on the counter and generously sprinkle it with sugar. Upon removing from the oven, immediately turn the cake onto the towel and peel away the parchment paper. Trim away any crisp edges and generously sprinkle sugar over the cake. Starting from the long edge, roll the cake along with the towel. Be careful not to apply too much pressure, as the cake will crack. Place the wrapped roll on a rack to cool, seam side down. Allow the cake to cool completely, about 30 minutes.

To make the filling, grind together the vanilla pieces and sugar in a coffee bean grinder until throughly mixed together. Skip this step if you are using vanilla extract. Combine the cream and vanilla-sugar mixture in a large bowl and beat until very thick.

When the cake has cooled completely, open the roll and spread the cream mixture evenly, leaving a ½-inch border. Roll the cake up again, this time without the towel. Wrap in plastic wrap and chill in the fridge seam side down until ready to use.

Assembly

Line the bottom and sides of the bowl in which you are going to set the dessert with plastic wrap, leaving a generous overhang. Cut the Swiss roll into slices approximately 2 cms thick.

Arrange two slices at the bottom of the bowl, with their seam sides facing each other. Arrange the remainder of the Swiss roll slices up the bowl, with the seam sides facing away from the bottom, to cover the sides of the bowl. Cover the bowl with plastic wrap and freeze until the slices are firm (at least 30 minutes). Meanwhile, set the first layer of ice cream out to soften.

When ready to proceed, remove the bowl from the freezer, peel back the plastic wrap cover and spread the ice cream over the cake slices and up the sides of the bowl. Replace the plastic wrap and freeze until firm (at least 1 hour).

Pour the fudge sauce over the frozen ice cream layer, cover with the plastic wrap and freeze until firm (at least 1 hour). Meanwhile, soften the second flavor of ice cream.

When ready to proceed, spread the second layer of ice cream over the fudge sauce. Cover with plastic wrap and freeze for at least 4-5 hours until completely set.

When ready to serve, peel back the plastic cover, and used a serrated knife to level the bottom of the cake so that it is flush with the bowl. Place the serving plate on top of the bowl. Turn it upside down. Carefully lift off the bowl and peel off the plastic lining. If the bowl does not come away easily, wipe the outside of the bowl with a kitchen towel dampened with hot water.

Keep the cake out of the freezer for at least 10 minutes before slicing. Slice with a sharp knife, dipped in hot water.

Saturday, July 17, 2010

Fruit Curd Popsicles


Recently, I sensed a trend in the artisanal popsicle. Recipes and photo spreads are "pop"ping up in food magazines and blog posts, and a variety of molds are out on the market boasting nostalgia, fun shapes, or no-mess features. Also, there's these people of whom I'm completely in awe.


You don't need me to tell you that it's been a pretty hot summer and that the trend of DIY endures. I so entirely relate and was ready to jump on that bandwagon. My first vision of frozen relief: multiple, vibrant stripes of fruit curd. Tart, refreshing, and a gorgeous gradation of color. That's the concept I was after.


Making interesting fruit curds strongly rivals my interest in jam making. Freezing them in popsicle format just seemed like a logical next step. The flavors of this batch, layered from top to bottom/ lightest to darkest, include: lemon-buttermilk sherbet, gooseberry curd, raspberry curd, and black currant curd. See below for the recipes.


Not ready to invest in popsicle molds? Try the tricks outlined here.

And for fun, read the brief history of the popsicle. Learn how they got their name...


THE RECIPES:

Lemon Buttermilk Sherbet

from David Lebovitz's "The Perfect Scoop"

makes about a quart

⅓ cup water water
⅔ cup sugar
Zest of 1 lemon
2 cups buttermilk
¼ cup lemon juice

In a saucepan, bring the first three ingredients to a boil. Remove from heat, transfer to a bowl and refrigerate until thoroughly chilled. Once it has chilled, add the buttermilk and lemon juice and churn in your ice cream machine.


Gooseberry Curd
makes about 2 cups

1 pint pink gooseberries, rinsed
2 TBS water
½ cup sugar
2 TBS unsalted butter
2 large eggs
1 large egg yolk

Place the gooseberries and the water in a non-corroding saucepan. Cover and cook on a low-medium heat, stirring occasionally for 20 minutes or until the gooseberries are mushy. Pass the gooseberries through a food mill to produce about 1¼ cups puree. Stir the sugar and butter into the warm puree and heat, stirring constantly. Whisk the eggs and the egg yolk just until mixed, then whisk in a little of the hot gooseberry mixture to heat the eggs. Return to the pan and cook over low heat, stirring constantly, until the mixture is well thickened and has reached 170° F. Pour into a container, cover and chill.*


Raspberry Curd
from Tea and Cookies


makes about 3½ cups

12-oz fresh raspberries

1 cup sugar
4 large eggs

4 TBS fresh lemon juice

4 TBS unsalted butter (½ stick)

¼ tsp salt


In a medium saucepan, add the raspberries, sugar, lemon juice, butter, and salt. Heat on medium and, as the butter begins to melt and the raspberries break down, start whisking. Cook on medium heat until the mixture is uniform and the fruit has softened.

In a separate bowl, whisk the eggs. Stirring continually, slowly add ½ cup of the fruit mixture to the eggs. Mix to incorporate.

While whisking continually, slowly add the eggs back into the raspberry mixture. Stir constantly as the mixture heats and thickens slightly. Don’t let the mixture come to a boil, but small bubbles around the edges are okay.

Taste and add more sugar if desired.

Place a mesh strainer over a large bowl. Pour half the raspberry mixture into the strainer and, using a spatula or spoon, press the solids into the mesh. When all the raspberry curd has been expressed, discard the solids and strain the second half of the mixture.
Refrigerate the curd until use.*


Black Currant Curd
makes about 2 cups

1 pint black currants, rinsed
2 TBS water
½ cup sugar
2 TBS unsalted butter
2 large eggs
1 large egg yolk

Place the black currants and the water in a non-corroding saucepan. Cover and cook on a low-medium heat, stirring occasionally for 20 minutes or until the currants are mushy. Pass the currants through a food mill to produce about 1¼ cups puree. Stir the sugar and butter into the warm puree and heat, stirring constantly. Whisk the eggs and the egg yolk just until mixed, then whisk in a little of the hot currant mixture to heat the eggs. Return to the pan and cook over low heat, stirring constantly, until the mixture is well thickened and has reached 170° F. Pour into a container, cover and chill.*


*Curds can be stored about a week in the refrigerator, frozen for several months, or canned,
processing in
a hot water bath for about 15 minutes.

Wednesday, July 14, 2010

Nuts & Notions

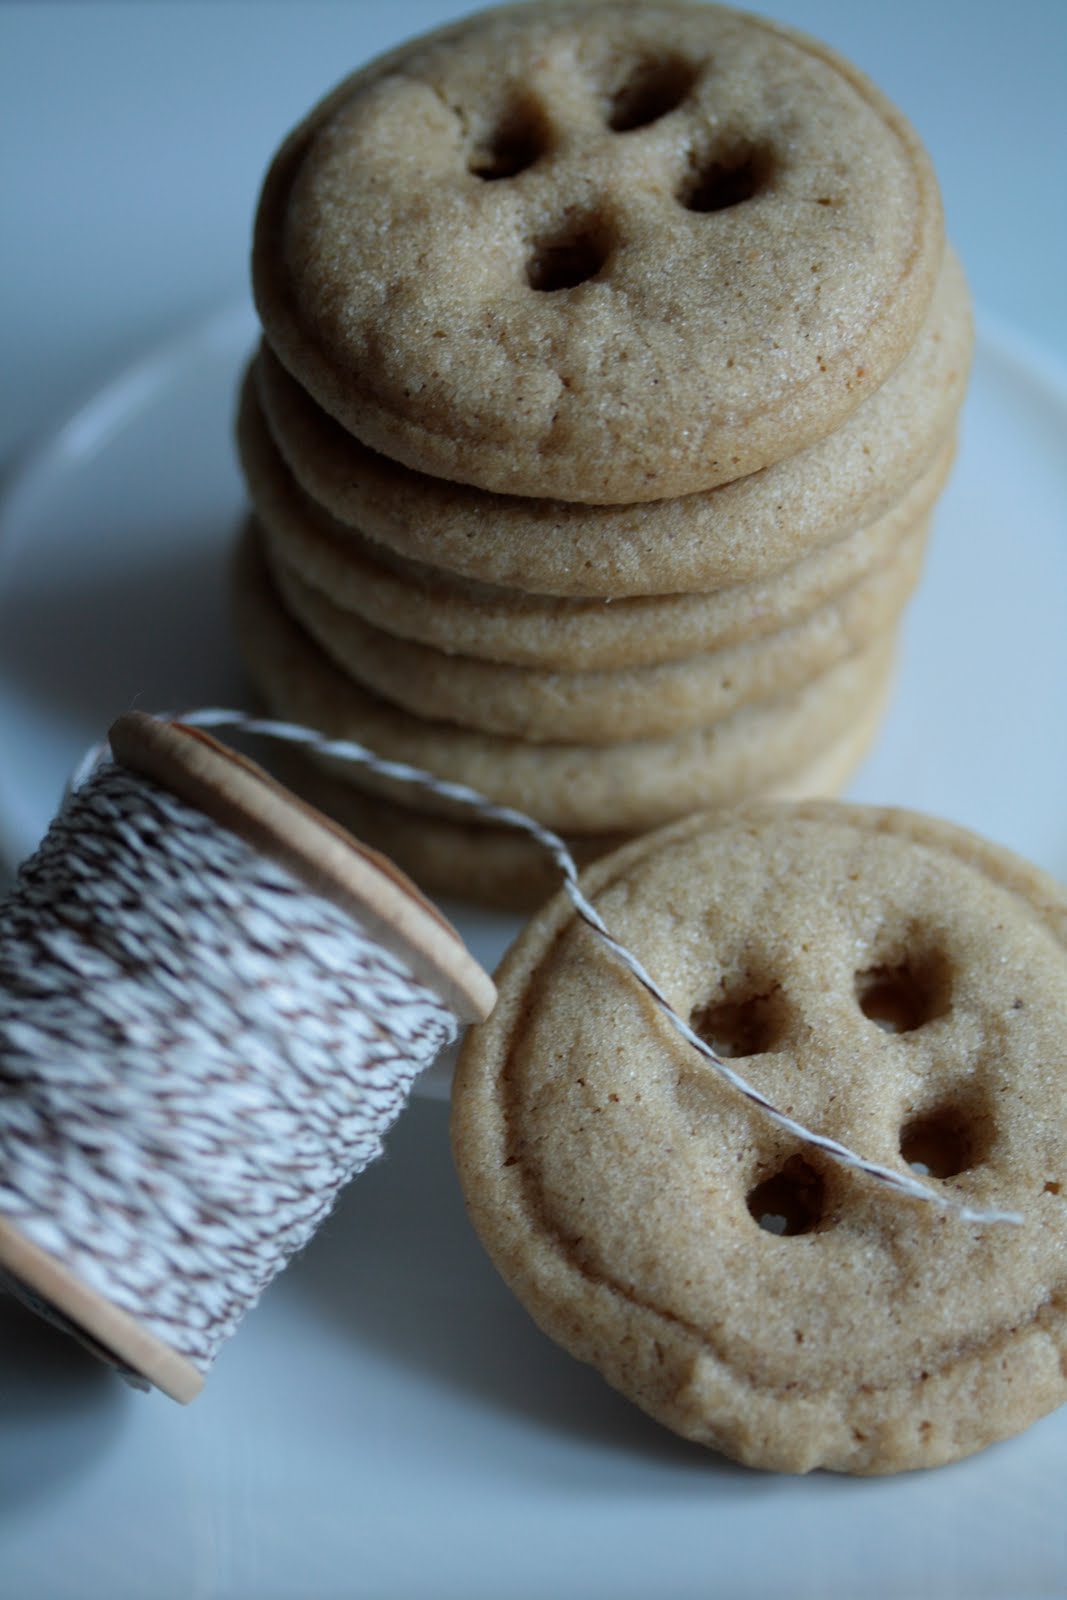
For awhile I had a fascination with Coraline. She was my Halloween costume last year (yep, I submitted a pic to Evil Buttons) and the reason I now own a blue wig and yellow wellies. When I came across an idea awhile ago for Coraline-inspired button cookies, I tucked it away in my memory. I thought it'd be a welcome change from the usual criss-cross pattern used to decorate classic peanut butter cookies, and maybe an adorable idea for a cute-as-a-button-themed baby shower. Then last week my friend Lisa showed me another pretty blog with shortbread button cookies. With a directive from the Daring Kitchen to make something with self-ground nut butter, I decided this would be my chance to try out the button technique. My rendition, however, is made a little differently with hazelnuts that I toasted and then ground into a buttery paste. If I'd a had any cacao nibs in my pantry, I'd have tossed those into the food processor as well to make something akin to a chocolate-hazelnut spread. Nutella buttons! Maybe next time...

To tell you the truth, though, the nut butter cooking challenge wasn't supposed to involve something sweet. Dessert was an optional bonus I just couldn't resist. So with the extra credit out of the way, I did make something savory with ground nuts. Before washing the bowl of the food processor completely clean of the hazelnut butter, I tossed in more hazelnuts and roasted almonds and toasted bread and garlic. To that I added piquant spices, fresh basil leaves, a roasted red pepper, and fresh tomatoes from the farmer's market. What resulted was a Catalan-style Romesco sauce. This version is a great healthy and versatile (and vegan!) accompaniment to grilled or broiled vegetables, especially potatoes, as well as smeared on grilled polenta (as I did in the picture down below) or meats or fish. My plan is to freeze it in batches, to use all summer (or however long it lasts) as a fancy alternative to ketchup.

The July 2010 Daring Cooks’ Challenge was hosted by Margie of More Please and Natashya of Living in the Kitchen with Puppies. They chose to challenge Daring Cooks to make their own nut butter from scratch, and use the nut butter in a recipe. Their sources include Better with Nut Butter by Cooking Light Magazine, Asian Noodles by Nina Simonds, and Food Network online.

Hazelnut Buttons
makes ~11 dozen

3 cups hazelnuts
5½ cups flour
1½ tsp baking powder
1 tsp baking soda
1 tsp salt
12 ounces unsalted butter, softened
⅔ cup granulated sugar, plus extra for flattening into rounds
2¼ cup dark brown sugar, packed
⅓ cup vegetable oil
3 large eggs plus 2 yolks
2 TBS vanilla extract

Preheat oven to 375°.

Toast hazelnuts for 12-15 minutes until golden. When cool enough to touch, rub off as much of the skin as possible with a clean dishtowel. Process in a food processor until a firm, thick and grainy butter forms, stopping the machine to scrape down the sides as needed. This should take 2-3 minutes.

Reduce oven temperature to 350°.

Whisk together the flour, baking powder, baking soda, and salt in a large bowl. In the bowl of a standing mixer, combine 1⅓ cups hazelnut butter, butter, sugar, and oil. Beat at high speed until pale and creamy, about 2 minutes. Add eggs, yolks, and vanilla and beat until just incorporated. Reduce speed to low, then add the flour mixture in three portions, mixing until well incorporated.

Scoop scant tablespoons of dough onto parchment-lined baking sheets. If the dough is very soft, chilling it for an hour or 2 will make this easier. Roll into balls and space about 1½ inches apart. Dip a small drinking glass into sugar and flatten each mound evenly to about ⅓ of an inch high. Use the non-business end of large diameter piping tip and the business end of a small tip to press button details into each round.

Bake until slightly puffed and golden around the edges, about 10 minutes. Before cookies cool completely, use the small piping tip to reopen the button holes that closed during baking.


Romesco Sauce
from Deborah Madison's Vegetarian Cooking for Everyone
makes ~3 cups

1 slice country-style white bread
Olive oil for frying
¼ cup almonds, roasted
¼ cup hazelnuts, roasted and peeled
4 garlic cloves
2 tsp red pepper flakes
4 Roma tomatoes
1 TBS fresh basil leaves
salt and fresh ground pepper
1 tsp sweet paprika
1 red bell pepper, roasted
¼ cup sherry vinegar
½ cup plus 2 TBS extra virgin olive oil

Fry the bread in a little olive oil until golden and crisp. When cool, grind the bread, nuts, garlic, and red pepper flakes in a food processor. Add everything but the vinegar and oil and process until smooth. With the machine running, gradually pour in the vinegar, then the oil. Taste and adjust seasonings as necessary.

Wednesday, June 30, 2010

Tea-Laced Shortbread Trio

I often contribute recipes to the blog of my friends' tea company, Arbor Teas. Here is the latest recipe I shared using a few of their teas.

Requiring only a handful of ingredients, few things are more simple, yet so satisfying to make than classic shortbread. These delicate cookies complement a glass of milk or a cup of tea equally well, and their buttery, not overtly sweet nature takes on additional flavors with ease. Here I've paired a basic shortbread dough with three classic organic, loose leaf teas from Arbor Teas: Earl Grey Black Tea, Matcha Green Tea, Masala Chai Black Tea. With each tea selection and a few additional mix-ins, three distinctive flavors and hues spring from the platform of a once plain dough. Try all three, or mix and match to your own preferences. The standard shortbread recipe presented here is endlessly adaptable, so don't hesitate to play to your tastes. As a technical aside, though, know that it can be a bit tricky to work with such a butter-laden dough. Success in perfectly shaped cookies comes from keeping the dough well-chilled before rolling and again before baking. Also placing the cookie sheet furthest away from the heat source, in the bottom third of the oven, will prevent spreading as they bake.

Earl Grey Shortbread
makes ~2 dozen 1-inch square cookies

1 cup all-purpose flour
1 tablespoon Earl Grey black tea leaves, finely ground*
¼ teaspoon salt
½ cup (1 stick) unsalted butter, softened at room temperature
¼ cup confectioners' sugar, sifted
½ tablespoon finely grated orange zest


Matcha Shortbread
makes ~2 dozen 1-inch square cookies

1 cup all-purpose flour
2 tablespoons matcha green tea powder
¼ teaspoon salt
½ cup (1 stick) unsalted butter, softened at room temperature
¼ cup confectioners' sugar, sifted


Chocolate Chai Shortbread
makes ~2 dozen 1-inch square cookies

¾ cup all-purpose flour
⅓ cup Dutch-process cocoa powder
1 tablespoon masala chai black tea leaves, finely ground*
¼ teaspoon salt
½ cup (1 stick) unsalted butter, softened at room temperature
¼ cup confectioners' sugar, sifted


Method

Whisk flour, tea, (cocoa powder, if using) and salt in a small bowl; set aside.

In the bowl of a standing electric mixer fitted with a paddle, beat the butter until creamy. Add the sugar (and zest if using) and beat until fluffy. Add the flour/tea mixture to the mixing bowl, then beat on low speed until just incorporated. The dough will be very soft.

Transfer the dough to a sheet of parchment paper (or plastic wrap), shape into a disc, and wrap tightly to seal. Refrigerate the dough until firm, at least 2 hours or, preferably, overnight. The dough can be refrigerated for up to 3 days.

Position a rack in the bottom third of the oven and preheat the oven to 350° F. Roll out the dough on a floured surface to about ⅜-inch thickness and cut into shapes. Space 1 inch apart on baking sheets lined with parchment. Chill cookies in the refrigerator on a baking sheet for 10-15 minutes or until firm. Re-roll the scraps and cut out more cookies, as above, chilling the scraps between batches.

Bake the shortbread in the bottom third of the oven, one sheet at a time until the edges are golden, 13 to 15 minutes. Let cool completely on sheets on wire racks. These cookies can be stored in an airtight container at room temperature for about a week.

*You can grind the tea leaves in a small food processor, spice grinder, coffee grinder, or by using a mortar & pestle.