

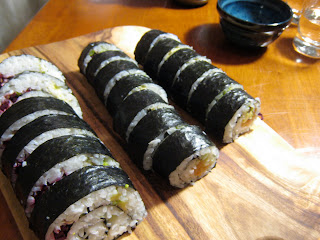
The November 2009 Daring Cooks challenge was hosted by Audax of Audax Artifex and Rose of The Bite Me Kitchen. They chose sushi as the challenge. This challenge required making proper sushi rice to be used to form three types of sushi: a dragon sushi roll – an avocado and sea urchin roe covered inside-out rice roll filled with BBQ eel; a spiral sushi roll – a nori-coated rice roll filled with local veggies from the farmers market that reveals a decorative, spiral pattern when cut; and nigiri sushi – hand-shaped rice balls topped with sashimi-grade yellow tail, ahi or salmon.
Oh, my. A challenge indeed for a flexitarian (that’s me) with squeamish tendencies towards raw meats (or in this case fishes). I usually order my sushi with just veggies. I know, not too exciting. So wanting to step it up for this challenge, I did what any sensible person in my predicament might do, I enlisted help from my friends. How does the saying go? Sometimes it’s not what you know, but rather who you know.

First, a stop to the local fish market, Monahan’s for sashimi-grade fish. Discussing my options (eel, ahi, yellow fin, fluke, salmon) with the fishmonger was actually quite fun. I ended up purchasing a bit of each (minus the fluke) along with a lobe of sea urchin roe. Mmhmm, that’s right, I even splurged on a bit of roe!
Then, a quick pop over to the neighbors to borrow their fancy “fuzzy neuro” rice cooker. Admittedly, the challenge wasn’t written for this option, but I cheated. My friends sing high praises for their rice cookers. You know they can be programmed to make you breakfast? Imagine, oatmeal ready first thing in the morning without dirtying a pot. I’ve never used one. This was just the excuse I was looking for to try it myself.
Finally, an invitation to a friend with superb julienning skills to bring a bottle of good drinking sake, a bamboo rolling mat, and a hearty appetite. Absolute brilliance on my part! I didn’t touch the fish at all. I was in charge of rice. Don’t think I got off too easy, though. Proper sushi rice definitely has its own nuances (mainly all the rinsing) before pressing the cook button on the machine. And of course, there was the fun of filling and rolling the nori and forming the nigiri.
I’m sure you are wondering, so yes, after it was prepared, I did eat the sushi, raw fishes and all. It was actually quite amazing! I think both quality ingredients and the pride that goes into preparing something yourself make all the difference in your perception of a meal. For me, the satisfaction from both these factors plus the gratitude from friendships made this dinner especially meaningful.
SUSHI RICE (makes about 7 cups of cooked sushi rice)
2½ cups uncooked short grain sushi rice
2½ cups water
3 inch square dashi konbu (or kombu) (dried kelp seaweed) wipe with a damp cloth to remove white powder & cut a few slits in the sides of the kelp to help release its flavors
2½ tsp quality drinking sake
Sushi vinegar dressing
5 Tbs rice vinegar
5 tsp sugar
1¼ tsp salt
DRAGON ROLLS (also called Caterpillar Rolls)
Yield: 2 inside-out (uramaki) sushi rolls
INGREDIENTS:
1 sheet 7”x8” of toasted nori
half of Japanese cucumber
2 cups of prepared sushi rice Glazed Barbecued Eel (ungai)
1 Avocado
Vinegared Water – ½ cup of water combined with a dash of rice vinegar
2 TBS Fish Roe
 SPIRAL SUSHI ROLL
INGREDIENTS:
2½ cups prepared sushi rice
2 sheets of toasted nori, each sized 7”x8”
Six assorted fillings, each filling should be the size of a pencil
NIGIRI SUSHI
Yield: 14-16 pieces of sushi
INGREDIENTS:
2 cups prepared sushi rice
8 pairs of assorted toppings, 7 ozs total of fish
1 TBS Wasabi to adhere topping to rice
2½ cups water
3 inch square dashi konbu (or kombu) (dried kelp seaweed) wipe with a damp cloth to remove white powder & cut a few slits in the sides of the kelp to help release its flavors
2½ tsp quality drinking sake
Sushi vinegar dressing
5 Tbs rice vinegar
5 tsp sugar
1¼ tsp salt
Swirl rice gently in a bowl of water, drain, repeat 3-4 times until water is nearly clear. Gently place the rice into the bowl of a rice cooker and add 2½ cups of water and the dashi konbu. Add sake to the rice. Follow the instructions on the rice cooker to activate the cooking process.
Meanwhile, prepare the rice vinegar dressing by combining the rice vinegar, sugar and salt in a small bowl. Heat on low setting and stir until the mixture goes clear and the sugar and salt have dissolved. Set aside at room temperature until the rice is cooked.
When the rice has finished cooking, turn it out into a slightly moistened large shallow flat-bottomed non-metallic (plastic, glass or wood) bowl. (Do not use metallic objects since the vinegar will react with it and produce sour and bitter sushi rice.) Use a moistened spatula to loosen gently the rice and invert the rice pot over the bowl, gently causing the cooked rice to fall into the bowl in one central heap. Do this gently so as not to cause the rice grains to become damaged. Remove the dashi konbu (kelp) from the cooked rice.
Slowly pour the cooled sushi vinegar over the spatula onto the hot rice. Using the spatula gently spread the rice into a thin, even layer using a 45° cutting action to break up any lumps and to separate the rice. Don't stir or mash rice. After the rice is spread out, start turning it over gently, in small portions, using a cutting action, allowing steam to escape, for about a minute. Continue to gently slice, lift and turn the rice occasionally, for 10 minutes or until all the vinegar dressing has been adsorbed and the rice is shiny. Cover with a damp, lint free cloth to prevent the rice from drying out while preparing your fillings and toppings.
Yield: 2 inside-out (uramaki) sushi rolls
INGREDIENTS:
1 sheet 7”x8” of toasted nori
half of Japanese cucumber
2 cups of prepared sushi rice Glazed Barbecued Eel (ungai)
1 Avocado
Vinegared Water – ½ cup of water combined with a dash of rice vinegar
2 TBS Fish Roe
DIRECTIONS:
1. Cut cucumber into strips ¼ inch x 7” long, then salt, rinse and dry the strips.
2. Broil the eel for about 2-5 minutes until bubbling. Cut into two lengthwise strips.
3. Halve, pit and peel the avocado. Cut the avocado halves into thin even 1/8 inch slices. Fan out the cut avocado into a 7 inch overlapping pattern.
4. Cover bamboo mat with plastic wrap. Place a sheet of nori shiny side down, lengthwise, on the edge the mat.
5. Moisten lightly your hands in the bowl of vinegared water.
6.Place one cup of rice on the nori and gently rake your fingertips across grains to spread rice evenly. Do not mash or squash the rice onto the nori, the rice should appear loosely packed and be evenly distributed over the entire sheet, you should be able to see the nori sheet in a few places.
7. Flip the rice-covered nori over (so the bare nori is now on top) and place on the edge of the mat closest to you.
8. Arrange one of the eel strips across the length of the nori, not quite centred on it but a little closer to you. Place half the cucumber sticks next to the eel.
9. Lift the edge of the mat closest to you with both hands, keeping your fingertips over the fillings, and roll the mat and its contents until the edge of the mat touches straight down on the nori, enclosing the fillings completely. Lift up the edge of the mat you're holding, and continue rolling the inside-out roll away from you until it's sealed. Tug at the mat to tighten the seal. If the rice doesn't quite close the roll add more rice in the gap and re-roll using the mat to completely cover the inside-out roll. Place the roll on a damp, clean smooth surface.
10. Spread about 1 tablespoon of the optional fish roe along the entire top of the rice-covered roll. Using the plastic covered mat gently press the fish roe so it adheres to the rice.
11. Slide a knife under one fan of avocado and transfer it onto the top of an inside-out roll. Gently spread out the avocado layer to cover the entire roll. Lay the plastic wrapped mat over the avocado-covered roll. Squeeze very gently to shape the roll.
12. Lay a sheet of plastic wrap over the roll. Slice the roll into 6-8 equal, bite-sized pieces, wiping your knife with a damp towel before each slice. Discard the plastic wrap. Repeat the above to make one more roll.
13. Arrange the cut pieces on a serving plate with the sauces so the finished dish appears as a dragon breathing fire and flames (or a caterpillar with many legs).
SPIRAL SUSHI ROLLYield: One Roll, cut into 8 pieces
INGREDIENTS:
2½ cups prepared sushi rice
2 sheets of toasted nori, each sized 7”x8”
Six assorted fillings, each filling should be the size of a pencil
DIRECTIONS:
1. Join 2 sheets of nori by moistening the adjacent edges and overlapping them about ½ inch.
2. Place this double sheet shiny side down on a rolling mat, part of the nori will extend beyond the mat.
3. Using moist fingers place 2½ cups of rice on the nori and gently rake your fingertips across grains to spread rice evenly, leaving ¼ inch nori showing on the both ends of the sheet. Do not mash or squash the rice onto the nori, the rice should appear loosely packed and be evenly distributed over the entire sheet, you should be able to see the nori sheet in a few places.
4. Using your fingers form six grooves (in the same direction that you will be rolling the mat) at even intervals across the bed of rice. Make the first groove about 2 inches from the edge of the nori sheet. Form the grooves by pushing the rice away, do not mash or squash the rice, leave a loose one grain layer of rice in the bottom of the grooves. Level the areas between the grooves where you have pushed the rice.
5. Place your fillings in the grooves. Fill the grooves a little higher than the surrounding rice bed.
6. Then roll the sushi up from the edge closest to you, this will form a spiral pattern of nori, rice and fillings inside the roll.
7. Slice into 8 pieces with a very sharp wet knife, wiping the blade with a damp cloth after each cut.
8. Place the pieces on a platter and garnish.
Yield: 14-16 pieces of sushi
INGREDIENTS:
2 cups prepared sushi rice
8 pairs of assorted toppings, 7 ozs total of fish
1 TBS Wasabi to adhere topping to rice
DIRECTIONS:
1. When handling sushi rice, make certain your hands are very clean. To keep the rice from sticking to our hands moisten your hands with vinegared water.
2. Form nigiri sushi by scooping up a small amount (about 2 tablespoons) of rice with your forefinger and second finger of your right hand and placing it in your cupped left palm.
3. Use the fingers and thumb of your right hand to form it into a long, narrow mound (about 2 inches x 1 inch wide) in your cupped palm.
4. Press enough to make the rice hold firmly together. Place the nigiri on a damp cutting board flat side down. Don't let sushi touch or they'll stick to each other. At this point, you can cover the sushi with plastic wrap, and they'll keep at room temperature (not the refrigerator) for several hours.
5. Smear a thin line of wasabi on top of the rice and place the topping piece on it. You may need to press the topping down lightly with your fingers and adjust the shape of the rice accordingly to form an attractive piece of nigiri sushi.
4 comments:
sometimes the Daring Kitchen will put out a challenge that makes me regret leaving the group and this is one of those challenges. t all looks so good and the rice recipe looks like a good one.
So jealous - it's been far too long since we've made sushi... Looks D-lish!
I love making sushi! I need a friend with good julienning skills, though - as usual, yours looks lovely.
Mine often looks lumpy but tastes good. ;-)
Shayne, it's never too late to come back! The rice turned out exceptionally tasty. I'd really recommended trying it!
Jeremy, I remember your penchant for sushi. shucks! I shoulda saved you some.
Jen, thank you! Every kitchen needs a friend with exceptional julienning skills. Maybe sometimes, though, that comes in the form of a mandoline ;-)
Post a Comment