custom cakes/cookies

Sunday, January 30, 2011

Matcha-Hazelnut Sponge with Lemon Curd & Matcha Marzipan Flowers

The January 2011 Daring Bakers’ challenge was hosted by Astheroshe of the blog accro. She chose to challenge everyone to make a Biscuit Joconde Imprime to wrap around an Entremets dessert.

A joconde imprime (French Baking term) is a decorative design baked into a light sponge cake providing an elegant finish to desserts/torts/entremets/ formed in ring molds. A joconde batter is used because it bakes into a moist, flexible cake. The cake batter can be tinted or marbleized for a further decorative effect.

Entremets (another French baking term) is an ornate dessert with many different layers of cake and pastry creams in a mold, usually served cold, much like a trifle but molded to be free-standing versus layered in a glass bowl.

All seems intimidating, but if you work through the layers in stages, it's really not that big of deal. I sketched out a plan in advance. The idea for mine started with wanting to use up some "leftovers" in my "pastry" fridge. Believe it or not I had on hand fresh lemon curd (recently made to use up 8 extra yolks), homemade marzipan (a gift I was working on for my dad), matcha tea (from my good friends at Arbor Teas), hazelnut meal (a bag that seems perpetually full no matter how much has been scooped from it), and crystalized lilacs (maybe only a dozen left from the original batch of 200).

I wasn't sure if the flavors of the dessert I was crafting in my head would meld well, but I was excited for the vibrant colors--a bolt of the tropics smack in the middle of a snowy and frigid winter. Since this dessert needed to travel to a weekend brunch, I took the safe route and layered them in juice glasses like a trifle. A true entremet with joconde is free-standing. Nonetheless, now having tasted the finished dessert, I can say yes, green tea, lemon, hazelnut, almond, butter and sugar all seem to work nicely together to put a warm smile in your belly.

Joconde Sponge

This Joconde/spongecake requires attentive baking so that it remains flexible to easily conform to the molds. If under baked it will stick to the baking mat. It over baked it will dry out and crack. Once cooled, the sponge may be cut into strips to line any shape ring mold.

YIELD: Two ½ size sheet pans or a 13” x 18” jelly roll pan

Ingredients:
3 large egg whites (90g)
2½ teaspoons (10g) white granulated sugar
¾ cup (85g) almond flour/or hazelnut meal - *omit the butter if using hazelnut
½ cup plus 2 tablespoons (75g) confectioners' sugar
¼ cup (25g) cake flour
3 large eggs (150g)
2 tablespoons (30g) unsalted butter, melted

Directions:

In a clean mixing bowl whip the egg whites and white granulated sugar to firm, glossy peeks. Reserve in a separate clean bowl to use later.

Sift almond flour, confectioner’s sugar, cake flour into the just emptied mixing bowl, no need to wash out egg whites.) On medium speed with the paddle attachment, add the eggs a little at a time. Mix well after each addition. Mix until smooth and light.

Fold in one third reserved whipped egg whites to almond mixture to lighten the batter. Fold in remaining whipped egg whites. Do not over mix. Fold in melted butter, if using.

Reserve batter to be used later.

Patterned Joconde-Décor Paste

YIELD: Two ½ size sheet pans or a 13” x 18” jelly roll pan

Ingredients:
14 tablespoons (200g) unsalted butter, softened
1½ cups plus 1½ tablespoons (200g) Confectioners' sugar
7 large egg whites (200g)
1¾ cup (220g) cake flour

Food coloring gel, paste or liquid (optional)

COCOA or MATCHA Décor Paste Variation: Reduce cake flour to (170g). Add (60 g) cocoa powder or Matcha green tea. Sift the flour and cocoa powder together before adding to creamed mixture.

Directions:

Cream butter and sugar until light and fluffy. Gradually add egg whites. Beat continuously until emulsified. Fold in sifted flour. Tint batter with coloring to desired color, if not making cocoa or matcha variation.

Preparing the Joconde- How to make the pattern:

Spread a thin even layer of décor paste approximately 1/4 inch thick onto silicone baking mat with a spatula, or flat knife. Place mat on an upside down baking sheet. The upside down sheet makes spreading easier with no lip from the pan.

Pattern the décor paste – Here is where you can be creative. Make horizontal /vertical lines (you can use a knife, spatula, cake/pastry comb). Squiggles with your fingers, zig zags, wood grains. Be creative whatever you have at home to make a design can be used. OR use a piping bag. Pipe letters, or polka dots, or a piped design. If you do not have a piping bag. Fill a ziplock bag and snip off corner for a homemade version of one.

Slide the baking sheet with paste into the freezer. Freeze hard. Approx 15 minutes.


Remove from freezer. Quickly pour the Joconde batter over the design. Spread evenly to completely cover the pattern of the Décor paste.

Bake at 475ºF until the joconde bounces back when slightly pressed, approx. 8-15 minutes. You can bake it as is on the upside down pan. This is a very quick bake, so watch carefully.

Cool briefly. Do not leave too long, or you will have difficulty removing it from mat.

Flip cooled cake on to a powdered sugared parchment paper. Remove silpat. Cake should be right side up, and pattern showing! (The powdered sugar helps the cake from sticking when cutting.)

Preparing the Jaconde for Molding:

Trim the cake of any dark crispy edges. You should have a nice rectangle shape.

Decide how thick you want your “Joconde wrapper”. Traditionally, it is ½ the height of your mold. This is done so more layers of the plated dessert can be shown. However, you can make it the full height.

Once your height is measured, then you can cut the cake into equal strips, of height and length. (Use a very sharp paring knife and ruler.)

Make sure your strips are cut cleanly and ends are cut perfectly straight. Press the cake strips inside of the mold, decorative side facing out. Once wrapped inside the mold, overlap your ends slightly. You want your Joconde to fit very tightly pressed up to the sides of the mold. Then gently push and press the ends to meet together to make a seamless cake. The cake is very flexible so you can push it into place. You can use more than one piece to “wrap" your mold, if one cut piece is not long enough.

The mold is done, and ready to fill.

Entremet- Filling:

Lemon Curd
makes 1 full cup

4 large egg yolks
1/2 cup plus 2 TBS sugar
3 fl oz freshly squeezed lemon juice
4 TBS, unsalted butter softened
pinch of salt
2 tsp finely shredded lemon zest

In a heavy, non-corrosive saucepan whisk the yolks and sugar until well blended. Stir in the remaining ingredients except the lemon zest. Cook over medium-low heat, stirring constantly, until thickened and thickly coats the back of a wooden spoon and reaches 170 F. Do not allow it to boil or it will curdle. Pour immediately through a fine mesh strainer, pressing on any remains with the back of a spoon to extract as much curd as possible. Stir in the lemon zest and cool. Pour into an airtight container and press a piece of plastic to the surface of the curd before sealing. The curd will continue to thicken when refrigerated.

Matcha Marzipan

1 tsp matcha powder
6 TBS marzipan

On a wooden surface, knead matcha into Marzipan until completely incorporated. Roll out to desired thickness to cut shapes or sculpt into character. Keep tightly wrapped in plastic until ready to use, to prevent drying out.

Friday, January 21, 2011

Cultured Tea Butter and Buttermilk

I often contribute recipes to the blog of my friends' tea company, Arbor Teas. Here is the latest recipe I developed using a few of their teas.

2010 seemed to be the year of DIY in the food world, and I have no doubt that 2011 will continue to be the same. If the reasons are not for putting up (canning, curing, dehydrating, etc.) to preserve the abundance of harvest for leaner times like our great grandparents used to or not meant to ease reliance on commercially-packaged, convenience foods, then it's to satiate the curiosity of how basic foodstuffs are produced and to relish in the pure satisfaction that you can DO IT YOURSELF.

Remember taking turns to shake that jar of cream in kindergarten until it thickened and yielded a soft, spreadable butter? Patience-inducing yet awe-inspiring to a 5-year old. Making cultured butter from scratch is just one step up from that sort of classroom demo magic. And using a modern stand mixer makes it an easily approachable task if your kitchen amenities are sans old-fashioned butter churn and butter bats. Furthermore, fresh, liquid cream presents a blank canvas on which you can layer a custom flavor profile at the very foundation, before churning. You can add cultures for tangy-ness as well as ingredients, like tea, that steep best in liquid without altering the final texture. Compound butters, a different approach to flavored butter where herbs, aromatics, syrups or fruit pastes are mashed into solid butter, while good in there own right, offer only the opportunity for flavor afterthoughts, post-churning.

So in the spirit of DIY, I present you below with directions for culturing butter and flavoring it using
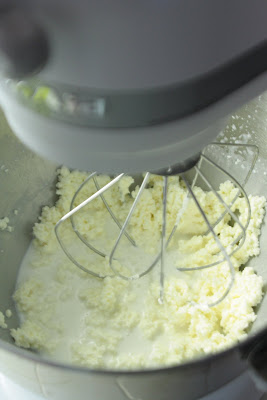
 Arbor Teas' oraganic, loose-leaf tea. Cultured tea butter should not be confused with Tibetan butter tea, a yak milk-derived, fortifying hot beverage for the iron-stomached. This is a wholly different dining experience. I chose two very different Arbor Teas to make two unique flavors. The first was organic genmaicha green tea, which is composed of Japanese green tea leaves mixed with toasted brown rice kernels. This tea flavor brings to mind popcorn, and thus lightly salted butter flavored with genmaicha lends itself to savory applications: smeared on crusty bread or slathered on roasted vegetables. The second was organic masala chai tea. Redolent with warm spice and delicately sweetened (post-churn) with honey, this makes a welcome addition to a breakfast table spread or to afternoon tea fare.

As a premium for churning your own butter, you will also produce a good amount of deliciously drinkable, tea-flavored buttermilk. I used the excess to make the tiny corn biscuits pictured above. They were a perfect vehicle to deliver taste tests of homemade tea butter (either sweet or savory) to friends. A note of caution, though, before proceeding: you may start consuming more butter than you ever thought necessary. It's that good!

Cultured Tea Butter and Buttermilk
makes about a ½-pound of butter and about 1 cup buttermilk

2 TBS organic loose tea leaves
2 cups heavy cream (the best quality you can find: highest butterfat, least pasteurized)
2 heaping TBS plain whole-milk yogurt, crème fraîche or buttermilk (be sure these do not contain any additive gums or stabilizers)

ice

⅛ - ¼ tsp flaky sea salt
1 TBS (or more to taste) honey (optional)

Make a tea sachet by packing the loose tea leaves in a tea sac or other type of disposable filter and tying securely with kitchen twine. Place the tea sachet in a clean glass mason jar. Pour the heavy cream and yogurt over the tea. Stir to combine. Cover loosely and place it in a warmish part of the house - the ideal temperature is around 75° F, but anywhere in the range from 70-80° F will work.

After 12-18 hours, the cream should be noticeably thicker and should taste slightly tangy. If it hasn't thickened yet, leave it alone for another few hours and eventually it will. When your cream has thickened, remove the tea sachet and scrape off any thickened cream that may adhere to the filter, adding this back to the cream. If you are not ready to make your butter right away, transfer the container to the fridge where you can leave it for up to another 24 hours.

When ready to churn the cream, remove it from the fridge and allow it to stand at room temperature until it reaches about 60° F. If you're making it from room temperature you'll need to place the bowl in a bath of ice water for a few minutes to cool it down.

Fill another large bowl with water and ice cubes and set this aside.

Pour the cream into the bowl of a stand mixer and beat at high speed using the whisk attachment. A hand-held electric beater or even whisking vigorously by hand will also work. When the cream starts to form stiff peaks (see picture below at left), reduce the speed to low. Watch carefully, first the peaks will start to look grainy, and a few seconds later the cream will break. When it does, clumps of pale yellow butterfat will form leaving a pool of buttermilk in the bowl (see picture below at right). Stop beating. Carefully strain the bowl over a cup to drain away as much buttermilk as possible. Reserve the buttermilk for another use.


Next the butter must be washed with ice water to remove any residual buttermilk, which could cause the butter to spoil prematurely. If using a stand mixer, switch the whisk attachment for the dough hook. If you don't have a stand mixer, a fork or a stiff rubber spatula will do. Pour some of the reserved ice water over the butter, kneading it vigorously. The water will turn cloudy and the butter will seize up, making it cohere and knead more easily (see before and after pictures below). Pour out the liquid and repeat as many times as needed (about 3-4 times) until the rinse water in the bowl is completely clear. After the last of the rinse water has been poured off, continue kneading for a few more minutes to get as much water as possible out of the butter. Pour off any residual liquid. Add the salt (and honey, if using) now and continue to knead until completely incorporated.


Pack the cultured tea butter into ramekins or shallow jelly jars, roll it in parchment paper, or use it to fill shaped molds before covering tightly and refrigerating. Place in the freezer for longer term storage.

Monday, January 17, 2011

Using up the Last of the T-giving Turkey in a Faux Cassoulet

Well, almost two months later, I finally did it. I finished my turkey leftovers from Thanksgiving. Yes, that took awhile! I had proudly cooked a large (15.7-pound) bird for a small group. Guests were sent home with leftovers and a stock was made and some was repurposed into meals the days following the big dinner and still plenty was left to freeze! Now that it's gone, it's safe to assume that I'm not gonna want to eat turkey again anytime soon. Not gonna want to eat any meat for awhile, actually. I'm ready for a post-holiday cleanse...


And when I finish the last of the multitude of winter squash and potatoes still left from my CSA, I'll probably want a cleanse from orange or starchy vegetables, too...


Just as I was deciding this, the Daring Kitchen challenged me to make a confit to use for a classic preparation of a traditional French cassoulet. Do you know what that means? Typically confit refers to meat that is seasoned and slowly cooked submerged in its own rendered fat. An interesting food preservation technique that I do want to learn, but, um, not very cleansing.

I took the veg option, which meant cooking vegetables with a good glug of olive oil before adding in the stock and other various ingredients to make it a stew of sorts. And then I deleted its vegetarian label by stirring in the last of the shredded turkey. The finishing accent was a crumble of garlicky toasted breadcrumbs. It's a fine cold-weather soup and a practical solution for turkey excess. Maybe after a few months of virtuous eating have passed, I'll be ready to approach the confit...

Turkey and Veg Cassoulet
adapted from Vegetarian Cassoulet by Gourmet Magazine, March 2008
serves 10-12


Ingredients:
3 medium leeks (white and pale green parts only)
¾ lbs carrots, halved lengthwise and roughly diced
1½ lb butternut squash, peeled, seeded and roughly diced
4 garlic cloves, chopped
¼ cup olive oil
4 thyme sprigs
2 oregano sprigs
1 bay leaf
⅛ tsp ground cloves
½ tsp salt
½ tsp fresh group pepper
4 cups cooked snow cap beans, reserve about a half cup to mash to thicken the soup, reserve the pot liquor (cooking liquid)
28-oz can fire-roasted tomatoes, roughly chopped, reserve juices
about 2 cups shredded, cooked turkey
1 qt turkey stock
1 bunch kale, center ribs removed and roughly chopped

Bread Crumb Topping
4 cups coarse fresh bread crumbs from a baguette
⅓ cup olive oil
1 tablespoon chopped garlic
1 TBS chopped parsley
¼ tsp salt
¼ tsp freshly ground pepper

Directions:
1. Halve leeks lengthwise and cut crosswise into ½-inch pieces, then wash well by swirling in a deep bowl of cold water. Allow the dirt to fall to the bottom of the bowl. Skim off clean leeks from the water surface being careful not to disturb the silt that collected at the bottom of the bowl.
2. Cook leeks, carrots, butternut squash, and garlic in oil with herb sprigs, bay leaf, cloves, salt and pepper in a large heavy pot over medium heat, stirring occasionally, until softened, about 15 minutes. Stir in beans (both whole and mashed) and its pot liquor, tomatoes and their juices, shredded turkey and stock. Stir in the kale. Simmer, partially covered, stirring occasionally, until kale is wilted and carrots are tender but not falling apart, about 30 minutes.
3. Preheat oven to 350°F with rack in middle.
4. Toss bread crumbs with oil, garlic, parsley, salt and pepper in a bowl until well coated.
5. Spread in a baking pan and toast in oven, stirring once halfway through, until crisp and golden, 12 to 15 minutes.
6. Cool crumbs in pan.
7. Discard herb sprigs and bay leaf.
8. Season with salt and pepper. Just before serving, sprinkle with garlic crumbs.


Our January 2011 Challenge comes from Jenni of The Gingered Whisk and Lisa from Parsley, Sage, Desserts and Line Drives. They have challenged the Daring Cooks to learn how to make a confit and use it within the traditional French dish of Cassoulet. They have chosen a traditional recipe from Anthony Bourdain and Michael Ruhlman.