custom cakes/cookies

Showing posts with label jam. Show all posts

Thursday, February 23, 2012

Honeybush Tea Jelly

I sometimes contribute recipes to the blog of my friends' tea company, Arbor Teas. Recently, they were featured in the February edition of MetroParent Magazine. (Click through to see a picture of Jeremy, Aubrey, Arthur and Penelope.) Here is a kid-friendly recipe I created using one of their teas.

This one’s for the kids!

One of my favorite naturally non-caffeinated Arbor Teas is their organic Honeybush. Steeping the leaves, stems, and flowers of this plant indigenous to South Africa yields a sweet, light and woody infusion. It is enjoyable both hot and iced, and makes quite a pleasant transition beverage when you are ready to stop drinking caffeine for the day. Here honeybush is used to flavor a jelly. Its woody sweetness balances the tartness of the homemade apple pectin used to thicken the jelly. Really any loose leaf tea could be substituted in this recipe, but I chose honeybush for the kids! Honeybush tea jelly makes fantastic PB&J sandwiches. I’ve also combined the jelly with nuts and spices and stuffed the mixture into apple dumplings. Its sweet tart flavor is fairly versatile and broadly appealing to all sorts.


Honeybush Tea Jelly


6 tablespoons loose tea leaves
2¼ cups boiling water
3 cups green apple pectin stock (see recipe below)
¼ cups fresh lemon juice
3¼ cups sugar

Steep the tea leaves in the boiling water for 5 minutes, then pour through a fine-mesh sieve into a 6-8 quart pan. Add the pectin stock, lemon juice, and sugar to the pan. Bring to a boil over high heat and cook for 25-30 minutes, stirring occasionally to prevent scorching, until the jelly registers 220 °F on a candy thermometer.

Ladle the jelly into sterilized canning jars and process for storage using whichever method you prefer best.


Green Apple Pectin Stock

3 pounds green apples (I used early transparent, one of the first apple varieties available at my farmer’s market in early fall. More readily, commercially available Granny Smith will work as well.)

Cut the apples into 8 sections. Discard the stems only. Peels, core, seeds and remaining fruit all contain valuable pectin. Place the apple sections in a 6-8 quart pan. Add 6 cups of water. Cover the pan and bring to a boil over high heat. Boil until the apples have broken down and the peels separate from the pulp. This should take 30-40 minutes. Stir occasionally to prevent apples at the bottom of the pot from scorching.

Set a large mesh sieve over a deep bowl. Pour the cooked apples and juice into the sieve and let drain for at least half an hour, until you have about 5½ cups juice. Stir occasionally, to dislodge the pulp at the bottom of the sieve and allow proper draining, but do not press down too hard so as to push the pulp through the sieve.

Once strained, the pulp can be passed though a food mill to remove seeds and skins. This yields a very tart applesauce that can be eaten straight out of hand (sweetened and spiced at will) or incorporated into another recipe.

Bring the 5½ cups juice to a boil over high heat and cook until reduced to about 3 cups. This should take about 20 minutes. Refrigerate pectin stock, up to 2 weeks, until ready to use, or freeze for several months.

Holiday Spice Black Tea Red Pepper Relish

I sometimes contribute recipes to the blog of my friends' tea company, Arbor Teas. Here is a recipe I created over the winter holiday using one of their special seasonal teas.

Over the final few weeks of my CSA share last year, I built quite a collection of red peppers. Both hot varieties (Krimzon Lee, Serrano, Jalapeno, Shishito) and sweet bells (Apple Pimento, Carmen, Red Knight Bell) were filling up the crisper until enough accumulated to make this relish. Sweet with piquant heat and spiced just so with orange, cinnamon, and clove using Arbor Teas Organic Holiday Spice Black Tea, this ruby-toned relish makes a useful condiment to have on hand to dress up holiday meals or to gift away to friends this season. Use it to top cheese and crackers for a quick snack, mix with ketchup for a fancy chili dipping sauce, or dollop over your take-out ramen bowl to add a festive touch.


Holiday-Spice Red Pepper Relish
Makes 1½ pints

About 2 ½ pounds mixed types of red peppers (sweet and/or hot varieties)
1 tablespoon kosher salt
2 cups white vinegar
3 tablespoons Organic Holiday Spice Black Tea
3 cups sugar


Directions:

Pulse red peppers in a food processor to finely chop. This should yield about 4 cups. Combine chopped peppers and salt in a large bowl. Set aside for 2 to 3 hours, until a considerable amount of liquid is drawn out of the peppers. Meanwhile combine the vinegar and the tea in a separate bowl and set aside at room temperature to steep for the duration of salting the peppers.

Place the peppers in a sieve to strain, pressing with the back of a spatula to squeeze out as much liquid as possible. Transfer the peppers to a wide, 6-quart, heavy-bottomed pan and add the sugar. Place the sieve over the pan (to catch the loose tea) and pour in the steeped vinegar. Bring to a boil over high heat, stirring frequently. Cook until the pepper is translucent and the syrup is somewhat thick. Jelly-like consistency is achieved at 220° F. This may take 25-35 minutes of stirring. Temperatures higher than 220° F will yield a more resinous-like relish that will be difficult to spread, so be attentive to the thermometer throughout the boiling.

Ladle hot relish into clean jars and process for canning or store in the refrigerator for use within the next few months.

Wednesday, November 10, 2010

"Mornin' Mash is the Truth!"


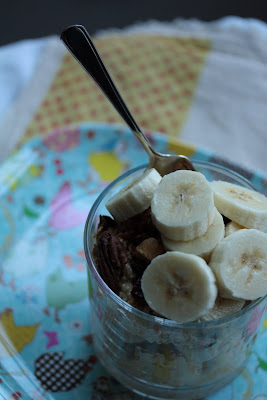
Those words were chatted to me enthusiastically after sharing my new go-to breakfast with my workplace BFF. He was referring to what most of Europe (and beyond) might call Bircher Müesli: a "mash up" of raw oats and raisins softened and plumped by a long soak in citrus juices and/or yogurt (or some other type of dairy), then embellished with endless combinations of fruits, nuts, and natural sweeteners. Absolutely refreshing and perfectly filling (in an appetite-curbing, good way), this is first-meal-of-the-day virtue at its humblest. It resembles a sort of cold oatmeal or soft, chewy granola, but with way, WAY better texture and flavor! I like to mix in mashed banana or homemade jam or applesauce to give it a bit of sweetness. I added mashed pawpaw fruit when that was in season! Pumpkin butter or apple butter or my pear butter would be a nice seasonal choice also. A jar of homemade granola always sits on my kitchen counter, so I sprinkle on a bit of that too for added crunch. If you don't eat breakfast in the car while driving to work like I do each morning, a drizzle of honey would be an excellent touch. I should also mention this is a great make ahead deal that with minimal advanced prep work should see you through a week's worth of breakfasts, helping you get out the door just a wee bit faster. Varying your toppings should keep you from getting bored.

I was introduced to Bircher Müesli several years ago at a hotel breakfast bar in Sydney and was happy to find it again when I traveled this summer to Hamburg and Oslo. European hotels' complimentary breakfasts (even the budget-friendly ones) knock the socks off of what's considered a "continental breakfast" in the States. Across the pond you will find generous spreads with much more healthy, non-processed options. Since returning home, I found a recipe in my Gourmet Magazine cookbook that I've been tweaking here and there and was eager to post my variations. Then David Lebovitz beat me to the punch with a post on Bircher Müesli last week! With that, I almost wasn't going to post my recipe, but then I thought twice. Perhaps ::shudder:: you don't know of his blog or have never heard of this recipe or of Maximilian Bircher-Benner, the Swiss equivalent of the Michigan health-enthusiast/inventor of corn flakes, John Harvey Kellogg. Everyone deserves a little morning goodness. I'm happy to do my part!


Bircher Müesli
makes 16 cups; serves 8-10

1 lemon
1 juicing orange
1 grapefruit
1½ cups steel cut oats (Irish oats)
3 cups old fashioned rolled oats
⅔ cup raisins
1 quart whole milk, plain yogurt

Toppings and Mix-ins:
sliced or mashed banana
granola
coarsely grated apples
toasted nuts
fresh berries
honey
etc...

Finely grate zest from lemon and orange. Squeeze juice from all of the fruits to obtain about 1½ - 2 cups of citrus juice. Combine the zest, juice, oats, raisins, and yogurt in a large re-sealable container. Stir until thoroughly mixed. Refrigerate covered for at least eight hours to allow the oats to soften.

When hungry, portion out servings into individual bowls and top as desired.

Bircher Müesli will keep for about a week, covered tightly and refrigerated.


Tuesday, September 14, 2010

Million Dollar Butter


Late last summer, I started what I think just may become a tradition. Or ritual? Or right of season's passage? Well, maybe...

I made pear butter.

There's an unkempt pear tree in the field behind my home. The first year I noticed it, I picked so many, climbing first a tall ladder and then higher, straight up the branches. I picked and picked and then fretted each day after. "Are they ripe yet?" Pears ripen best off the tree. The technical term is climacteric. Like waiting for bananas to ripen, this may not seem like a big deal to let your harvest ripen here and there at a snail's pace, especially if you're just consuming out of hand as a snack. If your intention is to can them at peak flavor, though, the trick is to get the bulk to ripen simultaneously, and preferably on a not-so-busy weekend. That wasn't the case my first time around...

The reality for pears: the zenith of perfect ripeness seems to last an all too brief second before rot sets in. The reality of this recipe I'm sharing below: possibly every pot and pan in your kitchen will be used and a vigilant eye and stir-happy hand is required to monitor simmering for a couple of hours.

For the fretting over ripeness, for making this recipe the same day as hosting a largish dinner party, for stemming and quartering a way too ambitious quantity of fruit, for the passing through a food mill, not once, but twice to ensure proper consistency, for the stirring and simmering for hours in a hot kitchen, for the precious pear butter-full half-pint jar that broke irreparably in the hot water bath when being processed for storage and thus had to be thrown out, is why I've started charging $$$$/jar. No other jam has caused me this much hassle....or been received so well by friends!

Nah, I don't really charge. Like most everything else I make in my kitchen, I freely give it away, but I am sure to let its recipients know how much its worth in labor. Thankfully, they're quick to let me know that value I'm estimating matches in flavor.

Hopefully this doesn't deter you from trying to make it yourself. I bet you can find ways to make it less labor intensive! This year's batch went a little smoother, and I've got next year to look forward to further streamlining my technique.


Spiced Pear Butter
make 1½ quarts

6 lbs barlett pears, rinsed, stemmed and quartered, if you plan to use a food mill, don't bother to peel or core
¾ cup pear brandy
the juice of one lemon
1 cup turbinado sugar
6 orange slices
2 lemon slices
2 vanilla beans, split length wise, seed scraped
2 cinnamon sticks
9 cardamom pods
6 whole cloves
2 pinches of sea salt

Combine the pears, brandy, and lemon juice in a large preserve pan. Cover and simmer until the pears are soft, about 25 minutes. Lift the lid to occasionally give the pears a stir and push unsubmerged pears into the liquid. When soft, pass the pears through the coarsest setting of your food mill or coarse sieve to remove the peel. Then pass through the finest setting of the mill or transfer to a food processor to puree.

Return the puree to a large, heavy saucepan. Add remaining ingredients. Stir over low heat until the sugar dissolves. Increase the heat to medium and boil ever so gently until the mixture thickens and mounds slightly on the spoon. This could take 1 to 1½ hours depending on the juiciness of the pears. Stir often to prevent burning the bottom.

Discard fruit slices and spices. Ladle pear butter into hot canning jars, filling only ¼ inch from the top. Using a cloth dipped in hot water, wipe the rim free of drips. Place lids on jars and seal.

Arrange the jars in a pot of boiling water so that at least one inch of water covers the tops. Boil rapidly for 15 minutes. Remove the jars and cool to room temperature. Press the center of each lid. If any lids pop up, store these in the refrigerator. Sealed jars will keep at room temperature for up to one year. Refrigerate after opening.

The September 2010 Daring Cooks’ challenge was hosted by John of Eat4Fun. John chose to challenge The Daring Cooks to learn about food preservation, mainly in the form of canning and freezing. He challenged everyone to make a recipe and preserve it. John’s source for food preservation information was from The National Center for Home Food Preservation.

Saturday, July 17, 2010

Fruit Curd Popsicles


Recently, I sensed a trend in the artisanal popsicle. Recipes and photo spreads are "pop"ping up in food magazines and blog posts, and a variety of molds are out on the market boasting nostalgia, fun shapes, or no-mess features. Also, there's these people of whom I'm completely in awe.


You don't need me to tell you that it's been a pretty hot summer and that the trend of DIY endures. I so entirely relate and was ready to jump on that bandwagon. My first vision of frozen relief: multiple, vibrant stripes of fruit curd. Tart, refreshing, and a gorgeous gradation of color. That's the concept I was after.


Making interesting fruit curds strongly rivals my interest in jam making. Freezing them in popsicle format just seemed like a logical next step. The flavors of this batch, layered from top to bottom/ lightest to darkest, include: lemon-buttermilk sherbet, gooseberry curd, raspberry curd, and black currant curd. See below for the recipes.


Not ready to invest in popsicle molds? Try the tricks outlined here.

And for fun, read the brief history of the popsicle. Learn how they got their name...


THE RECIPES:

Lemon Buttermilk Sherbet

from David Lebovitz's "The Perfect Scoop"

makes about a quart

⅓ cup water water
⅔ cup sugar
Zest of 1 lemon
2 cups buttermilk
¼ cup lemon juice

In a saucepan, bring the first three ingredients to a boil. Remove from heat, transfer to a bowl and refrigerate until thoroughly chilled. Once it has chilled, add the buttermilk and lemon juice and churn in your ice cream machine.


Gooseberry Curd
makes about 2 cups

1 pint pink gooseberries, rinsed
2 TBS water
½ cup sugar
2 TBS unsalted butter
2 large eggs
1 large egg yolk

Place the gooseberries and the water in a non-corroding saucepan. Cover and cook on a low-medium heat, stirring occasionally for 20 minutes or until the gooseberries are mushy. Pass the gooseberries through a food mill to produce about 1¼ cups puree. Stir the sugar and butter into the warm puree and heat, stirring constantly. Whisk the eggs and the egg yolk just until mixed, then whisk in a little of the hot gooseberry mixture to heat the eggs. Return to the pan and cook over low heat, stirring constantly, until the mixture is well thickened and has reached 170° F. Pour into a container, cover and chill.*


Raspberry Curd
from Tea and Cookies

makes about 3½ cups

12-oz fresh raspberries

1 cup sugar
4 large eggs

4 TBS fresh lemon juice

4 TBS unsalted butter (½ stick)

¼ tsp salt


In a medium saucepan, add the raspberries, sugar, lemon juice, butter, and salt. Heat on medium and, as the butter begins to melt and the raspberries break down, start whisking. Cook on medium heat until the mixture is uniform and the fruit has softened.

In a separate bowl, whisk the eggs. Stirring continually, slowly add ½ cup of the fruit mixture to the eggs. Mix to incorporate.

While whisking continually, slowly add the eggs back into the raspberry mixture. Stir constantly as the mixture heats and thickens slightly. Don’t let the mixture come to a boil, but small bubbles around the edges are okay.

Taste and add more sugar if desired.

Place a mesh strainer over a large bowl. Pour half the raspberry mixture into the strainer and, using a spatula or spoon, press the solids into the mesh. When all the raspberry curd has been expressed, discard the solids and strain the second half of the mixture.
Refrigerate the curd until use.*


Black Currant Curd
makes about 2 cups

1 pint black currants, rinsed
2 TBS water
½ cup sugar
2 TBS unsalted butter
2 large eggs
1 large egg yolk

Place the black currants and the water in a non-corroding saucepan. Cover and cook on a low-medium heat, stirring occasionally for 20 minutes or until the currants are mushy. Pass the currants through a food mill to produce about 1¼ cups puree. Stir the sugar and butter into the warm puree and heat, stirring constantly. Whisk the eggs and the egg yolk just until mixed, then whisk in a little of the hot currant mixture to heat the eggs. Return to the pan and cook over low heat, stirring constantly, until the mixture is well thickened and has reached 170° F. Pour into a container, cover and chill.*


*Curds can be stored about a week in the refrigerator, frozen for several months, or canned,
processing in
a hot water bath for about 15 minutes.

Saturday, March 27, 2010

Orange Tian, Nostalgia

It may take a good long meandering to get where you're going, but there are some things in life that are fairly, intrinsically evident from the very beginning. Let me explain...

When I was a kid, growing up in Florida, our yard was pretty fantastically prolific with a lemon tree, 2 grapefruit trees (one pink and one white), 3 orange trees (of various types), 2 tangerine trees, and an avocado tree. Playing outside meant climbing the trees and picking the fruit to snack on at whim. When the little neighbor boys came over, my sister and I would set up "house" under the branches of a particular orange tree. Interestingly, now that I think back on our pretend roles, I was never the "wife" or the "mother" or the "child". Instead, I was the "cook". (That's me in the picture below.) And, oh boy, (with all that citrus at my little finger tips) did I come up with some creative "meals"! The thing I remember making the most, my specialty if you will, was tangerine pie.

The recipe was simple really: take one frisbee, fill with dirt, then level off the surface; next peel several tangerines, separating the segments and arrange each segment with care atop the dirt; serve immediately to hungry playmates. Every time I made it, I would arrange the tangerine pieces in a different pattern. I bet in one play session alone I must have consumed 4-5 tangerines on my own, clinging dirt included. Tangerines tasted so much better back then... Although, I'm doubting the extra "minerals" had anything to do with their incredibly sweet juiciness.

When this month's baking challenge popped on my horizon, I was instantly taken back to my days of tangerine pie making. We were challenged to make an orange tian. The dessert is made of different layers: a pâte sablée (a shortbread crust) with orange marmalade, a flavored whipped cream topped with fresh orange segments, and served with a caramel and orange sauce.

You build the dessert upside down and then unmold it so that the bottom layer (the orange segments) becomes the top layer. Admittedly, the tian is much fancier of an approach than my frisbee method, but the fanned-out orange segments look so amusingly similar. As a tribute to my childhood, I substituted a chocolate pâte sablée crust to approximate the dirt layer, and I posed the finished tian in a frisbee I borrowed from a friend. Doesn't quite taste the same as I remember when I was a kid, but that's alright by me. This "new" method has a grown-up appeal all its own.

The 2010 March Daring Baker’s challenge was hosted by Jennifer of Chocolate Shavings. She chose Orange Tian as the challenge for this month, a dessert based on a recipe from Alain Ducasse’s Cooking School in Paris.


ORANGE TIAN RECIPE

Chocolate Pâte Sablée

2 medium-sized egg yolks at room temperature
6 TBS + 1 tsp granulated sugar
½ teaspoon vanilla extract
7 TBS unsalted butter, cubed and frozen
⅓ teaspoon salt
1¼ cups all-purpose flour
¼ cup + 2 TBS cocoa powder
1 tsp baking powder

Put the flour, cocoa powder, baking powder, ice cold cubed butter and salt in a food processor fitted with a steel blade. Pulse briefly to combine.
In a separate bowl, add the eggs yolks, vanilla extract and sugar and beat with a whisk until the mixture is pale. Pour the egg mixture in the food processor.
Process until the dough just comes together. If you find that the dough is still a little too crumbly to come together, add a couple drops of water and process again to form a homogenous ball of dough. Form into a disc, cover with plastic wrap and leave to rest in the fridge for 30 minutes.

Preheat your oven to 350° F. Roll out the dough onto a lightly floured surface until you obtain a ¼-inch thick circle. Using your cookie cutter, cut out circles of dough and place on a parchment (or silicone) lined baking sheet. Bake for 20 minutes.

Citrus Melange Marmalade
makes 1½ pints

Juice and flesh from 2 oranges

10 thinly sliced kumquats (discard ends)

Juice and flesh from 1 large grapefruit

Juice and flesh from 2 Meyer lemons

2¾ cups sugar

½ cup water

Remove rind from all fruit with a vegetable peeler. (Set aside small piece of rind from all fruits to add in later)
 Remove all of the white pith from the fruit. If left on this will make your marmalade very bitter! 
Very thinly slice reserved rind into matchsticks.
 Supreme the oranges, gratefruit and lemons and add all ingredients including juice to a non-reactive saucepan.
 Bring to a boil and simmer until mixture begins to thicken about 45 minutes.
 Once mixture has become thick and reduced, registering 221° F on a candy thermometer, transfer to jars and process in a hot water bath canner.

Orange Segments

Supreme about 8 oranges into segments over a shallow bowl, collecting the juice as you slice. Add the segments to the bowl with the juice. For a variegated effect, I used both cara cara (a pinkish, navel orange) and regular navel oranges.

Orange Caramel Sauce

1 cup granulated sugar
1½ cups + 2 TBS fresh-squeezed orange juice

Place the sugar in a wide pan on medium heat and begin to heat it. The sugar will start to melt and turn a caramel color. Holding the handle of the pan, gently swirl the pan occasionally to evenly distribute the heat. Do not stir with a utensil. The sugar will begin to turn a caramel color and smell like cotton candy.

Once the sugar starts to bubble and foam, slowly add the orange juice. As soon as the mixture starts boiling, remove from the heat and pour half of the mixture over the orange segments.

Reserve the other half of the caramel mixture in a small bowl — you will use this later to spoon over the finished dessert. When the dessert is assembled and setting in the freezer, heat the kept caramel sauce in a small saucepan over low heat until it thickens and just coats the back of a spoon (~10 minutes). You can then spoon it over the orange tians.

Stabilized Whipped Cream

3 TBS hot water
1 tsp gelatine
1 cup heavy whipping cream
1 TBS confectioner's sugar
1 TBS marmalade (see recipe above)

In a small bowl, sprinkle the gelatine over the surface of the hot water, wait one minute and then stir well until the gelatine dissolves. Let the gelatine cool to room temperature while you make the whipped cream. Combine the cream in a chilled mixing bowl. Whip the cream using a hand mixer on low speed until the cream starts to thicken for about one minute. Add the confectioner sugar. Increase the speed to medium-high. Whip the cream until the beaters leave visible (but not lasting) trails in the cream, then add the cooled gelatine slowly while beating continuously. Continue whipping until the cream is light and fluffy and forms soft peaks. Transfer the whipped cream to a bowl and fold in the orange marmalade.

Putting it all together:

Make sure you have some room in your freezer. Ideally, you should be able to fit a small baking sheet or tray of desserts to set in the freezer.

Lay out tian molds (i.e., cookie cutters set on a removable base like parchment or small springform pans) on a baking tray.

Drain the orange segments on a kitchen towel.

Have the marmalade, whipped cream and baked circles of chocolate pâte sablée ready to use.

Arrange the orange segments at the bottom of each ring mold. Make sure the segments all touch each other and that there are no gaps arranging them in a fanned out pattern. Make sure they fit snuggly and look pretty as they will end up being the top of the dessert.

Once you have neatly arranged one layer of orange segments at the bottom of each mold, add a couple spoonfuls of whipped cream and gently spread it so that it covers the orange segments entirely in an even layer. Leave about ¼-inch at the top so there is room for the pâte sablée cookies.

Using a butter knife or small spoon, spread a small even layer of orange marmalade on each cookie.

Carefully place the cookie over each ring (the side of dough covered in marmalade should be the side touching the whipping cream). Gently press on the cookie to make sure the dessert is compact.

Place the desserts to set in the freezer to set for 10 minutes.

To unmold, use a small knife to gently go around the edges of the cookie cutter to make sure the dessert will be easy to release. Gently place your serving plate on top of each tian mold and turn the plate over. Slowly remove the ring, add a spoonful of caramel sauce and serve immediately.

Sunday, February 14, 2010

*Vegan* Citrusy, Raspberry Triple Chocolate Layer Cake


Finally, I am posting a layer cake. I adore making layer cakes, as my profile states, but I've yet to actually put one on this blog. Layer cakes are quite celebratory in nature, kinda necessitating a reason to make them. There's been plenty to celebrate of late, I've just been down other avenues with cupcakes and macarons and cutout cookies. I was starting to think about updating my profile, removing the mention of layer cake, when my friend Karin's mom contacted me about making a cake to surprise Karin on her first wedding anniversary. Oh boy was I delighted and honored!


Immediately my head starting spinning with flavor combinations. Because Karin was my faithful canning partner last summer, I knew I wanted to do something with jam. This idea has been in the works since before Christmas! Karin's mom was really cute about pinning down the details: "It has to be vegan, I'm afraid." No problems here, I'm no stranger to vegan baking; I've got a handful of vegan friends to lean on for taste testing! While personally I prefer whole cream and real butter in my desserts, vegan baked goods are usually a snap to whip together--often less finicky in the details (although not always the case).


This is a rich, moist chocolate cake layered with homemade citrus-raspberry jam and decadent tofu-based chocolate amaretto mousse and finished with a poured chocolate ganache. All accomplished without the use of dairy (or much refined sugar for that matter). The chemistry of vegan baking really is fascinating. An early version of this cake was going to incorporate DIY vegan white chocolate as an elegant decoration, but that's a trick I've yet to master; test trials did not turn out favorably. So I assessed my strengths and looked to my friend Heather for help with fondant. The love bird decorations were inspired by a spool of ribbon used to decorate the cake board. I'm hoping it's the perfect touch of whimsy befitting a first wedding anniversary celebration.


Congratulations, Karin and Jes! And thank you, Marcia for trusting me with such an important task!

Triple Chocolate Cake
adapted from New Vegetarian
makes two 8-inch cakes

2½ cups all-purpose flour
½ cup cocoa powder
2 tsp baking powder
2 tsp baking soda
1 tsp salt
2 oz. dark chocolate chips, melted
½ cup canola oil, plus more for greasing cake pans
½ cup raw organic agave nectar
½ cup maple syrup
2 cups chocolate soy milk
2 tsp vanilla extract
2 tsp rice vinegar
2 TBS Amaretto

Preheat oven to 350 F. Lightly grease two 8-inch cake pans with oil and line each bottom with a round of greased parchment.

In a large bowl, whisk together the flour, cocoa, baking powder, baking soda and salt. In a separate bowl combine melted chocolate and ½ cup canola oil. Add the agave and maple syrups to the chocolate mixture, stirring to combine. In a third bowl, preferably one fitted to a stand mixer, mix together chocolate soy milk, vanilla, vinegar and Amaretto. Add the chocolate syrup mixture to the mixing bowl and stir to combine. Next add the dry ingredients to this and mix on medium speed for 2-3 minutes, until a thicker batter forms.

Divide batter between prepared cake pans and bake for about 30-35 minutes until the cake begins to pull away from the sides of the pan and springs back when gently prodded. Allow cakes to cool in their pans for about 20 minutes and then turn out onto a cooling rack. Remove parchment rounds. Let cakes cool completely before frosting.

Citrusy Raspberry Jam
makes 1 pint

10 oz. raspberries, fresh or frozen
¼ cup candied kumquats in syrup with candied citrus zest, puréed

Combine raspberries and citrus purée in a saucepan over medium-high heat. Allow fruit to boil until thickened and liquid has cooked down. Consistency looser than typical jam is helpful for spreading.

Amaretto-Spiked Chocolate Mousse
straight from 101 Cookbooks
makes enough to completely frost a 4-layer, 8-inch round cake


½ cup chocolate soy milk, room temperature
10 oz. dark chocolate chips
12 oz. soft, silken tofu, drained and at room temperature
¼ cup Amaretto
¼ tsp almond extract

Melt chocolate chips in a double boiler over barely simmering water. Stir occasionally until completely melted. Remove from heat. Process tofu and chocolate soy milk in a food processor until smooth. Add the melted chocolate chips and process again to fully incorporate. Stir in the Amaretto and almond extract. Taste and adjust for flavor, adding a bit more extract if needed. Keep at room temperature to frost cake or refrigerate in individual cups for several hours until firm to serve as a separate dessert.

Chocolate Ganache Glaze
adapted from Post Punk Kitchen
makes enough to glaze a 4-layer, 8-inch round cake


¾ cups soy creamer
6 TBS nonhydrogenated margarine (such as Earth Balance buttery sticks)
10 oz dark chocolate chips

Place chocolate chips in a large bowl. Heat soy creamer on medium high until it comes to an active simmer. Add the margarine to melt. Remove from heat and immediately pour cream over chocolate and stir until completely mixed and glossy. Allow ganache to cool before pouring over cake as a glaze. The longer you allow the ganache to cool, the thicker it will set. For piping consistency, allow the ganache to completely cool and set up. Once cooled completely, the ganache can also be whipped with a mixer for several minutes at high speed to give it a more airy, spreadable texture.

“Butter”cream Frosting
adapted from Vegan Cupcakes Take over the World
makes about 4 cups


½ cup nonhydrogenated shortening
½ cup nonhydrogenated margarine (such as Earth Balance buttery sticks)
3½ cups confectioners sugar
1½ tsp vanilla extract
½ tsp rum extract
½ tsp almond extract
½ tsp maple extract
¼ cup plain soy creamer

Beat the shortening and margarine together until well combined and fluffy. Add the sugar and beat until fully incorporated. Add extracts and soy creamer, and beat until smooth (5-7 minutes). Tint with food colorings and use to decorate.

Sunday, January 24, 2010

Kumquats, an introduction

At the start of the year, a lot of food blogs began posting recipes and photos of kumquats. Some of the most inspiring came from Cannelle et Vanille. Really?! I thought. Kumquats? I'm originally from Florida and, having spent a good deal of my life in the state, I must admit: I've never had a kumquat. I had no idea what they tasted like. I was actually surprised people ate them because of a misconception I had about what they truly were. You see, the house I grew up in had palm trees in the front yard. These trees were queen palm trees that grew clusters of small orange oval fruits that looked not unlike the kumquat. If left unharvested (as often was the case), the fruits would over ripen on the tree and then drop to the ground to rot giving off a putrid, sweet odor. They were an added nuisance to yard work. If you ran over a pile with the lawn mower, they would sorely pelt your legs. Accidently stepping in a heap was a slippery mess. When I saw kumquats in the grocery store looking very similar to the fruits from our trees, I wondered why on earth someone would pay money to eat them.

I had mentioned that I was ready to try a kumquat, and my friend Elizabeth sweetly gifted me a pint. At first bite, oh how wrong was I! Kumquats are actually quite lovely. Brightly tart. Not overly bitter or sour. I might prefer them with popcorn as a movie treat over a bag of sour patch kids. I began to eat them like candy. The only thing that stopped me from consuming the whole pint fresh out of hand was that I wanted to incorporate some in a few upcoming baking projects. So I candied a portion to be used in a dried fruit and nut tea cake, and I sliced the rest to stir into a batch of marmalade. Thinly sliced discs of kumquats have great visual appeal. They look like tiny wagon wheels. I imagine they'd make a nice addition to a winter salad or atop a hearty braise. Hm, perhaps it's time to purchase another pint.

Candied Kumquats
From The Gourmet Cookbook edited by Ruth Reichl
1 cup water
1 cup sugar
⅛ tsp. salt
2 cups halved kumquats (leaves and seeds discarded)

Bring the water, sugar, and salt to a boil in a saucepan; stir the mixture until the sugar has
dissolved. Reduce heat and simmer, uncovered, for 2 minutes. Add halved kumquats and simmer, uncovered, stirring occasionally for 10 to 12 minutes or until tender. With a slotted spoon, transfer kumquats to a heatproof bowl. Boil syrup for 3 to 7 minutes, until reduced to about ¾ cup. Pour syrup over kumquats and cool completely. Store in the refrigerator until ready to use.


Fruit and Nut Cake
makes 4 small loaves
Adapted from Pure Dessert by Alice Medrich

¾ cup all-purpose flour
¼ tsp baking soda
¼ tsp baking powder
½ tsp salt
¾ cup packed dark brown sugar
3 cups walnut halves
2 cups dates, pitted and quartered
½ cup dried plums, cut into thirds
½ cup dried figs, cut into thirds
½ cup candied kumquats
3 large eggs
1 teaspoon vanilla extract

1. Spray loaf pans with oil and line with parchment paper

2. Position a rack in the lower third of the oven and preheat to 300°F

3. In a large bowl, toss together the flour, baking powder, baking soda, and salt. Add the brown
sugar, walnuts, and fruits. Use your fingers to mix the fruit, separate any pieces sticking together.

4. Beat the egg and vanilla in a separate small bowl, then mix it with the fruit and nut mixture until everything is coated with the batter. Pour the mixture into the prepared loaf pans, distributing evenly across all pans.

5. Bake for 60-75 minutes until the top of the bars are golden brown and has pulled away just-slightly from the sides of the pan. Cool the bars completely in the pan, then lift out before serving.

6. Use a serrated bread knife to make clean slices through the loaf.


Citrus Melange Marmalade
makes 1½ pints
inspired by design*sponge

Juice and flesh from 2 oranges

10 thinly sliced kumquats (discard ends)

Juice and flesh from 1 large grapefruit

Juice and flesh from 2 Meyer lemons

2¾ cups sugar

½ cup water

Remove rind from all fruit with a vegetable peeler. (Set aside small piece of rind from all fruits to add in later)
 Remove all of the white pith from the fruit. If left on this will make your marmalade very bitter! 
Very thinly slice reserved rind into matchsticks.
 Supreme the oranges, gratefruit and lemons and add all ingredients including juice to a non-reactive saucepan.
 Bring to a boil and simmer until mixture begins to thicken about 45 minutes.
 Once mixture has become thick and reduced, registering 221° F on a candy thermometer, transfer to jars and process in a hot water bath canner.

Sunday, September 27, 2009

Vols-au-vent with braised pork and grape-apple-quince chutney

The September 2009 Daring Bakers' challenge was hosted by Steph of A Whisk and a Spoon. She chose the French treat, Vols-au-Vent based on the Puff Pastry recipe by Michel Richard from the cookbook Baking With Julia by Dorie Greenspan.

Puff pastry (pâte feuilletée) is something you probably would buy frozen at the grocery store or (for more instant gratification) already baked and filled as a treat from your favorite bakery. Why not try making it yourself? Coming away from this challenge, I can earnestly say that it is surprisingly easy and satisfying to do so--very much well-worth the effort! In preparation, I watched the on-line video from the PBS show “Baking with Julia”.
This was a pure treat to see Michel demonstrate making the pastry under Julia’s watchful eye and quite honestly a great confidence builder to observe the technique of an expert. Ever since watching the movie Julia and Julie and reading her memoir My life in France, I am admittedly enamored with the passion for good food and genuinely lovely personality of Julia Child. So this for me was an exciting challenge to complete!

Much like Danish dough and croissant dough, puff pastry is a laminated dough, which means it consists of a large block of butter (the beurrage) that is enclosed in dough (the détrempe). This dough/butter packet (termed a paton) is rolled and folded repeatedly (a process known as “turning”) to create the crisp, flaky, parallel layers you see when baked. Unlike Danish or croissant however, puff pastry dough does not contain yeast in the détrempe, and relies solely on aeration to achieve its high rise. The turning process creates hundreds of layers of butter and dough, with air trapped between each one. In the hot oven, water in the dough and from the melting butter creates steam, which expands in the trapped air pockets, forcing the pastry to rise. Another essential for achieving rise is to use a low-gluten flour. American all-purpose flours typically contain a lot more gluten then French “equivalents”. While in France developing recipes for her cookbook that was to be used in American kitchens, Julia Child had to take this difference into account. For this reason, a blend of cake flour and all-purpose flour are suggested in order to reduce gluten content.

Vols-au-vent are typically served hot and filled with a creamy, savory filling (often poultry or seafood-based), but cold fillings, such as chicken or tuna salad, are used as well. Sweet versions tend to include whipped cream or pastry cream with fresh or stewed fruit. Wanting to keep things savory, I tapped the finest local resource I knew for an appropriate filling that would pair well with the pastry. I purchased a delicious braised pork shoulder from Durham's Tracklements, a local culinary artisan of fine-quality, custom smoked meats and fishes. For those of you who know me, I know what you’re thinking…yes, I cook (for the most part) vegetarian, but that doesn’t mean I don’t know how to order and enjoy a superb piece of meat! Excited about the project, I told Mr. Durham about how I planned to use his pork and about the concord grape, macoun apple, quince, and ginger chutney I was making to accompany the pastry. He told me that was the "fanciest way [he’d] ever heard of pulled pork being served". TR, I think I might just have to agree with you on that one!

Michel Richard’s Puff Pastry Dough
Yield: 2-1/2 pounds dough


Ingredients:

2½ cups unbleached all-purpose flour

1¼ cups cake flour

1 Tbs salt (you can cut this by half for a less salty dough or for sweet preparations)

1¼ cups ice water

1 pound very cold unsalted butter (frozen for 20 minutes or so)
plus extra flour for dusting work surface

Mixing the Dough:
Put the all-purpose flour, cake flour, and salt in the work bowl of a food processor fitted with a metal blade and pulse a couple of times just to mix. Add the water all at once, pulsing until the dough forms a ball on the blade. The dough will be very moist and pliable and will hold together when squeezed between your fingers much like Play-Doh.

Remove the dough from the machine, form it into a ball, with a small sharp knife, slash the top in a cross hatch pattern. Wrap the dough in a damp towel and refrigerate for about 5 minutes.

Meanwhile, place the butter between 2 sheets of plastic wrap and beat it with a rolling pin until it flattens into a square that's about 1" thick. This can be great fun, especially after a stressful day, but take care not to mash your fingers like I did…ouch! The butter must remain cool and firm: if it has softened or become oily, chill it before continuing.

Incorporating the Butter:
Unwrap the dough and place it on a work surface dusted with all-purpose flour with your rolling pin, press on the dough to flatten it and then roll it into a 10" square. Keep the top and bottom of the dough well floured to prevent sticking and lift the dough and move it around frequently. (This will allow for the gluten to rest.) Starting from the center of the square, roll out over each corner to create a thick center pad with flaps.

Place the cold butter in the middle of the dough and fold the flaps over the butter, stretching them as needed so that they overlap slightly and encase the butter completely. (If you have to stretch the dough, stretch it from all over; don't just pull the ends) you should now have a package that is 8" square.

To make great puff pastry, it is important to keep the dough cold at all times. There are specified times for chilling the dough, but if your room is warm, or you work slowly, or you find that for no particular reason the butter starts to ooze out of the pastry, cover the dough with plastic wrap and refrigerate it. You can stop at any point in the process and continue at your convenience or when the dough is properly chilled.

Making the Turns:
Gently but firmly press the rolling pin against the top and bottom edges of the square (this will help keep it square). Then, keeping the work surface and the top of the dough well floured to prevent sticking, roll the dough into a rectangle that is three times as long as the square you started with, about 24" (don't worry about the width of the rectangle: if you get the 24", everything else will work itself out.) With this first roll, it is particularly important that the butter be rolled evenly along the length and width of the rectangle; check when you start rolling that the butter is moving along well, and roll a bit harder or more evenly, if necessary, to get a smooth, even dough-butter sandwich (use your arm-strength!).

Brush off the excess flour from the top of the dough, and fold the rectangle up from the bottom and down from the top in thirds, like a business letter, brushing off the excess flour. You have completed one turn.

Rotate the dough so that the closed fold is to your left, like the spine of a book. Repeat the rolling and folding process, rolling the dough to a length of 24" and then folding it in thirds. This is the second turn.

Chilling the Dough:
Wrap dough in plastic wrap and refrigerate it for at least 30 or up to 60 minutes before repeating the rolling and folding process to complete the next set of turns. Each time you refrigerate the dough, mark the number of turns you've completed by indenting the dough with your fingertips.

The total number of turns needed is six. If you prefer, you can give the dough just four turns now, chill it overnight, and do the last two turns the next day. Puff pastry is extremely flexible in this regard. However, no matter how you arrange your schedule, you should plan to chill the dough for at least an hour before cutting or shaping it.

Forming and Baking the Vols-au-Vent:
Line a baking sheet with parchment and set aside.

Using a knife or metal bench scraper, divided your chilled puff pastry dough into three equal pieces. Work with one piece of the dough, and leave the rest wrapped and chilled. On a lightly floured surface, roll the piece of dough into a rectangle about ⅛ to ¼-inch thick. Transfer it to the baking sheet and refrigerate for about 10 minutes before proceeding with the cutting.

For smaller, hors d'oeuvre sized vols-au-vent, use a 1½” round cutter to cut out 8-10 circles. For larger sized vols-au-vent, fit for a main course or dessert, use a 4” cutter to cut out about 4 circles. Make clean, sharp cuts and try not to twist your cutters back and forth or drag your knife through the dough. Half of these rounds will be for the bases, and the other half will be for the sides. (Save any scrap by stacking—not wadding up—the pieces…they can be re-rolled and used if you need extra dough. If you do need to re-roll scrap to get enough disks, be sure to use any rounds cut from it for the bases, not the ring-shaped sides.)

Using a ¾-inch cutter for small vols-au-vent, or a 2- to 2½-inch round cutter for large, cut centers from half of the rounds to make rings. These rings will become the sides of the vols-au-vent, while the solid disks will be the bottoms. You can either save the center cut-outs to bake off as little “caps” forr you vols-au-vent, or put them in the scrap pile.

Prick the solid bottom rounds with a fork (do this lightly so as not to go all the way through the pastry) and lightly brush them with egg wash (1 egg mixed with 1 Tbs warm water). Place the rings directly on top of the bottom rounds and very lightly press them to adhere. Brush the top rings lightly with egg wash, trying not to drip any down the sides (which may inhibit rise). If you are using the little “caps,” stack and egg wash them as well.

Refrigerate the assembled vols-au-vent on the lined baking sheet while you pre-heat the oven to 400ºF.

Once the oven is heated, remove the sheet from the refrigerator and place a silicon baking mat (preferred because of its weight) or another sheet of parchment over top of the shells. This will help them rise evenly. Bake the shells until they have risen and begin to brown, about 10-15 minutes depending on their size. Reduce the oven temperature to 350ºF, and remove the silicon mat or parchment sheet from the top of the vols-au-vent. If the centers have risen up inside the vols-au-vent, you can gently press them down. Continue baking (with no sheet on top) until the layers are golden, about 15-20 minutes more. (If you are baking the center “caps” they will likely be finished well ahead of the shells, so keep an eye on them and remove them from the oven when browned.)

Remove to a rack to cool. Cool to room temperature for cold fillings or to warm for hot fillings.

Fill and serve.

Saturday, June 27, 2009

Strawberry Bakewell Tart…er…pudding

The June Daring Bakers' challenge was hosted by Jasmine of Confessions of a Cardamom Addict and Annemarie of Ambrosia and Nectar. They chose a Traditional (UK) Bakewell Tart... er... pudding that was inspired by a rich baking history dating back to the 1800's in England.

Bakewell tarts…er…puddings combine a number of dessert elements but still let you show off your area’s seasonal fruits. In my case: strawberries!

Like many regional dishes there’s no “one way” to make a Bakewell Tart…er…Pudding, but most of today’s versions fall within one of two types. The first is the “pudding” where a layer of jam is covered by an almondy pastry cream and baked in puff pastry. The second is the “tart” where a rich shortcrust pastry holds jam and an almondy sponge cake-like filling. Today’s post is a combination of the two: a sweet almond-flavored shortcrust pastry, frangipane and homemade strawberry-lemon-ginger jam. 

Bakewell Tart History and Lore

Flan-like desserts that combine either sweet egg custard over candied fruit or feature spiced ground almonds in a pastry shell have Medieval roots. The term “Bakewell pudding” was first penned in 1826 by Meg Dods; 20 years later Eliza Acton published a recipe that featured a baked rich egg custard overtop 2cm of jam and noted, “This pudding is famous not only in Derbyshire, but in several of our northern counties where it is usually served on all holiday occasions.”

By the latter half of the 1800s, the egg custard evolved into a frangipane-like filling; since then the quantity of jam decreased while the almond filling increased.

This tart, like many of the world's great foods has its own mythic beginnings…or several mythic beginnings. Legend has it in 1820 (or was it in the 1860s?) Mrs. Greaves, landlady of The White Horse Inn in Bakewell, Derbyshire (England), asked her cook to produce a pudding for her guests. Either her instructions could have been clearer or the cook should have paid better attention to what she said because what he made was not what she asked for. The cook spread the jam on top of the frangipane mixture rather than the other way around. Or maybe instead of a sweet rich shortcrust pastry case to hold the jam for a strawberry tart, he made a regular pastry and mixed the eggs and sugar separately and poured that over the jam—it depends upon which legend you follow.

Regardless of what the venerable Mrs. Greaves’ cook did or didn’t do, lore has it that her guests loved it and an ensuing pastry-clad industry was born. The town of Bakewell has since played host to many a sweet tooth in hopes of tasting the tart in its natural setting.

Bakewell tarts are a classic English dessert, abounding in supermarket baking sections and in ready-made, mass-produced forms, some sporting a thick sugary icing and glazed cherry on top for decorative effect.


Is it a tart or is it a pudding?

It’s a debate that rages on… It’s been said that the “The Bakewell pudding is a dessert. The Bakewell tart is that girl over there.”

The etymology of pudding is a rather interesting and slightly convoluted one. The naming confusion may come from the British manner of referring to the dessert course as ‘pudding’, and so any dessert is a pudding until another name comes along and adds clarity to what it really is.

the Recipe:

Makes one 9” tart

Components

One quantity sweet shortcrust pastry (recipe follows), 1 cup jam or curd, warmed for spreadability
(recipe follows), one quantity frangipane (recipe follows),
and one handful blanched, flaked almonds

Assembling the tart

Place the chilled dough disc on a lightly floured surface and roll the pastry to 1/4” thickness, by rolling in one direction only (start from the center and roll away from you), and turning the disc a quarter turn after each roll. When the pastry is to the desired size and thickness, transfer it to the tart pan, press in and trim the excess dough. Patch any holes or tears with trimmed bits. Chill in the freezer for 15 minutes.

Preheat oven to 400F.

Remove shell from freezer, spread as even a layer as you can of jam onto the pastry base. Top with frangipane, spreading to cover the entire surface of the tart. Smooth the top and pop into the oven for 30 minutes. Five minutes before the tart is done, the top will be poofy and brownish. Remove from oven and strew flaked almonds on top and return to the heat for the last five minutes of baking.

The finished tart will have a golden crust and the frangipane will be tanned, poofy and a bit spongy-looking. When you slice into the tart, the almond paste will be firm, but slightly squidgy and the crust should be crisp but not tough.

Sweet shortcrust pastry

225g all purpose flour


30g sugar


½ tsp salt


110g unsalted butter, cold (frozen is better)


2 egg yolks


½ tsp almond extract


5-6 Tbsp ice-cold water

Sift together flour, sugar and salt. Grate butter into the flour mixture, using the large hole-side of a box grater. Using your finger tips only, and working very quickly, rub the butter into the flour until the mixture resembles bread crumbs. Set aside.

Lightly beat the egg yolks with the almond extract and quickly mix into the flour mixture. Keep mixing while dribbling in the water a tablespoon at a time, only adding enough to form a cohesive and slightly sticky dough.

Form the dough into a disc, wrap in plastic and refrigerate for at least 30 minutes

Strawberry-Lemon-Ginger Jam

4 quarts strawberries, hulled and quartered

½ cup lemon juice

2 packs no sugar pectin

3 TBS minced crystallized ginger

1 TBS butter

1 cup agave nectar

2 2/3 cups sugar

Place all ingredients except for agave nectar and sugar in a large pot. Mix well and cook on high heat, stirring often, bring to a rolling boil. When boil can no longer be stirred down add the agave nectar and 1 cup of sugar. Mix well. When pot begins to boil again add the remaining sugar. Stirring continuously, bring to a full rolling boil and hold at this state for 3 minutes. Test for jelling and then hot pack and process jars according to safe canning practices.

Frangipane

125g unsalted butter, softened


125g confectioner’s sugar


3 eggs


½ tsp almond extract


125g ground almonds


30g flour

Cream butter and sugar together for about a minute or until the mixture is pale and very fluffy. Scrape down the side of the bowl and add the eggs, one at a time, beating well after each addition. The batter may appear to curdle. Pour in the almond extract and mix for about another 30 seconds and scrape down the sides again. With the beaters on, spoon in the ground almonds and the flour. Mix well. The mixture will be soft, keep its slightly curdled look (mostly from the almonds) and retain its pallid yellow color.