custom cakes/cookies

Showing posts with label breakfast. Show all posts

Monday, March 18, 2013

Warming Matcha Smoothie & Thai-Tea Cream Biscuits


I contribute recipes to the blog of my friends' tea company, Arbor Teas. Here are two breakfast recipes that use their teas to begin your morning on a good note.  

I agree. A warm smoothie doesn’t sound all that appetizing to me either. But after a long, chilly winter of drinking cold smoothies, a hot one actually makes a lot of sense. Think drinkable oatmeal, fortified with energy and nutrients, including Arbor Teas' organic matcha green tea. Matcha provides a welcome dose of antioxidants, L-theanine--an amino acid proven to promote relaxation, chlorophyll--a powerful detoxifier, Vitamins C and A, selenium, zinc, chromium, and magnesium. All of this makes for a healthy, natural energy boost and a delicious start to your day.


Warming Matcha Smoothie

Makes about 2½ cups
1 very ripe banana
1¼ cups almond milk, steaming hot
4 TBS old fashioned oats
2 TBS blueberries, fresh or frozen
½ TBS coconut butter (try making your own)
½ TBS whey powder
¾ tsp organic matcha green tea, or more to taste
1 Medjool Date, seed removed

Blend all ingredients together at once, until smooth.
Enjoy straightaway.


Also, you might like to pair it with these...

Thai-Tea Cream Biscuits


You may call this a scone, but I prefer cream biscuit. It’s on the softer (less dense) side of the biscuit-to-scone continuum, especially if you take care to use the gentlest mixing possible. The lovely Thai mango scone I had as part of an impressively creative full-service tea at Craftsman & Wolves, a contemporary pâtisserie in San Francisco’s Mission District, inspired this attempt at replication. In addition to mango, I added Arbor Teas’ Organic Thai Iced Tea, unsteeped. Since it’s a mix of black tea, vanilla bean, cardamom, and anise seeds, when used dry in baking, the spices in the Thai tea toast in the oven, elevating their flavor quite favorably. I especially liked the subtle, fragrant black licorice taste from the anise. Green curry adds an usual twist that plays nicely against both the toasted spices and the slight sweetness of the biscuit.


makes about 8-10 biscuits


2¼ cups (280 grams) all-purpose flour
1 tablespoon (15 grams) baking powder
¼ cup (50 grams) granulated sugar
1 tablespoon (5 grams) organic loose Thai tea leaves
½ teaspoon kosher salt
6 tablespoons (85 grams) cold, unsalted butter
½ cup chopped mango (dried, fresh or frozen)
½ cup (50 grams) shredded coconut
1 tablespoon (19 grams) green curry paste
1 cup heavy cream


Preheat oven to 425 degrees. Line a large baking sheet with parchment paper.

In bowl of a food processor, briefly pulse flour, baking powder,sugar, Thai tea, and salt to even distribute. Add the butter to the flour mixture, and pulse several more times until the mixture resembles a crumbly texture with tiny pea-sized bits of butter. Next add the mango and coconut, and pulse to distribute. Dump this dry mixture into a large mixing bowl. In a separate bowl, whisk the green curry paste into the heavy cream to create a slurry, then gently fold this into the dry mix with the spatula.  Lightly knead the dough just once or twice in the bowl, to bind all the ingredients in  one large mass. It’s important that the dough is not overworked, so don't worry about getting it completely mixed. Transfer the dough to a floured work surface. Using your hands, gently press the dough out to a ¾-inch thickness. Cut 2½-inch circles with a floured biscuit cutter or the top edge of a drinking glass. Place the biscuits on the baking sheet,leaving a couple inches between each. Reroll the scraps of dough as necessary.


Bake for 12 to 15 minutes, until bronzed at the edges. Cool in pan for a minute, then transfer to a cooling rack. Serve warm or at room temperature.


Tuesday, October 2, 2012

Masala Chai-Spiced Donuts

I contribute recipes to the blog of my friends' tea company, Arbor Teas. Here are two donut recipes I adapted using their Masala Chai teas.

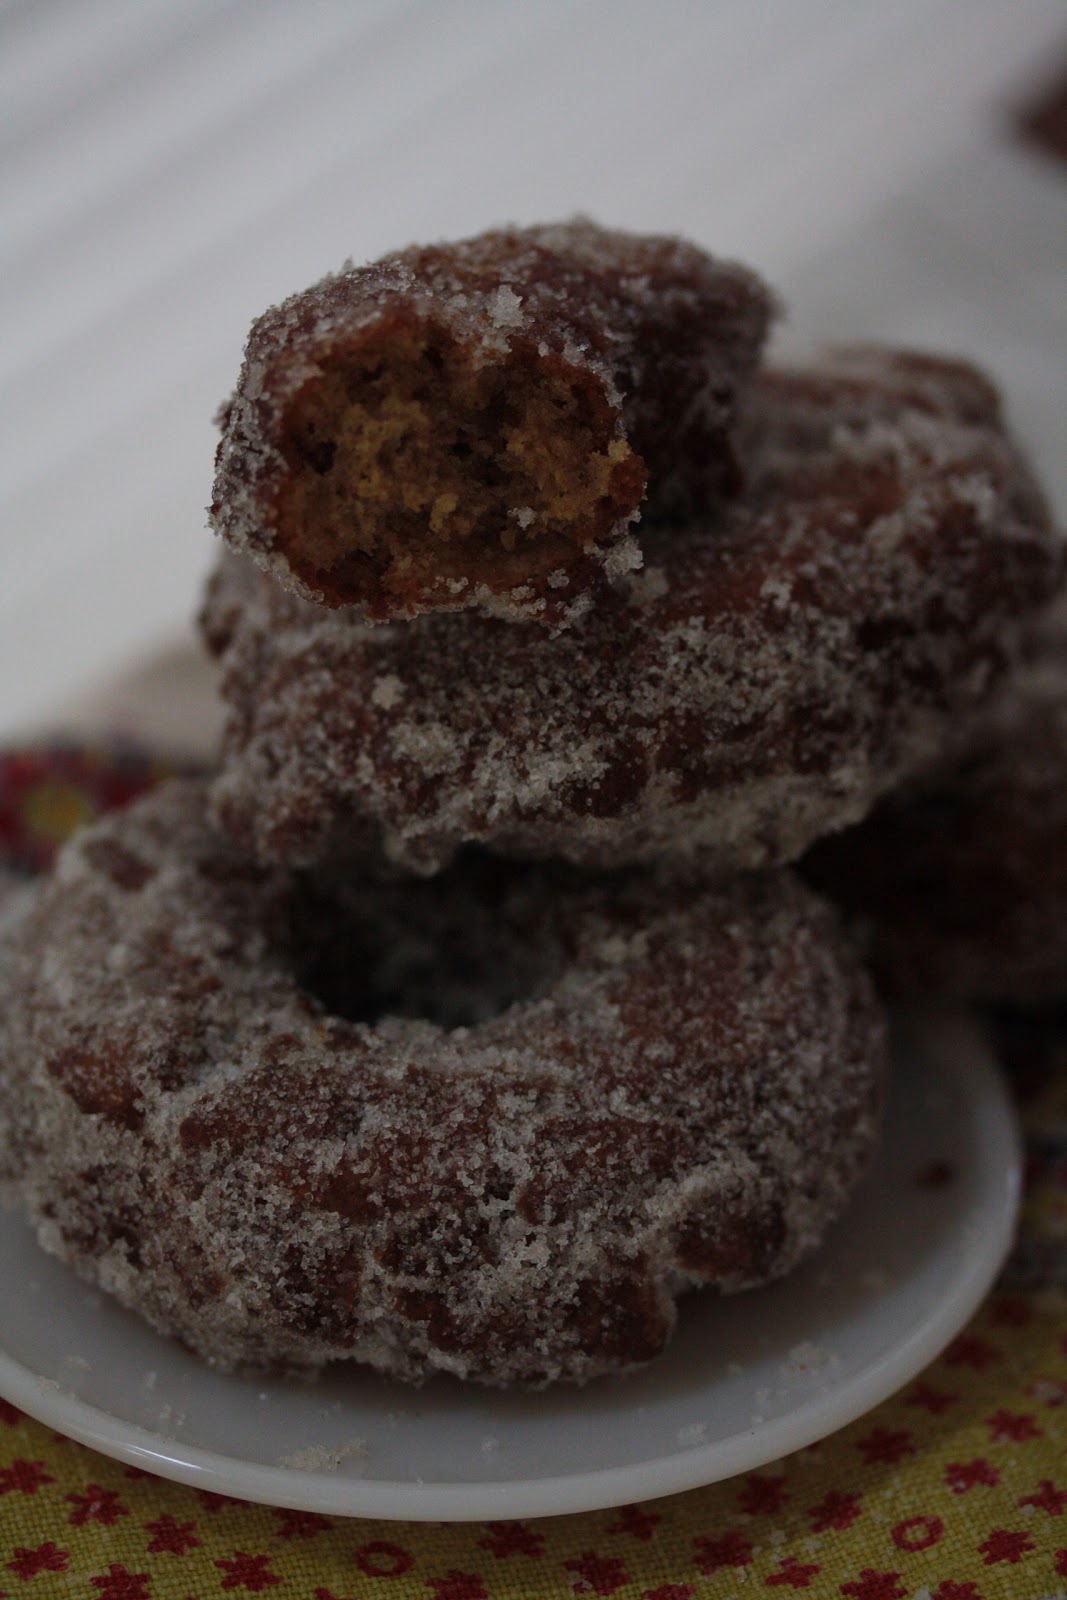
Chai Cider Donuts
Chai Glazed Donuts

Choose your own adventure! This post is filled with decisions... Fried or Baked? Caffeinated or Not? Doughnuts or Donuts? When the weather turns cool, I like to make donuts. At least that’s how I’ve settled on spelling it. As for fried or baked? Well, that’s a texture preference. Personally, I like the cake-like quality of a fried cider donut more so than the doughy-ness of a glazed. The caffeine question is a bit more mood related. Arbor Teas’ organic Masala Chai Black Tea has more prominent notes of spicy cardamom and a kick from black pepper, while the naturally decaffeinated Organic Masala Chai Rooibos has a flavor profile distinct with warm ginger. Indecisive? The Organic Decaf Masala Chai Black Tea is yet another option that probably doesn’t help break any ties. Here are two very different and customizable approaches to making chai-spiced donuts. Which do you prefer?


Masala Chai-Spiced Apple Cider Donuts

Makes 18 3-inch donuts
Adapted from The Apple Lover’s Cookbook by Amy Traverso

Masala chai-spiced, boiled apple cider:

1½ cups fresh apple cider
1 tablespoon organic Masala Chai Black Tea or organic Masala Chai Rooibos, loosely packed in a disposable filter and tied off with kitchen twine

To make masala chai-spiced, boiled apple cider for use in the recipe below, simmer 1½ cups apple cider with the chai tea in a small sauce pan. After 5 minutes or so remove the tea bag. Bring the cider to a strong boil and continue to cook, stirring frequently to prevent spill overs, until the liquid is syrup-like and reduced down to about ⅓ cup. This should take about 25 minutes.


Donut batter:

3½ cups all-purpose flour, plus additional for work surface
1¼ teaspoons salt
2 teaspoons baking powder
1 teaspoon baking soda
1½ teaspoons ground cinnamon
½ teaspoon ground cardamom
1 cup granulated sugar
5 tablespoons unsalted butter, at room temperature
2 large eggs, at room temperature
½ cup buttermilk, at room temperature
⅓ cup masala chai-spiced, boiled apple cider, cooled
1 tablespoon vanilla extract
Vegetable oil for frying

Masala chai-sugar for dipping:

1½ cups sugar 
2 teaspoons ground cinnamon
2 teaspoons ground cardamom 
2 teaspoons ground cloves
1 teaspoons ground ginger
½ teaspoons ground black pepper

In a medium bowl, whisk together flour, salt, baking powder, baking soda, cinnamon, and cardamom and set aside. With a mixer fitted with the whisk attachment, beat together the sugar and butter until pale and fluffy, 4 to 6 minutes. Add the eggs, one at a time, beating for a minute after each. Next, add the buttermilk, chai-spiced boiled cider, and vanilla and mix well. The batter may look curdled at this stage. Fold in the flour mixture until mostly incorporated. A few lumps are OK, so don’t over mix.
Line a baking sheet with parchment paper and dust with flour. Turn the dough out onto the baking sheet and gently pat flat to about ¾-inch-thickness. Dust the top of dough with additional flour, cover with plastic wrap and put in the freezer for 10 minutes to firm up a bit. Remove the dough from the freezer and use a lightly floured 3-inch donut or a cookie cutter to cut out about 18 donuts with holes. Gather any scraps and re-roll, chilling the dough again if needed to firm it up. Place cut donuts on another baking sheet lined with parchment paper, then transfer to the freezer for 5 minutes to firm up again.
In a Dutch oven or large pot, heat about 3 inches of oil to 370° F degrees. Line a tray with several layers of paper towels. Slip 3 or 4 donuts at a time into the hot oil, being careful not to crowd the pan. Fry until deep golden on one side, about 1 minute, then flip and continue to fry about one minute more or until thoroughly cooked. Using a slotted serving spoon, transfer donuts to the paper-towel-lined tray. Continue frying the remaining dough (transferring to the freezer again for 10 minutes if you find it getting too soft as you work). 

For the topping, mix 1½  cups sugar with the spices. While still warm yet cool enough to handle, dip the donuts into the masala chai-sugar mixture.

Eat immediately with a mug of warm cider steeped in masala chai tea!

Masala Chai-Glazed Donuts (Baked not Fried!)

makes 10-14 donuts
Adapted from Doughnuts by Lara Ferroni

1 egg
¼ cup sugar
1 cup whole milk, heated to 115° F
1 tablespoon active dry yeast
1 teaspoon salt
2 teaspoons vanilla extract
2½  to 3½ cups all purpose flour, divided, plus more for kneading
8 tablespoons unsalted butter, cut into 1 inch cubes

For the masala chai glaze:

2 teaspoons organic Masala Chai Black Tea or organic Masala Chai Rooibos
⅓ cup water
⅔ cup milk
1 cup powdered sugar

In a mixer fitted with the paddle attachment, beat the egg and sugar on medium speed until blended, about 1 minute. Add the milk, yeast, salt and vanilla, and stir until blended. With the machine on low speed, add 2 cups of flour, about ½ cup at a time, and mix until the dough is thick and pulls away from the sides of the bowl.

Switch to the dough hook. With the machine on medium speed, add the butter one cube at a time, and continue to knead until no large chunks of butter are left in the bottom of the bowl, 3-5 minutes. Reduce speed to low and add the additional flour until the dough gathers around the hook and cleans the sides of the bowl. It will be soft and tacky, but not overly sticky.

Turn the dough out onto a floured surface and knead gently until the dough no longer sticks to your hands. Lightly butter a large mixing bowl.

Transfer the dough to the bowl and turn to coat. Cover with a damp tea towel and let rise in a warm spot until doubled in volume, about 1 hour.

Punch down the dough and roll out to ½-inch thick. With a 3-inch donut or a cookie cutter, cut out 10 to 14 donuts and holes.

Preheat the oven to 400° F and line a baking sheet with parchment paper. Place the donuts at least 1 inch apart on the baking sheet. Cover with plastic wrap and let sit in a warm spot until nearly doubled in size, about 20 minutes.

Bake until the donuts are light golden brown, 5 to 8 minutes.

Meanwhile, make a chai tea latte for the glaze. Steep 2 teaspoons of masala chai tea in ⅓ cup of boiling water for about 5 minutes. Heat ⅔ cup milk until steaming. Combine the hot milk with the steeped tea. Next sift one cup of powdered sugar into a separate bowl. Add 3 tablespoons of the chai tea latte to the sugar and whisk until smooth. Dip the top side of each donut into the glaze and let drip on a wire rack set over a piece of parchment paper.

Best eaten when still warm and along side an extra chai tea latte!

Wednesday, December 15, 2010

Oeufs en Meurette

I've been neglecting my usual posting schedule these past couple of months for good reason: I bought a house. It was a huge decision that caused me a lot of anxiety as my friends, family and realtor can attest. But now that I'm (mostly) unpacked, I feel very much at home. My house is cozy and full of character and enjoys hosting friends around my teeny dining table, or by the wood-burning stove, or even in the sometimes band practice area designated in the basement. When the time is right, I'd like to turn the back yard into a permaculture oasis complete with compost and edible garden and keep chickens and bees...

In the meantime, I've been welcoming friends over to warm my new space. Last weekend, I served oeufs en meurette for brunch. Eggs poached in red wine may seem like an intimidating, high stress choice to make for company...but I had a trick up my sleeve: eggs can be poached in advance, held in chilled water, then slipped back into heated water to gently rewarm just before serving. In fact, this recipe requires that advanced prep because the wine that is the poaching liquid becomes a velvety-rich reduction sauce (meurette) to complete the dish. I could crack eggs and troubleshoot mishaps without an audience. Also, I could use technical "crutches" without judgment. It was not easy to gauge the cooking progress of eggs dropped into an opaque liquid, so I used a thermometer to ensure an appropriate simmer was maintained and a timer to keep me from getting distracted by other prepping tasks of peeling onions, slicing mushrooms, and chopping bacon for the accompaniments.

This is a good snowy weather dish. Here's the recipe if you'd like to try it as well:


Oeufs en Meurette
Serves 8

8 eggs
1 bottle, full-bodied red wine (I used a Tempranillo)
2 cups chicken stock
1 onion, quartered
1 carrot, cut into three pieces
1 celery stalk, cut into three pieces
1 clove garlic, crushed
Bouquet garni (thyme, parsley, bay leaf)
½ tsp black peppercorns
2 TBS butter
¼ lb mushrooms, sliced
¼ lb bacon, diced
16 pearl onions, peeled
Vegetable oil for frying
8 slices of baguette, ¼-in thick
2 TBS butter, room temp
2 TBS flour
salt and pepper


1. Bring wine and stock to a boil in a large pan and then lower heat to maintain a strong simmer around 190°F. Poach eggs a couple at a time for 3-4 min. Yolks should be firming but still a little soft. Set them aside in a bowl of ice water.

2. Add the vegetables, herbs, and peppercorns to the poaching liquid and let the sauce simmer until reduced to half volume. This will become the meurette sauce.

3. In a separate large skillet, melt 1 TBS of the butter on medium-high heat and sauté the mushrooms until soft and then set aside. Add in another 1 TBS butter and the bacon, frying until browned, then set aside on a paper towel. Turn down the heat to medium, add in the pearl onions and sauté until softened and browned. Then drain off the fat and add the bacon and mushrooms back to the pan and set aside off the heat for the moment.

4. In a medium skillet, heat a few tablespoons of oil and then fry the baguette slices until browned on each side. Add more oil as needed. Set the fried bread (croûtes) on a paper towel and then place on a baking sheet in an oven that is set to whatever your lowest setting is to keep them warm.

5. Blend 2 TBS butter and flour together to form a paste of sorts that will be used as the thickener for the sauce. Whisk this into the reduction sauce until the sauce starts to thicken. Strain the sauce over the skillet of mushrooms, bacon and onions, and return the skillet to heat, bringing to a boil. Season with salt & pepper to taste, then set aside again.

6. Reheat the eggs by placing them in hot water for a quick minute. To serve, plate a poached egg on top of a croûte, and then ladle some of the mushrooms/bacon/onions and sauce on top.


Jenn and Jill have challenged The Daring Cooks to learn to perfect the technique of poaching an egg. They chose Eggs Benedict recipe from Alton Brown, Oeufs en Meurette from Cooking with Wine by Anne Willan, and Homemade Sundried Tomato & Pine Nut Seitan Sausages (poached) courtesy of Trudy of Veggie num num.

Wednesday, November 10, 2010

"Mornin' Mash is the Truth!"


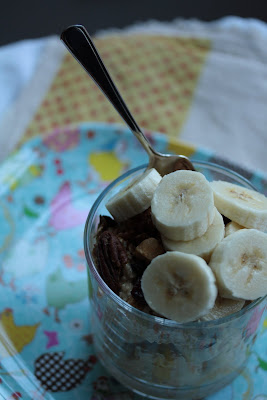
Those words were chatted to me enthusiastically after sharing my new go-to breakfast with my workplace BFF. He was referring to what most of Europe (and beyond) might call Bircher Müesli: a "mash up" of raw oats and raisins softened and plumped by a long soak in citrus juices and/or yogurt (or some other type of dairy), then embellished with endless combinations of fruits, nuts, and natural sweeteners. Absolutely refreshing and perfectly filling (in an appetite-curbing, good way), this is first-meal-of-the-day virtue at its humblest. It resembles a sort of cold oatmeal or soft, chewy granola, but with way, WAY better texture and flavor! I like to mix in mashed banana or homemade jam or applesauce to give it a bit of sweetness. I added mashed pawpaw fruit when that was in season! Pumpkin butter or apple butter or my pear butter would be a nice seasonal choice also. A jar of homemade granola always sits on my kitchen counter, so I sprinkle on a bit of that too for added crunch. If you don't eat breakfast in the car while driving to work like I do each morning, a drizzle of honey would be an excellent touch. I should also mention this is a great make ahead deal that with minimal advanced prep work should see you through a week's worth of breakfasts, helping you get out the door just a wee bit faster. Varying your toppings should keep you from getting bored.

I was introduced to Bircher Müesli several years ago at a hotel breakfast bar in Sydney and was happy to find it again when I traveled this summer to Hamburg and Oslo. European hotels' complimentary breakfasts (even the budget-friendly ones) knock the socks off of what's considered a "continental breakfast" in the States. Across the pond you will find generous spreads with much more healthy, non-processed options. Since returning home, I found a recipe in my Gourmet Magazine cookbook that I've been tweaking here and there and was eager to post my variations. Then David Lebovitz beat me to the punch with a post on Bircher Müesli last week! With that, I almost wasn't going to post my recipe, but then I thought twice. Perhaps ::shudder:: you don't know of his blog or have never heard of this recipe or of Maximilian Bircher-Benner, the Swiss equivalent of the Michigan health-enthusiast/inventor of corn flakes, John Harvey Kellogg. Everyone deserves a little morning goodness. I'm happy to do my part!


Bircher Müesli
makes 16 cups; serves 8-10

1 lemon
1 juicing orange
1 grapefruit
1½ cups steel cut oats (Irish oats)
3 cups old fashioned rolled oats
⅔ cup raisins
1 quart whole milk, plain yogurt

Toppings and Mix-ins:
sliced or mashed banana
granola
coarsely grated apples
toasted nuts
fresh berries
honey
etc...

Finely grate zest from lemon and orange. Squeeze juice from all of the fruits to obtain about 1½ - 2 cups of citrus juice. Combine the zest, juice, oats, raisins, and yogurt in a large re-sealable container. Stir until thoroughly mixed. Refrigerate covered for at least eight hours to allow the oats to soften.

When hungry, portion out servings into individual bowls and top as desired.

Bircher Müesli will keep for about a week, covered tightly and refrigerated.


Wednesday, October 27, 2010

Delicata Squash & Toasted Fennel Seed Doughnuts


I have fond childhood memories of doughnuts. Just ask me about “little girl” doughnuts and you’ll see my face light up about special, perfectly-portioned treats my dad used to bring us from a small neighborhood doughnut shop. It operated out of a trailer parked in the lot of a shopping plaza. (I suppose this was my early introduction to food carts.) The best flavors always seemed to sell-out before sunrise, and the shop never stayed open past late morning. Now that I'm older, for health-conscious reasons, I stopped eating such fried indulgences. And really, most places selling doughnuts around town just don't do justice to my flavor memory anyways.

Although lately, I've been justifying eating “junk food” if I make it myself AND if I turn it into something a little more “high-end”. About this time last year I became very interested in homemade doughnuts. I was inspired by this post from Cannelle et Vanille, and then as the doughnut trend took off, built up momentum in my doughnut-making repertoire trying several different recipes. The recipe below is adapted from Cannelle et Vanille, but it incorporates the flavors I’ve been drawn to this fall: roasted winter squash and toasted fennel seed; warm notes of caramel with cool notes of licorice. To me, that combination tastes like a decadent candy; satisfyingly sweet but not overly saccharin.

I’ve been sampling various squash from my farm share, trying earnestly to learn the differences amongst them. So far, my squash of choice is delicata. A well-ripened one will taste candied when roasted, but not cloying. A moderate-sized one (just under a pound) yields the perfect amount of puree needed to make these doughnuts. Expect about one cup of puree per pound of squash. Sure it’s an extra step of preparation to roast and puree a whole squash instead of mindlessly opening a can of solid packed pumpkin. But branch out a little in your “from scratch” abilities. Try a new flavor. Learn how to circumvent a pumpkin shortage, if the need again arises. Avoid the fallout from what BPA-lined cans might leech into your food. I'll stop. I think you get the point.

Farmer's Market photo by Sarijk.

The October 2010 Daring Bakers challenge was hosted by Lori of Butter Me Up. Lori chose to challenge DBers to make doughnuts. She used several sources for her recipes including Alton Brown, Nancy Silverton, Kate Neumann and Epicurious.

Delicata Squash & Toasted Fennel Seed Doughnuts
makes about 20 doughnut rings plus 20 doughnut holes

Pre-preparation of squash puree and fennel seeds:
1 medium delicata squash (about 12 oz or 350 grams)
1 TBS fennel seeds

Preheat oven to 350° F. Slice the squash in half lengthwise and use a spoon to scoop out the seeds. Roast the halves, cut side down, in a baking dish filled with enough water to come a ½-inch up the sides of the squash. Cook until ultra tender when pierced by a fork, 25-30 minutes.

When sufficiently tender, remove squash from oven and allow to rest until cool enough to handle. Scrape the flesh away from the skin and tranfser to the food processor. Puree until extremely smooth, like baby food. Transfer to a mesh sieve set over a bowl and strain for several hours to remove excess liquid.

Meanwhile, place the fennel seeds in a dry skillet set over medium heat. Toast the seeds for about a minute or two. Tossing the seeds often. When they have turned a few shades darker and begin to smell fragrant, remove from heat and transfer to a spice/coffee grinder. Grind the toasted fennel seeds to a fine powder.

To make the doughnuts:
3 cups (375 grams) all purpose flour
scant ½ cup (55 grams) hazelnut flour
10 grams baking powder
8 grams baking soda
1 tsp cinnamon
1½ tsp freshly ground toasted fennel seed
⅛ tsp ground cloves
10 grams salt
½ cup (110 grams) delicata squash puree
¼ cup (60 grams) whole milk at room temperature
2 TBS (40 grams) sour cream at room temperature
scant ½ cup (100 grams) sugar
2 eggs at room temperature
4 TBS (60 grams) butter, melted

Canola oil, for frying
2 cups (400 grams) sugar
2 tsp freshly ground toasted fennel seed
1 tsp ground cinnamon

In a large bowl whisk together the flour, hazelnut flour, baking powder, baking soda, cinnamon, ground fennel seed, cloves, and salt.

In a separate bowl, mix the squash puree, milk, sour cream, sugar, eggs, and melted butter. Add this wet mixture to the dry ingredients and fold until it starts to come together. Knead lightly with your hands until a cohesive mass forms.

Dust your work surface with a bit of flour and turn out the dough on to this. Dust your hands and the top of the dough mound lightly with flour. Shape and pat the dough gently down into a circle about ½-inch thick. Using a doughnut cutter or two graduated-sized, round cookie cutters, cut out the doughnuts and place them on a sheet pan lined with parchment and dusted with flour.

To fry the doughnuts, fill a pan up to 2" of canola oil. Heat the oil until it reaches 375° F. Do not over-crowd the pan with doughnuts. Fry about 3 at a time (depending on the size of the pan). They will sink to the bottom but then float to the top. Turn them over and let them cook for an additional minute or so.

Drain them on paper towels and while hot, toss them in the cinnamon-fennel seed sugar.

These are best eaten the day they are made, but will last a day or more, loosely covered at room temperature.

Friday, October 15, 2010

Tea-Cured Salmon

I often contribute recipes to the blog of my friends' tea company, Arbor Teas. Here is the latest recipe I developed using a few of their teas.

Last time I was in DC, I made a point to dine at Teaism. If you're not familiar, it's a restaurant and tea shop that offers simple tea cuisine, including Japanese bento boxes, Thai curries and Indian tandoor breads. I ordered a bento box. It provided all of the ingredients necessary to makeshift handroll sushi. Tea-cured salmon was the star of the kit.

Tea-curing was a new concept for me. Something I just had to try for myself when I got back to my kitchen. If you think logistically, it's basically a variation on gravadlax, but with tea leaves instead of dill. Just imagine the flavor potential tea offers! I tried three very different organic loose leaf teas from Arbor Teas collection: a smokey lapsang souchong black tea, a fragrant jasmine green tea, and a citrusy schizandra berry white tea. Samples were offered at a brunch that centered around the task of making homemade bagels. Surprisingly, jasmine yielded the most predominant flavor, and was preferred by all who sampled. The lapsang souchong gave a more traditional lox-like option. For something light and different, schizandra berries, found in Arbor Teas' newest organic loose leaf tea, lent a hint of tangerine.

Though salmon is most common, this method of curing can be applied to any fatty fish. This recent article in the LA Times has plenty of suggestions and champions the return of this ancient form of food preservation. One day, I'd like to try similar methods with pork belly to make bacon, though I get the impression it may be a bit more complicated... If you get to it before me, let me know how it turns out!


Tea-Cured Salmon

1 pound salmon filet, deboned with skin on
1 cup loose leaf tea
½ cup turbinado sugar (granulated will work too)
½ cup kosher salt or flakey sea salt

Mix the tea, salt and sugar in a small bowl. Line a large, non-reactive casserole dish or baking pan with plastic wrap. Pat the salmon filet dry and lay it skin-side down in the pan. Sprinkle the tea-salt-sugar cure mix over the salmon and coat evenly. Fold the edges of the plastic wrap over the salmon (somewhat like a present) to wrap tightly. Use something heavy - about 5-10 pounds - to weigh the salmon down. Refrigerate for 3 days. You must allow up to three days for curing. Remove the salmon from the refrigerator and use cold water to rinse off the cure mixture. Pat the salmon dry with paper towels, then place skin side-down on a cutting board. With a sharp knife, slice the salmon diagonally off the skin. The sliced salmon will keep for about a week in the refrigerator. Layer the slices on sheets of wax paper and store wrapped in plastic.

Friday, March 26, 2010

Tea-Infused, Cultured Yogurt

I often contribute recipes to the blog of my friends' tea company, Arbor Teas. Here is the latest recipe I developed using one of their teas.

Commercially available yogurts are usually heavily sweetened, sometimes artificially colored, and often excessively priced. Making your own is economical and a good way to avoid highly processed sugar, while providing boundless options to be creative with flavors. Lately, I’ve been perusing Arbor Teas' line of organic loose leaf herbal and rooibos teas for inspiration in my yogurt making. Flavors I’ve made so far include Crimson Berry Fruit Tisane (my hands-down absolute favorite), Orange Spice Herbal Infusion (with notes of lemongrass, cinnamon and ginger), and Vanilla Almond Rooibos (pictured to the left). Albeit tart, yogurt provides an impeccably blank canvas for the flavor of even the most delicate tea to stand out resoundingly.

Using a yogurt maker* undeniably streamlines the entire process, making things easier by automatically maintaining the proper incubation temperature. However, if you are like me and don’t own an automatic yogurt machine, then follow the steps I’ve outlined below. As with most things, your first batch is always the hardest, but once you get the method down, it feels like such an accomplishment to be able to create this healthy staple in your own kitchen. Tea-flavored yogurt has yet hit the supermarket shelves. Why not impress your friends with something completely unique and entirely wholesome?

DIY Tea-Flavored Yogurt
(makes 1 quart)

1 quart (4 cups) milk (any kind will work including whole milk, 2%, 1%, skim, soy, etc)
2 TBS existing yogurt with live “active” cultures or powdered yogurt starter (freeze-dried bacteria cultures)
3-4 TBS organic loose leaf tea

* If you are using a yogurt maker, follow the instructions from the manufacturer. Incorporate the sachet of tea as described below during the heating and cooling of the milk. Remove the sachet before adding your starter/culture.

Warm the starter. Let the starter yogurt sit at room temperature while you are waiting for the milk to heat and then cool. This will prevent it from being too cold when ready to add it in.

Pack loose tea in sachet. Add 3-4 tablespoons of loose leaf tea to a disposable filter and tie off with kitchen twine. Allow this sachet to float in the milk during the next two steps of heating and cooling.

Heat milk to 185° F. Using two pots that fit inside one another, create a double boiler or water jacket effect by filling the outer pot with water up to the level surface of the milk in the inner pot. This will prevent your milk from burning, and you should only have to stir it occasionally to prevent a skin from forming on the surface. If you cannot do this, and must heat the milk directly on the burner, be sure to monitor it constantly, stirring all the while. If you do not have a thermometer, 185° F is the temperature at which milk starts to froth. This should take 25-30 minutes.

Cool the milk to 110° F. The best way to achieve this is with a cold water bath, such as a kitchen sink filled with ice water. This will quickly (~4-minutes), and evenly, lower the temperature, and requires only occasional stirring. If cooling at room temperature or in the refrigerator, you must stir more frequently. Don't proceed until the milk is below 120° F, and don't allow it to go below 90° F. 110° F is optimal.

Add the starter. Remove the tea sachet and add 2 tablespoons of the existing yogurt, such as store-bought plain yogurt. Be certain it says "active cultures" on the label. Alternatively, instead of existing yogurt you can use freeze-dried bacteria cultures, which are often more reliable.

Put the mixture in containers. Pour your milk into a clean container and cover tightly with a lid.


Allow the yogurt bacteria to incubate. Keep the yogurt warm and still to encourage bacteria growth, while keeping the temperature as close to 100° F as possible. The best way to do this is to carefully pour the steaming water from the double boiler into an insulated cooler. Allow the water temperature to cool down to around 100° F before adding the container of yogurt. I use a mason jar lying on its side to prop the yogurt container above the water level.

Keep the cooler tightly shut and refrain from disturbing during the entire incubation process. Keeping the yogurt still is important to allow the culture to develop properly. Other options include placing atop a heating pad or in an oven with a pilot light. If your oven doesn't have a pilot light but does have an oven light, preheating the oven to the desired temperature, turning it off, and then leaving the oven light on to maintain the temperature may work for you. Another method is to turn your oven on and then off again periodically, being vigilant that it doesn't get too hot. To check the oven temperature, you can set a candy thermometer in a bowl of water inside the oven. Other methods for keeping the yogurt warm include: hot water in a sink, a stove burner, a crock-pot, or a warming tray.

Just use your thermometer, trial and error, and best judgment. Maintaining the proper incubation temperature is key to successful yogurt culturing. Admittedly, in a chilly winter home, I’ve had little success with most of the above techniques, except for the cooler method.

After eight or more hours incubation, you will have a custard-like, curdled texture, a sour, fermented odor, and a separation of whey (a thin yellow liquid) on top. This is exactly what you want. The longer you let it incubate, the thicker and tangier the yogurt will become.

Refrigerate the yogurt. Place the yogurt in the fridge for several hours before serving. I prefer a thicker texture akin to greek or skyr-style yogurt, so will strain the whey from a fresh batch. This can be achieved by using a specific canister designed to make yogurt cheese or by using a sieve, lined with several layers of cheesecloth, set over a bowl. Fresh yogurt will keep for 1-2 weeks. If you plan to use some of it as starter for your next yogurt making session, use it within 5-7 days, while the bacteria is most potent. If not strained, whey will rise to the surface. You can pour this off or stir it in before eating. Whey contains healthful nutrients. A decision to discard it completely should not be taken lightly.