custom cakes/cookies

Showing posts with label citrus. Show all posts

Friday, May 6, 2011

Citrus and Tea Cream Pie

I often contribute recipes to the blog of my friends' tea company, Arbor Teas. Here is the latest recipe I shared using a few of their teas.

Hurry! Before Meyer lemons are out of season, go make this pie! Or don't. Just wait for the right occasion and be inspired by what citrus is in abundance at that time. The original inspiration for this recipe came from Martha Stewart as a chamomile version of lemon meringue pie in a homey cornmeal crust. All of these elements, the mellow chamomile flowers, the zesty lemon, the pillowy marshmallow meringue, and the crunchy cornmeal work together in a wonderful, satisfying combination. But with the variety of organic loose-leaf teas available from Arbor Teas, why stop there? You could alter the recipe into a summery mojito rendition by subbing in lime for lemon and organic moroccan mint green tea for chamomile, all atop a buttery shortbread crust. Organic jasmine green tea and grapefruit (or those giant pumelos) would make a sophisticated, perfumed dessert. Tangerine and organic schizandra white tea, orange and organic earl grey black tea, or even blood orange and organic holiday spice black tea are a few more pairings I brainstormed to go with your favorite graham cracker, gingersnap, or chocolate cookie crust. Here is the original lemon-chamomile recipe. Let me know what combinations you dream up!

Citrus and Tea Cream Pie
adapted from Martha Stewart

Cornmeal Pie Dough
1½ cups all-purpose flour
¾ cup medium-ground yellow cornmeal
¾ teaspoon salt
¾ teaspoon sugar
12 tablespoons cold unsalted butter, cut into small pieces
¼ cup ice water

Lemon-Chamomile Cream Filling
3 cups whole milk
3-4 tablespoons loose organic chamomile (or whatever other tea flavor strikes your fancy)
¼ cup cornstarch
1 cup sugar
¼ teaspoon salt
4 large egg yolks
1½ teaspoons finely grated lemon zest (or other citrus zest)
¼ cup fresh-squeezed lemon juice (or other fresh citrus juice)
4 tablespoons unsalted butter, softened

Meringue
4 large egg whites
1 cup plus 2 tablespoons sugar
½ teaspoon pure vanilla extract
¼ teaspoon cream of tartar
a pinch of salt

To make the Cornmeal Crust:
Pulse flour, cornmeal, salt, and sugar in a food processor to combine. Add butter, and process briefly until mixture resembles coarse meal. With the machine running, slowly add ice water until dough just begins to hold together.

Shape dough into a disk, wrap in plastic, and refrigerate until firm, at least 1 hour.

Roll cornmeal dough to ⅛-inch thickness on a lightly floured surface. Ease the dough into a 9-inch pie dish and trim the edges, leaving a 1-inch overhang. Tuck overhang under dough so edges are flush with rim and crimp edges. Prick the bottom of dough with a fork in several spots and chill for 30 minutes.

Preheat oven to 375° F. Line dough with parchment and fill with pie weights or dried beans. Bake until edges begin to turn golden, about 15 to 18 minutes. Lift up the parchment to remove the pie weights. Continue to bake, uncovered until the crust is golden brown, 12 to 15 minutes more. Let cool completely before adding the cream filling.

To make the Cream Filling:
When ready to make the filling, bring milk to a boil in a medium saucepan. Remove from heat, add the loose leaf tea directly to the hot milk, cover, and steep for 5 minutes. Strain the milk through a fine sieve into a bowl, pressing on the spent tea leaves with a spatula to extract as much liquid as possible. Discard tea.

Combine cornstarch, sugar, and ¼ teaspoon salt in a medium saucepan. Whisk in the tea-infused milk. Turn heat to medium-high and cook, stirring constantly, until bubbling and thickly coats the spatula. This should take about 7 minutes total (about 2 minutes after it comes to a boil).

Whisk yolks in a separate bowl, then pour in the milk mixture into the yolks in a slow, steady stream, whisking until thoroughly incorporated. Return the mixture to the saucepan. Cook over medium heat, stirring constantly, until it returns to a boil, 1 to 2 minutes more.

Remove from the custard from heat, and stir in lemon zest and juice. Add butter, 1 tablespoon at a time, stirring until butter melts before adding the next piece. Let cool in the saucepan off heat, whisking occasionally, for about 10 minutes.

Pour custard into the prepared crust. Press plastic wrap directly on surface of custard, taking care to smooth out any wrinkles as these will appear on the finished pie as it firms. Refrigerate at least 4 hours (or overnight) so that the custard filling is chilled and firm.

To make the Meringue:
Just before serving, combine egg whites and sugar in a heat-proof mixing bowl set over a saucepan of simmering water. Whisk until the sugar dissolves and the mixture is warm, about 3 minutes. Remove from heat and add vanilla, cream of tartar, and a pinch of salt. Transfer the bowl to the mixing stand and whisk on medium-high speed until shiny, stiff peaks form, about 7 minutes.

Pipe the meringue in dollops over the pie. If you’d like, toast the tips of the meringue with a culinary torch. Or, bake the meringue-topped pie briefly on a rimmed baking sheet under a broiler until lightly golden.

Serve immediately.

Sunday, February 27, 2011

Vanilla Panna Cotta with Kumquat Gelée

The first time I had panna cotta was this summer when in Norway. Expressly for the purpose of tasting reindeer carpaccio, I ate at a restaurant that claimed to have an authentic Norwegian menu. As a bonus for the total local experience, the dessert menu listed a panna cotta topped with cloudberries. Panna cotta, is by no means Nordic, but I was more interested in eating those cloudberries. The guide book made them sound rare and special. As a maker of jam I was intrigued. The name alone connotes loftiness!

The cloudberries, served as a pretty amber-colored glaze on top the panna cotta, were nice. Distictly tart. They made for a good pairing with the creamy panna cotta, resulting overall in a light and refreshing summer-y end to a meal.

For those that don't know, panna cotta is honey-sweetened cream and milk, stabilized with unflavored gelatin. Though cream-based, it's really only a fancy Jell-O of sorts, that's very simple to make. In my version here, I top it with a season-approapriate, citrusy and spiced kumquat gelée, which also has a jello-like consistency due to the addition of gelatin. With the free-floating fruit, it is perhaps somewhat reminiscent of the Jell-O salad ubiquitous at retro potlucks. But I'd like to believe this is a slightly more sophisticated version.

The February 2011 Daring Bakers’ challenge was hosted by Mallory from A Sofa in the Kitchen. She chose to challenge everyone to make Panna Cotta from a Giada De Laurentiis recipe and Nestle Florentine Cookies. I attempted the florentine cookies as well, but gave them all away before photos could be taken.

Giada's Vanilla Panna Cotta
serves 6

1 cup whole milk
1 TBS (one packet) unflavored powdered gelatin
3 cups whipping cream (30+% butterfat)
1/3 cup honey
1 TBS granulated sugar
pinch of salt

Pour the milk into a chilled sauce pan and sprinkle gelatin evenly and thinly over the milk. Let stand for 5 minutes to soften the gelatin.
Place the saucepan over medium heat on the stove. Heat this mixture until it is hot, but not boiling, about five minutes, whisking a few times as it heats.
Next, add the cream, honey, sugar, and pinch of salt. Making sure the mixture doesn't boil, continue to heat and stir occasionally until the sugar and honey have dissolved, 5-7 minutes.
Remove from heat, allow it to sit for a few minutes to cool slightly. Then pour into individual glasses or ramekins.

Refrigerate about 6 hours or until firm. When firm enough to support the gelée layer (see recipe below), pour the room temperature gelée over the panna cotta, distributing evenly among all the glasses. Room temperature is important so as not to melt the panna cotta, which would disturb the distinct separation of layers. Chill several more hours to allow the gel to set up firm.

Kumquat Gewurztraminer Gelée
from Jamie Stachowski, Restaurant Kolumbia

1 pint kumquats
1½ tsp powdered gelatin
1¼ cup Gewurztraminer wine, divided
½ cup sugar
½ cup honey
1 small knob peeled ginger root
1 star anise clove
zest of ½ a lemon
1½ tsp lemon juice
a pinch of salt

In a saucepan, cover the whole kumquats with water and bring to a boil. Reduce to simmer for 2 minutes, then drain. Repeat process twice until kumquats are very soft, don't worry if some begin to split. This process removes the bitterness. Slice into thin rounds and remove seeds. Set aside.

In a bowl, sprinkle the gelatin over ¼ cup wine. Set aside.

Set a pot over medium heat and mix the sugar with the honey. When the sugar dissolves, turn heat to low and add the ginger, anise clove, and lemon zest. Simmer for a few minutes until aromatic. Stir in the remaining cup of wine, then add sliced kumquats and simmer on low until the flesh is tender, about 5 to 7 minutes. Remove from heat. Take ¼ cup of syrup and whisk into gelatin/wine mixture, then stir the gelatin mixture back into pot of kumquats and syrup. Add the lemon juice and a pinch of salt. Stir to evenly distribute kumquats and whole spices. Cool until room temperature and then remove spices.

Sunday, January 30, 2011

Matcha-Hazelnut Sponge with Lemon Curd & Matcha Marzipan Flowers

The January 2011 Daring Bakers’ challenge was hosted by Astheroshe of the blog accro. She chose to challenge everyone to make a Biscuit Joconde Imprime to wrap around an Entremets dessert.

A joconde imprime (French Baking term) is a decorative design baked into a light sponge cake providing an elegant finish to desserts/torts/entremets/ formed in ring molds. A joconde batter is used because it bakes into a moist, flexible cake. The cake batter can be tinted or marbleized for a further decorative effect.

Entremets (another French baking term) is an ornate dessert with many different layers of cake and pastry creams in a mold, usually served cold, much like a trifle but molded to be free-standing versus layered in a glass bowl.

All seems intimidating, but if you work through the layers in stages, it's really not that big of deal. I sketched out a plan in advance. The idea for mine started with wanting to use up some "leftovers" in my "pastry" fridge. Believe it or not I had on hand fresh lemon curd (recently made to use up 8 extra yolks), homemade marzipan (a gift I was working on for my dad), matcha tea (from my good friends at Arbor Teas), hazelnut meal (a bag that seems perpetually full no matter how much has been scooped from it), and crystalized lilacs (maybe only a dozen left from the original batch of 200).

I wasn't sure if the flavors of the dessert I was crafting in my head would meld well, but I was excited for the vibrant colors--a bolt of the tropics smack in the middle of a snowy and frigid winter. Since this dessert needed to travel to a weekend brunch, I took the safe route and layered them in juice glasses like a trifle. A true entremet with joconde is free-standing. Nonetheless, now having tasted the finished dessert, I can say yes, green tea, lemon, hazelnut, almond, butter and sugar all seem to work nicely together to put a warm smile in your belly.

Joconde Sponge

This Joconde/spongecake requires attentive baking so that it remains flexible to easily conform to the molds. If under baked it will stick to the baking mat. It over baked it will dry out and crack. Once cooled, the sponge may be cut into strips to line any shape ring mold.

YIELD: Two ½ size sheet pans or a 13” x 18” jelly roll pan

Ingredients:
3 large egg whites (90g)
2½ teaspoons (10g) white granulated sugar
¾ cup (85g) almond flour/or hazelnut meal - *omit the butter if using hazelnut
½ cup plus 2 tablespoons (75g) confectioners' sugar
¼ cup (25g) cake flour
3 large eggs (150g)
2 tablespoons (30g) unsalted butter, melted

Directions:

In a clean mixing bowl whip the egg whites and white granulated sugar to firm, glossy peeks. Reserve in a separate clean bowl to use later.

Sift almond flour, confectioner’s sugar, cake flour into the just emptied mixing bowl, no need to wash out egg whites.) On medium speed with the paddle attachment, add the eggs a little at a time. Mix well after each addition. Mix until smooth and light.

Fold in one third reserved whipped egg whites to almond mixture to lighten the batter. Fold in remaining whipped egg whites. Do not over mix. Fold in melted butter, if using.

Reserve batter to be used later.

Patterned Joconde-Décor Paste

YIELD: Two ½ size sheet pans or a 13” x 18” jelly roll pan

Ingredients:
14 tablespoons (200g) unsalted butter, softened
1½ cups plus 1½ tablespoons (200g) Confectioners' sugar
7 large egg whites (200g)
1¾ cup (220g) cake flour

Food coloring gel, paste or liquid (optional)

COCOA or MATCHA Décor Paste Variation: Reduce cake flour to (170g). Add (60 g) cocoa powder or Matcha green tea. Sift the flour and cocoa powder together before adding to creamed mixture.

Directions:

Cream butter and sugar until light and fluffy. Gradually add egg whites. Beat continuously until emulsified. Fold in sifted flour. Tint batter with coloring to desired color, if not making cocoa or matcha variation.

Preparing the Joconde- How to make the pattern:

Spread a thin even layer of décor paste approximately 1/4 inch thick onto silicone baking mat with a spatula, or flat knife. Place mat on an upside down baking sheet. The upside down sheet makes spreading easier with no lip from the pan.

Pattern the décor paste – Here is where you can be creative. Make horizontal /vertical lines (you can use a knife, spatula, cake/pastry comb). Squiggles with your fingers, zig zags, wood grains. Be creative whatever you have at home to make a design can be used. OR use a piping bag. Pipe letters, or polka dots, or a piped design. If you do not have a piping bag. Fill a ziplock bag and snip off corner for a homemade version of one.

Slide the baking sheet with paste into the freezer. Freeze hard. Approx 15 minutes.


Remove from freezer. Quickly pour the Joconde batter over the design. Spread evenly to completely cover the pattern of the Décor paste.

Bake at 475ºF until the joconde bounces back when slightly pressed, approx. 8-15 minutes. You can bake it as is on the upside down pan. This is a very quick bake, so watch carefully.

Cool briefly. Do not leave too long, or you will have difficulty removing it from mat.

Flip cooled cake on to a powdered sugared parchment paper. Remove silpat. Cake should be right side up, and pattern showing! (The powdered sugar helps the cake from sticking when cutting.)

Preparing the Jaconde for Molding:

Trim the cake of any dark crispy edges. You should have a nice rectangle shape.

Decide how thick you want your “Joconde wrapper”. Traditionally, it is ½ the height of your mold. This is done so more layers of the plated dessert can be shown. However, you can make it the full height.

Once your height is measured, then you can cut the cake into equal strips, of height and length. (Use a very sharp paring knife and ruler.)

Make sure your strips are cut cleanly and ends are cut perfectly straight. Press the cake strips inside of the mold, decorative side facing out. Once wrapped inside the mold, overlap your ends slightly. You want your Joconde to fit very tightly pressed up to the sides of the mold. Then gently push and press the ends to meet together to make a seamless cake. The cake is very flexible so you can push it into place. You can use more than one piece to “wrap" your mold, if one cut piece is not long enough.

The mold is done, and ready to fill.

Entremet- Filling:

Lemon Curd
makes 1 full cup

4 large egg yolks
1/2 cup plus 2 TBS sugar
3 fl oz freshly squeezed lemon juice
4 TBS, unsalted butter softened
pinch of salt
2 tsp finely shredded lemon zest

In a heavy, non-corrosive saucepan whisk the yolks and sugar until well blended. Stir in the remaining ingredients except the lemon zest. Cook over medium-low heat, stirring constantly, until thickened and thickly coats the back of a wooden spoon and reaches 170 F. Do not allow it to boil or it will curdle. Pour immediately through a fine mesh strainer, pressing on any remains with the back of a spoon to extract as much curd as possible. Stir in the lemon zest and cool. Pour into an airtight container and press a piece of plastic to the surface of the curd before sealing. The curd will continue to thicken when refrigerated.

Matcha Marzipan

1 tsp matcha powder
6 TBS marzipan

On a wooden surface, knead matcha into Marzipan until completely incorporated. Roll out to desired thickness to cut shapes or sculpt into character. Keep tightly wrapped in plastic until ready to use, to prevent drying out.

Monday, December 27, 2010

Christmas Wreath Stollen

I told a few people I was making stollen. Their first response: "Have you ever had fill-in-the-blank's stollen?!!" Me: "Um, no. I didn't think I liked stollen, and so-and-so's is kinda pricey. I'm just making it for my baking challenge. I figured I'd send it to my Ome."

I didn't realize so many places in town sold it or that it had a bit of an exuberant following. The adult me was relying on the kid me's experiences of not liking the sorta dry and strangely fruity, rum-scented bread. I wasn't that excited to make it, so I was looking at this as an opportunity to hone my bread making skills, which need some work.

Since I've moved, getting yeasted doughs to rise has been a challenge. I was wanting more recipes to troubleshoot warm, non-drafty proofing zones, to figure out if my stash of instant yeast I've been storing in my fridge for several years was still viable, and to learn the cues of achieving a springy, well-kneaded dough.

To my relief this bread came together perfectly thanks to thorough directions, finding an ideal proofing spot in my oven, and using brand new packet yeast instead of the old instant stuff. I'm still learning the trick of kneading and adding appropriate amounts of flour so things don't stick to my hands. Right now, I still rely on my stand mixer and dough hook to do the messy, hard work. But success with this has given me a little more confidence to try more bread projects.

In my opinion this stollen is best eaten within a day or so that it is made. But I suppose it would still be good toasted several days after. Mine didn't last long enough to find out... After eating two good-sized portions on my own, I sectioned off the rest and packaged them to give as gifts to neighbors, coworkers and family. It was studded with Grand Marnier-soaked cherries and candied blood orange peels and limequats. Yes, limequats! Apparently kumquats are being hybridized with other fruits. My grocer had already sold out of mandarinquats. I'm hoping they'll be restocked soon. I think a medley of kumquat hybrids would make a lovely marmalade!

The 2010 December Daring Bakers’ challenge was hosted by Penny of Sweet Sadie’s Baking. She chose to challenge Daring Bakers’ to make Stollen. She adapted a friend’s family recipe and combined it with information from friends, techniques from Peter Reinhart’s book.........and Martha Stewart’s


Stollen Wreath

Makes one large wreath or two traditional shaped Stollen loaves. Serves 10-12 people

¼ cup lukewarm water (110º F)
2 packages active dry yeast
1 cup milk
10 TBS unsalted butter
5½ cups (770 grams) all-purpose flour
½ cup (115 gms) sugar
¾ tsp kosher salt
1 tsp cinnamon
3 large eggs, lightly beaten
Grated zest of 1 lemon and 1 orange
2 tsp vanilla extract
1 tsp rum extract
¾ cup mixed candied citrus peel (here's a link to make your own) I used blood oranges and limequats this time
1 cup firmly packed unsweetened dried cherries
3 TBS Grand Marnier
1 cup flaked almonds
Melted unsalted butter for coating the wreath
Confectioners’ sugar for dusting wreath

Directions:
In a small bowl, soak the cherries in the Grand Marnier and set aside.

To make the dough:
Pour ¼ cup warm water into a small bowl, sprinkle with yeast and let stand 5 minutes. Stir to dissolve yeast completely.

In a small saucepan, combine 1 cup milk and 10 tablespoons butter over medium - low heat until butter is melted. Let stand until lukewarm, about 5 minutes.

Lightly beat eggs in a small bowl and add the vanilla and rum extracts.

In a large mixing bowl, stir together the flour, sugar, salt, cinnamon, orange and lemon zests.

Then stir in the yeast/water mixture, eggs and the lukewarm milk/butter mixture. This should take about 2 minutes. It should be a soft, but not sticky ball. When the dough comes together, cover the bowl with either plastic or a tea cloth and let rest for 10 minutes.

Add in the candied citrus peel, soaked cherries and almonds and mix with your hands or on low speed in the stand mixer to incorporate.

Sprinkle flour on the counter, transfer the dough to the counter, and begin kneading (or mixing with the dough hook) to distribute the fruit evenly, adding additional flour if needed. The dough should be soft and satiny, tacky but not sticky. Knead for approximately 8 minutes (6 minutes by machine). The full six minutes of kneading is needed to distribute the dried fruit and other ingredients and to make the dough have a reasonable bread-dough consistency. You can tell when the dough is kneaded enough – a few cherries will start to fall off the dough onto the counter because at the beginning of the kneading process the dough is very sticky and the cherries will be held into the dough but when the dough is done it is tacky which isn't enough to bind the outside cherries onto the dough ball.

Lightly oil a large bowl and transfer the dough to the bowl, rolling around to coat it with the oil. Cover the bowl with plastic wrap. Put it in the fridge overnight. The dough becomes very firm in the fridge (since the butter goes firm) but it does rise slowly. The raw dough can be kept in the refrigerator up to a week and then baked on the day you want.

Shaping the dough and baking the wreath:
Let the dough rest for 2 hours after taking out of the fridge in order to warm slightly. Line a sheet pan with parchment paper.

Punch dough down, roll into a rectangle about 16 x 24 inches and ¼-inch thick. Starting with a long side, roll up tightly, forming a long, thin cylinder.

Transfer the cylinder roll to the sheet pan. Join the ends together, trying to overlap the layers to make the seam stronger and pinch with your fingers to make it stick, forming a large circle. You can form it around a bowl to keep the shape.

Using kitchen scissors, make cuts along outside of circle, in 2-inch intervals, cutting 2/3 of the way through the dough. Twist each segment outward, forming a wreath shape. Mist the dough with spray oil and cover loosely with plastic wrap. Proof for approximately 2 hours at room temperature, or until about 1½ times its original size.

Preheat oven to 350°F with the oven rack on the middle shelf. Bake the stollen for 20 minutes, then rotate the pan 180 degrees for even baking and continue to bake for 20 to 30 minutes. The bread will bake to a dark mahogany color, should register 190°F in the center of the loaf, and should sound hollow when thumped on the bottom.

Transfer to a cooling rack and brush the top with melted butter while still hot. Immediately tap a layer of powdered sugar over the top through a sieve or sifter. Wait for 1 minute, then repeat with another layer of butter and sifted sugar over the first. Wait a minute and then coat with butter and sugar for a final time. The bread should be coated generously with the powdered sugar.

Let cool at least an hour before serving. When completely cool, store in a plastic bag. Or leave it out uncovered overnight to dry out slightly, German style.

The stollen tastes even better in a couple of days and it toasts superbly.

Storage
The more rum and the more coatings of butter and sugar you use the longer it will store. Stollen freezes beautifully about 4 months, stores well for 2 weeks covered in foil and plastic wrap on the counter at room temperature, or for one month in the refrigerator well covered with foil and plastic wrap.

Wednesday, November 10, 2010

"Mornin' Mash is the Truth!"


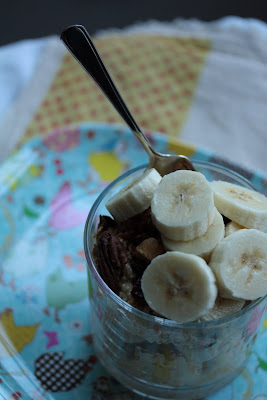
Those words were chatted to me enthusiastically after sharing my new go-to breakfast with my workplace BFF. He was referring to what most of Europe (and beyond) might call Bircher Müesli: a "mash up" of raw oats and raisins softened and plumped by a long soak in citrus juices and/or yogurt (or some other type of dairy), then embellished with endless combinations of fruits, nuts, and natural sweeteners. Absolutely refreshing and perfectly filling (in an appetite-curbing, good way), this is first-meal-of-the-day virtue at its humblest. It resembles a sort of cold oatmeal or soft, chewy granola, but with way, WAY better texture and flavor! I like to mix in mashed banana or homemade jam or applesauce to give it a bit of sweetness. I added mashed pawpaw fruit when that was in season! Pumpkin butter or apple butter or my pear butter would be a nice seasonal choice also. A jar of homemade granola always sits on my kitchen counter, so I sprinkle on a bit of that too for added crunch. If you don't eat breakfast in the car while driving to work like I do each morning, a drizzle of honey would be an excellent touch. I should also mention this is a great make ahead deal that with minimal advanced prep work should see you through a week's worth of breakfasts, helping you get out the door just a wee bit faster. Varying your toppings should keep you from getting bored.

I was introduced to Bircher Müesli several years ago at a hotel breakfast bar in Sydney and was happy to find it again when I traveled this summer to Hamburg and Oslo. European hotels' complimentary breakfasts (even the budget-friendly ones) knock the socks off of what's considered a "continental breakfast" in the States. Across the pond you will find generous spreads with much more healthy, non-processed options. Since returning home, I found a recipe in my Gourmet Magazine cookbook that I've been tweaking here and there and was eager to post my variations. Then David Lebovitz beat me to the punch with a post on Bircher Müesli last week! With that, I almost wasn't going to post my recipe, but then I thought twice. Perhaps ::shudder:: you don't know of his blog or have never heard of this recipe or of Maximilian Bircher-Benner, the Swiss equivalent of the Michigan health-enthusiast/inventor of corn flakes, John Harvey Kellogg. Everyone deserves a little morning goodness. I'm happy to do my part!


Bircher Müesli
makes 16 cups; serves 8-10

1 lemon
1 juicing orange
1 grapefruit
1½ cups steel cut oats (Irish oats)
3 cups old fashioned rolled oats
⅔ cup raisins
1 quart whole milk, plain yogurt

Toppings and Mix-ins:
sliced or mashed banana
granola
coarsely grated apples
toasted nuts
fresh berries
honey
etc...

Finely grate zest from lemon and orange. Squeeze juice from all of the fruits to obtain about 1½ - 2 cups of citrus juice. Combine the zest, juice, oats, raisins, and yogurt in a large re-sealable container. Stir until thoroughly mixed. Refrigerate covered for at least eight hours to allow the oats to soften.

When hungry, portion out servings into individual bowls and top as desired.

Bircher Müesli will keep for about a week, covered tightly and refrigerated.


Saturday, July 17, 2010

Fruit Curd Popsicles


Recently, I sensed a trend in the artisanal popsicle. Recipes and photo spreads are "pop"ping up in food magazines and blog posts, and a variety of molds are out on the market boasting nostalgia, fun shapes, or no-mess features. Also, there's these people of whom I'm completely in awe.


You don't need me to tell you that it's been a pretty hot summer and that the trend of DIY endures. I so entirely relate and was ready to jump on that bandwagon. My first vision of frozen relief: multiple, vibrant stripes of fruit curd. Tart, refreshing, and a gorgeous gradation of color. That's the concept I was after.


Making interesting fruit curds strongly rivals my interest in jam making. Freezing them in popsicle format just seemed like a logical next step. The flavors of this batch, layered from top to bottom/ lightest to darkest, include: lemon-buttermilk sherbet, gooseberry curd, raspberry curd, and black currant curd. See below for the recipes.


Not ready to invest in popsicle molds? Try the tricks outlined here.

And for fun, read the brief history of the popsicle. Learn how they got their name...


THE RECIPES:

Lemon Buttermilk Sherbet

from David Lebovitz's "The Perfect Scoop"

makes about a quart

⅓ cup water water
⅔ cup sugar
Zest of 1 lemon
2 cups buttermilk
¼ cup lemon juice

In a saucepan, bring the first three ingredients to a boil. Remove from heat, transfer to a bowl and refrigerate until thoroughly chilled. Once it has chilled, add the buttermilk and lemon juice and churn in your ice cream machine.


Gooseberry Curd
makes about 2 cups

1 pint pink gooseberries, rinsed
2 TBS water
½ cup sugar
2 TBS unsalted butter
2 large eggs
1 large egg yolk

Place the gooseberries and the water in a non-corroding saucepan. Cover and cook on a low-medium heat, stirring occasionally for 20 minutes or until the gooseberries are mushy. Pass the gooseberries through a food mill to produce about 1¼ cups puree. Stir the sugar and butter into the warm puree and heat, stirring constantly. Whisk the eggs and the egg yolk just until mixed, then whisk in a little of the hot gooseberry mixture to heat the eggs. Return to the pan and cook over low heat, stirring constantly, until the mixture is well thickened and has reached 170° F. Pour into a container, cover and chill.*


Raspberry Curd
from Tea and Cookies

makes about 3½ cups

12-oz fresh raspberries

1 cup sugar
4 large eggs

4 TBS fresh lemon juice

4 TBS unsalted butter (½ stick)

¼ tsp salt


In a medium saucepan, add the raspberries, sugar, lemon juice, butter, and salt. Heat on medium and, as the butter begins to melt and the raspberries break down, start whisking. Cook on medium heat until the mixture is uniform and the fruit has softened.

In a separate bowl, whisk the eggs. Stirring continually, slowly add ½ cup of the fruit mixture to the eggs. Mix to incorporate.

While whisking continually, slowly add the eggs back into the raspberry mixture. Stir constantly as the mixture heats and thickens slightly. Don’t let the mixture come to a boil, but small bubbles around the edges are okay.

Taste and add more sugar if desired.

Place a mesh strainer over a large bowl. Pour half the raspberry mixture into the strainer and, using a spatula or spoon, press the solids into the mesh. When all the raspberry curd has been expressed, discard the solids and strain the second half of the mixture.
Refrigerate the curd until use.*


Black Currant Curd
makes about 2 cups

1 pint black currants, rinsed
2 TBS water
½ cup sugar
2 TBS unsalted butter
2 large eggs
1 large egg yolk

Place the black currants and the water in a non-corroding saucepan. Cover and cook on a low-medium heat, stirring occasionally for 20 minutes or until the currants are mushy. Pass the currants through a food mill to produce about 1¼ cups puree. Stir the sugar and butter into the warm puree and heat, stirring constantly. Whisk the eggs and the egg yolk just until mixed, then whisk in a little of the hot currant mixture to heat the eggs. Return to the pan and cook over low heat, stirring constantly, until the mixture is well thickened and has reached 170° F. Pour into a container, cover and chill.*


*Curds can be stored about a week in the refrigerator, frozen for several months, or canned,
processing in
a hot water bath for about 15 minutes.

Saturday, March 27, 2010

Orange Tian, Nostalgia

It may take a good long meandering to get where you're going, but there are some things in life that are fairly, intrinsically evident from the very beginning. Let me explain...

When I was a kid, growing up in Florida, our yard was pretty fantastically prolific with a lemon tree, 2 grapefruit trees (one pink and one white), 3 orange trees (of various types), 2 tangerine trees, and an avocado tree. Playing outside meant climbing the trees and picking the fruit to snack on at whim. When the little neighbor boys came over, my sister and I would set up "house" under the branches of a particular orange tree. Interestingly, now that I think back on our pretend roles, I was never the "wife" or the "mother" or the "child". Instead, I was the "cook". (That's me in the picture below.) And, oh boy, (with all that citrus at my little finger tips) did I come up with some creative "meals"! The thing I remember making the most, my specialty if you will, was tangerine pie.

The recipe was simple really: take one frisbee, fill with dirt, then level off the surface; next peel several tangerines, separating the segments and arrange each segment with care atop the dirt; serve immediately to hungry playmates. Every time I made it, I would arrange the tangerine pieces in a different pattern. I bet in one play session alone I must have consumed 4-5 tangerines on my own, clinging dirt included. Tangerines tasted so much better back then... Although, I'm doubting the extra "minerals" had anything to do with their incredibly sweet juiciness.

When this month's baking challenge popped on my horizon, I was instantly taken back to my days of tangerine pie making. We were challenged to make an orange tian. The dessert is made of different layers: a pâte sablée (a shortbread crust) with orange marmalade, a flavored whipped cream topped with fresh orange segments, and served with a caramel and orange sauce.

You build the dessert upside down and then unmold it so that the bottom layer (the orange segments) becomes the top layer. Admittedly, the tian is much fancier of an approach than my frisbee method, but the fanned-out orange segments look so amusingly similar. As a tribute to my childhood, I substituted a chocolate pâte sablée crust to approximate the dirt layer, and I posed the finished tian in a frisbee I borrowed from a friend. Doesn't quite taste the same as I remember when I was a kid, but that's alright by me. This "new" method has a grown-up appeal all its own.

The 2010 March Daring Baker’s challenge was hosted by Jennifer of Chocolate Shavings. She chose Orange Tian as the challenge for this month, a dessert based on a recipe from Alain Ducasse’s Cooking School in Paris.


ORANGE TIAN RECIPE

Chocolate Pâte Sablée

2 medium-sized egg yolks at room temperature
6 TBS + 1 tsp granulated sugar
½ teaspoon vanilla extract
7 TBS unsalted butter, cubed and frozen
⅓ teaspoon salt
1¼ cups all-purpose flour
¼ cup + 2 TBS cocoa powder
1 tsp baking powder

Put the flour, cocoa powder, baking powder, ice cold cubed butter and salt in a food processor fitted with a steel blade. Pulse briefly to combine.
In a separate bowl, add the eggs yolks, vanilla extract and sugar and beat with a whisk until the mixture is pale. Pour the egg mixture in the food processor.
Process until the dough just comes together. If you find that the dough is still a little too crumbly to come together, add a couple drops of water and process again to form a homogenous ball of dough. Form into a disc, cover with plastic wrap and leave to rest in the fridge for 30 minutes.

Preheat your oven to 350° F. Roll out the dough onto a lightly floured surface until you obtain a ¼-inch thick circle. Using your cookie cutter, cut out circles of dough and place on a parchment (or silicone) lined baking sheet. Bake for 20 minutes.

Citrus Melange Marmalade
makes 1½ pints

Juice and flesh from 2 oranges

10 thinly sliced kumquats (discard ends)

Juice and flesh from 1 large grapefruit

Juice and flesh from 2 Meyer lemons

2¾ cups sugar

½ cup water

Remove rind from all fruit with a vegetable peeler. (Set aside small piece of rind from all fruits to add in later)
 Remove all of the white pith from the fruit. If left on this will make your marmalade very bitter! 
Very thinly slice reserved rind into matchsticks.
 Supreme the oranges, gratefruit and lemons and add all ingredients including juice to a non-reactive saucepan.
 Bring to a boil and simmer until mixture begins to thicken about 45 minutes.
 Once mixture has become thick and reduced, registering 221° F on a candy thermometer, transfer to jars and process in a hot water bath canner.

Orange Segments

Supreme about 8 oranges into segments over a shallow bowl, collecting the juice as you slice. Add the segments to the bowl with the juice. For a variegated effect, I used both cara cara (a pinkish, navel orange) and regular navel oranges.

Orange Caramel Sauce

1 cup granulated sugar
1½ cups + 2 TBS fresh-squeezed orange juice

Place the sugar in a wide pan on medium heat and begin to heat it. The sugar will start to melt and turn a caramel color. Holding the handle of the pan, gently swirl the pan occasionally to evenly distribute the heat. Do not stir with a utensil. The sugar will begin to turn a caramel color and smell like cotton candy.

Once the sugar starts to bubble and foam, slowly add the orange juice. As soon as the mixture starts boiling, remove from the heat and pour half of the mixture over the orange segments.

Reserve the other half of the caramel mixture in a small bowl — you will use this later to spoon over the finished dessert. When the dessert is assembled and setting in the freezer, heat the kept caramel sauce in a small saucepan over low heat until it thickens and just coats the back of a spoon (~10 minutes). You can then spoon it over the orange tians.

Stabilized Whipped Cream

3 TBS hot water
1 tsp gelatine
1 cup heavy whipping cream
1 TBS confectioner's sugar
1 TBS marmalade (see recipe above)

In a small bowl, sprinkle the gelatine over the surface of the hot water, wait one minute and then stir well until the gelatine dissolves. Let the gelatine cool to room temperature while you make the whipped cream. Combine the cream in a chilled mixing bowl. Whip the cream using a hand mixer on low speed until the cream starts to thicken for about one minute. Add the confectioner sugar. Increase the speed to medium-high. Whip the cream until the beaters leave visible (but not lasting) trails in the cream, then add the cooled gelatine slowly while beating continuously. Continue whipping until the cream is light and fluffy and forms soft peaks. Transfer the whipped cream to a bowl and fold in the orange marmalade.

Putting it all together:

Make sure you have some room in your freezer. Ideally, you should be able to fit a small baking sheet or tray of desserts to set in the freezer.

Lay out tian molds (i.e., cookie cutters set on a removable base like parchment or small springform pans) on a baking tray.

Drain the orange segments on a kitchen towel.

Have the marmalade, whipped cream and baked circles of chocolate pâte sablée ready to use.

Arrange the orange segments at the bottom of each ring mold. Make sure the segments all touch each other and that there are no gaps arranging them in a fanned out pattern. Make sure they fit snuggly and look pretty as they will end up being the top of the dessert.

Once you have neatly arranged one layer of orange segments at the bottom of each mold, add a couple spoonfuls of whipped cream and gently spread it so that it covers the orange segments entirely in an even layer. Leave about ¼-inch at the top so there is room for the pâte sablée cookies.

Using a butter knife or small spoon, spread a small even layer of orange marmalade on each cookie.

Carefully place the cookie over each ring (the side of dough covered in marmalade should be the side touching the whipping cream). Gently press on the cookie to make sure the dessert is compact.

Place the desserts to set in the freezer to set for 10 minutes.

To unmold, use a small knife to gently go around the edges of the cookie cutter to make sure the dessert will be easy to release. Gently place your serving plate on top of each tian mold and turn the plate over. Slowly remove the ring, add a spoonful of caramel sauce and serve immediately.