custom cakes/cookies

Wednesday, June 30, 2010

Tea-Laced Shortbread Trio

I often contribute recipes to the blog of my friends' tea company, Arbor Teas. Here is the latest recipe I shared using a few of their teas.

Requiring only a handful of ingredients, few things are more simple, yet so satisfying to make than classic shortbread. These delicate cookies complement a glass of milk or a cup of tea equally well, and their buttery, not overtly sweet nature takes on additional flavors with ease. Here I've paired a basic shortbread dough with three classic organic, loose leaf teas from Arbor Teas: Earl Grey Black Tea, Matcha Green Tea, Masala Chai Black Tea. With each tea selection and a few additional mix-ins, three distinctive flavors and hues spring from the platform of a once plain dough. Try all three, or mix and match to your own preferences. The standard shortbread recipe presented here is endlessly adaptable, so don't hesitate to play to your tastes. As a technical aside, though, know that it can be a bit tricky to work with such a butter-laden dough. Success in perfectly shaped cookies comes from keeping the dough well-chilled before rolling and again before baking. Also placing the cookie sheet furthest away from the heat source, in the bottom third of the oven, will prevent spreading as they bake.

Earl Grey Shortbread
makes ~2 dozen 1-inch square cookies

1 cup all-purpose flour
1 tablespoon Earl Grey black tea leaves, finely ground*
¼ teaspoon salt
½ cup (1 stick) unsalted butter, softened at room temperature
¼ cup confectioners' sugar, sifted
½ tablespoon finely grated orange zest


Matcha Shortbread
makes ~2 dozen 1-inch square cookies

1 cup all-purpose flour
2 tablespoons matcha green tea powder
¼ teaspoon salt
½ cup (1 stick) unsalted butter, softened at room temperature
¼ cup confectioners' sugar, sifted


Chocolate Chai Shortbread
makes ~2 dozen 1-inch square cookies

¾ cup all-purpose flour
⅓ cup Dutch-process cocoa powder
1 tablespoon masala chai black tea leaves, finely ground*
¼ teaspoon salt
½ cup (1 stick) unsalted butter, softened at room temperature
¼ cup confectioners' sugar, sifted


Method

Whisk flour, tea, (cocoa powder, if using) and salt in a small bowl; set aside.

In the bowl of a standing electric mixer fitted with a paddle, beat the butter until creamy. Add the sugar (and zest if using) and beat until fluffy. Add the flour/tea mixture to the mixing bowl, then beat on low speed until just incorporated. The dough will be very soft.

Transfer the dough to a sheet of parchment paper (or plastic wrap), shape into a disc, and wrap tightly to seal. Refrigerate the dough until firm, at least 2 hours or, preferably, overnight. The dough can be refrigerated for up to 3 days.

Position a rack in the bottom third of the oven and preheat the oven to 350° F. Roll out the dough on a floured surface to about ⅜-inch thickness and cut into shapes. Space 1 inch apart on baking sheets lined with parchment. Chill cookies in the refrigerator on a baking sheet for 10-15 minutes or until firm. Re-roll the scraps and cut out more cookies, as above, chilling the scraps between batches.

Bake the shortbread in the bottom third of the oven, one sheet at a time until the edges are golden, 13 to 15 minutes. Let cool completely on sheets on wire racks. These cookies can be stored in an airtight container at room temperature for about a week.

*You can grind the tea leaves in a small food processor, spice grinder, coffee grinder, or by using a mortar & pestle.

Sunday, June 27, 2010

Chocolate Pavlovas with Chicory Chocolate Mousse (and Juneberries!)


The June 2010 Daring Bakers’ challenge was hosted by Dawn of Doable and Delicious. Dawn challenged the Daring Bakers to make Chocolate Pavlovas and Chocolate Mascarpone Mousse. The challenge recipe is based on a recipe from the book Chocolate Epiphany by Francois Payard.

I've never made a pavlova, so this was an exciting endeavor for me. Also, it's always nice (as a frequent ice cream maker) to include additional uses for leftover egg whites in your repertoire. What challenged me though was deciding what story to tell in this blog post...


I could have written about Anna Pavlova, whose airy tutu inspired the dessert, and the rivalry between New Zealand and Australia in claiming its invention. But I think most people have heard this before...


Or I could have gone on about the creole-inspired chocolate bar (New Orleans style chicory coffee + cocoa nibs + 70% cacao Sao Thome bittersweet chocolate) I used to make the chicory chocolate mousse (isn't that fun to say!), and the southern origins of the consumption of chicory root as an obstinate substitute for coffee during the Civil War. But others far more knowledgeable than me can give you that history lesson...


Instead, I rather introduce you to juneberries, aka serviceberries or saskatoons or sugarplums or shadberries or chuckley pear. That's a lot of pseudonyms for a wild fruit that is quite often overlooked and quite frankly under appreciated. These purplish red berries grow on amelanchier trees, small trees planted for their ornamental value in urban landscapes throughout North America. The berries taste similar to a blueberry but have an edible seed with flavors akin to an almond.

Sadly, most people look at you strange if you forage "suspect"-looking berries from a tree growing on a busy main street downtown. But for the adventurous, juneberries are a special treat. When ripe, they taste perfect out of hand or can be used in pies and jams or on top of ice cream or to garnish pavlovas, as they pair well with chocolate.

Unfortunately, with competition from the birds and a short fruiting season, they won't be available too much longer. I preserved the remaining berries from my foraging haul by incorporating them into a batch of strawberry jam. That makes for a little bit of June whenever I fancy, no matter the calendar month.

Chocolate Pavlova
makes about 2 dozen 3-inch rounds

6 large egg whites
1 cup plus 2 TBS (220 grams) white granulated sugar
½ cup (60 grams) confectioner’s sugar
⅔ cup (60 grams) cocoa powder

Place a rack in the center of the oven and preheat to 200º F degrees. Line two baking sheets with silpat or parchment and set aside.

Put the egg whites in a bowl and whip until soft peaks form. Increase speed to high and gradually add granulated sugar about 1 TBS at a time until stiff peaks form. (The whites should be firm but moist.)

Sift the confectioner’s sugar and cocoa powder over the egg whites and fold the dry ingredients into the white. (This looks like it will not happen. Fold gently and it will eventually come together.)

Fill a pastry bag with the meringue. Pipe the meringue into whatever shapes you desire. Alternatively, you could just free form your shapes and level them a bit with the back of a spoon. The meringues will expand slightly during baking, so keep this in mind when determining final shape.

Bake for 2-3 hours until the meringues become dry and crisp. Cool and store in an airtight container for up to 3 days.


Chocolate Mascarpone Mousse
makes about 4 cups

1½ cups (355 mls) heavy cream
9 ounces (255 grams) dark chocolate, finely chopped
1⅔ cups (390 mls) mascarpone*
pinch of nutmeg
2 tbsp (30 mls) Cognac (I recommend Kelt. It has an interesting maturation process that involves a 3 month ocean voyage.)

*Here is a link to a recipe, if you are interested in making your own mascarpone from scratch. I recommend doubling this recipe to have enough mascarpone for use in both the mousse and the cream drizzle sauce below.

Put ½ cup (120 mls) of the heavy cream in a double boiler set over a pan of simmering water. Once warm, add the chocolate and whisk until melted and smooth. Remove from heat and let sit at room temperature until cool.

Place the mascarpone, the remaining cup of cream and nutmeg in a bowl of a standing mixer. Using a whisk attachment, whip on low speed for a minute until the mascarpone is loose. Add the cognac and whip on medium speed until it holds soft peaks. (DO NOT OVERBEAT AS THE MASCARPONE WILL BREAK.)

Mix about a fourth of the mascarpone mixture into the chocolate to lighten. Fold in the remaining mascarpone until well incorporated. Fill a pastry bag with the mousse to pipe atop the pavlova.


Crème Anglaise
makes 3 cups

1 cup (235 mls) whole milk
1 cup (235 mls) heavy cream
1 tsp pure vanilla bean paste
6 large egg yolks
6 tbsp (75 grams) sugar

In a bowl, whisk together the egg yolks and sugar until the mixture turns pale yellow.

In a saucepan, combine the milk, cream and vanilla and bring the mixture to a boil over medium high heat. Take off the heat.

Pour about ½ cup of the hot liquid into the yolk mixture, whisking constantly to keep from overcoagulating (or curdling) the eggs. Pour the yolk mixture into the pan with the remaining cream mixture and put the heat back on medium. Stir constantly with a wooden spoon until the mixture thickens enough to lightly coat the back of the spoon. DO NOT OVERCOOK.

Remove the mixture from the heat and strain it through a fine mesh sieve into a bowl. Cover and refrigerate until the mixture is thoroughly chilled, about 2 hours or overnight.


Mascarpone Cream (for drizzling)
makes about 1 quart

1 recipe crème anglaise (see above)
½ cup (120 mls) mascarpone
½ cup (120 mls) heavy cream

Prepare the crème anglaise. Slowly whisk in the mascarpone into the chilled crème anglaise. Put the cream in a bowl of an electric mixer and beat with the whisk attachment until very soft peaks are formed. Fold the whipped cream into the mascarpone mixture.

**The quantity this recipe makes is more than sufficient for garnishing the pavlova. Freeze the remainder in the canister of your ice cream maker for a light and creamy, custard-style ice cream.**

Assembly:
Pipe the mousse onto the pavlovas and drizzle with the mascarpone cream over the top. Garnish with fresh fruit if desired.

Monday, June 14, 2010

Pâté for every occasion

Last month my friend and frequent cooking companion moved away to open a deli and a restaurant with some talented people in Madison, WI. As a final kitchen project before the move, we decided to make a classic pâté en croute from Michael Ruhlman's Charcuterie. It consisted of a pork tenderloin seared in clarified butter then wrapped in a spiced sausage we made ourselves from grinding pork shoulder and belly fat. This was then wound in prosciutto, folded over neatly with a decorative pastry crust, and finally baked off in a terrine dish. Though to some (me) it may seem a bit gratuitous porkgasm, it presented beautifully as a perfectly appropriate addition to the spread at the sendoff party. Unfortunately, no photos were taken to document the making of it. (bad food blogger)

Adding to the tragedy, the very next day I received the Daring Cook's challenge:

Our hostesses this month, Evelyne of Cheap Ethnic Eatz, and Valerie of a The Chocolate Bunny, chose delicious pâté with freshly baked bread as their June Daring Cook’s challenge! They’ve provided us with 4 different pâté recipes to choose from and are allowing us to go wild with our homemade bread choice.

Oh snap! Why did I not take pictures?!

Fortunately, another good pâté-eating opportunity (my birthday party!) was on my radar. This time around I chose to make a colorful, veg-friendly version that included roasted red peppers, white beans, and pesto. This recipe may be the simplest prep I've ever presented on this blog. It takes under 20 minutes to assemble, which involves opening several jars of good quality pantry reserves and mixing in a couple of best quality feta and ricotta cheeses. Super easy! Beautiful presentation! And, if you do well sourcing ingredients, amazing flavor! Exactly the sort of effort-little dish worth preparing in a time crunch.

Though we miss our friend, I don't think anyone missed not having pork in the pâté this time around. The platter was wiped clean before the end of the evening! With that sort of compliment, this just might be my go-to recipe for future events.

Tricolor Vegetable Pâté

Red Pepper Layer
1 7-ounce jar roasted red bell peppers, drained, chopped (I used a tapenade mix imported from Italy and available from Zingerman's that contained eggplant, olives, artichoke, mushrooms and peppers.)
¾ cup crumbled feta cheese (about 4 ounces)

White Bean Layer
1 15-ounce can cannellini (white kidney) beans, rinsed, drained thoroughly
½ tablespoon fresh lemon juice
½ tablespoon olive oil
½ tablespoon minced fresh oregano or ½ teaspoon dried
2 garlic cloves, pressed

Pesto Layer
(Fresh basil was not yet available at my farmer's market; I used a jar of prepared pesto made by a nearby company instead of mixing from scratch)
2 garlic cloves
1 cup fresh basil leaves
1 cup fresh Italian parsley leaves
¼ cup toasted pine nuts
3 tablespoons olive oil
½ cup ricotta cheese, drained well

Good Food in Jars, Cans & Packages Makes Prep a Breeze:


Line an 8½ x 4½-inch pâté mold or loaf pan with plastic wrap overlapping sides.

For Red Pepper Layer:
Combine peppers and feta in a food processor and blend until smooth. Spread pepper mixture evenly on bottom of prepared pan.

For Bean Layer:
Mash beans in large bowl. Add lemon juice, olive oil, oregano and garlic and blend until smooth. Season to taste with salt and pepper. Spread bean mixture evenly over red pepper layer in prepared dish.

For Pesto Layer:
Mince garlic in processor. Add basil, parsley and pine nuts and mince. With machine running, gradually add oil through feed tube and process until smooth. Mix in ricotta. Spread pesto evenly over bean layer.

Cover with the overlapping ends of the plastic wrap to seal. Cut a piece of cardboard ¼ inch smaller on all sides than the tops of the loaf pan and place directly on top of plastic-covered pâté. Put 2-3 pounds of weight (heavy cans) on top of this and refrigerate overnight to firm for easy slicing. To unmold, invert pâté onto a serving platter. Peel off plastic wrap from pâté. Serve with a sliced baguette.

Monday, June 7, 2010

Brioche Baguettes with Jefferson Market Nostalgia


Do you remember Jefferson Market the way it used to be when Jean Henry owned it? If you do, consider yourself lucky. Sadly, it changed ownership before my arrival to Ann Arbor. My friends talk fondly of this popular bakery shop in its heyday. It was a favorite neighborhood hangout: a good location to run into friends, catch up on weekend gossip, and eat amazing pastries while lounging in the adjacent garden.

One fond memory involved eating brioche baguettes, a brioche dough-based pastry filled with vanilla cream and chocolate chunks. Jean was kind enough to share her recipe with my baking friends. (A perk of living in a small town; someone always knows someone...) Last Saturday, while sharing a stellar brunch from items collected that morning at the farmers' market, Susie, Shana, Shannon, Elizabeth, Emily, and I made the baguettes with great success. Elizabeth beautifully documented the day in pictures, which can be viewed here.

If you're appetite is whetted, and you are interested in making these yourself, then read on...

For the Brioche:
link to recipe source
Makes about 2¼ pounds dough

The Sponge
⅓ cup warm whole milk (100 to 110° F)
1½ tsp instant yeast
1 large egg, at room temperature
2 cups unbleached all-purpose flour

Put the milk, yeast, egg and 1 cup of the flour in the bowl of a heavy-duty mixer. Mix the ingredients together with a rubber spatula, mixing just until everything is blended. Sprinkle over the remaining cup of flour to cover the sponge.

The Rest
Set the sponge aside to rest uncovered for 30 to 40 minutes. After this resting time, the flour coating will crack, your indication that everything is moving along properly.


The Dough
⅓ cup granulated sugar
1 tsp kosher salt
4 large eggs, at room temperature and lightly beaten
1½ cups (approximately) unbleached all-purpose flour
1½ sticks (6 ounces) unsalted butter, at room temperature

Add the sugar, salt, eggs, and 1 cup of the flour to the sponge. Set the bowl into the mixer, attach the dough hook, and mix on low speed for a minute or two, just until the ingredients look as if they’re about to come together. Still mixing, sprinkle in ½ cup more flour.


When the flour is incorporated, increase the mixer speed to medium and beat for about 15 minutes, stopping to scrape down the hook and bowl as needed. During this mixing period, the dough should come together, wrap itself around the hook, and slap the sides of the bowl. If, after 7 to 10 minutes, you don’t have a cohesive, slapping dough, add up to 3 tablespoons more flour.


Continue to beat, giving the dough another full 15 minutes in the mixer – don’t skimp on the time; this is what will give the brioche its distinctive texture.

Warning
Be warned – your mixer will become extremely hot. Most heavy-duty mixers designed for making bread can handle this long beating, although if you plan to make successive batches of dough, you’ll have to let your machine cool down completely between batches.


Incorporating the butter
In order to incorporate the butter into the dough, you must work the butter until it is the same consistency as the dough. You can bash the butter into submission with a rolling pin or give it kinder and gentler handling by using a dough scraper to smear it bit by bit across a smooth work surface. When it’s ready, the butter will be smooth, soft, and still cool – not warm, oily or greasy. With the mixer on medium-low, add the butter a few tablespoons at a time. This is the point at which you’ll think you’ve made a huge mistake, because the dough that you worked so hard to make smooth will fall apart – carry on.


When all of the butter has been added, raise the mixer speed to medium-high for a minute, then reduce the mixer speed to medium and beat the dough for about 5 minutes, or until you once again hear the dough slapping against the sides of the bowl. Clean the sides of the bowl frequently as you work; if it looks as though the dough is not coming together after 2 to 3 minutes, add up to 1 tablespoon more flour. When you’re finished, the dough should still feel somewhat cool. It will be soft and sticky and may cling slightly to the sides and bottom of the bowl.


The First Rise
Transfer the dough to a very large buttered bowl, cover tightly with plastic wrap, and let it rise at room temperature until doubled in bulk, 2 to 2½ hours.


The Second Rise and Chilling
Deflate the dough by placing your fingers under it, lifting a section of the dough, and then letting it fall back into the bowl. Work your way around the circumference of the dough, lifting and releasing. Cover the bowl tightly with plastic wrap and refrigerate the dough overnight, or for at least 4 to 6 hours, during which time it will continue to rise and may double in size again. After this long chill, the dough is ready to use in any brioche recipe. This recipe yields enough brioche dough for 3 têtes or 3 loaves.

Storing
If you are not going to use the dough after the second rise, deflate it, wrap it airtight, and store it in the freezer. The dough can remain frozen for up to 1 month. Thaw the dough, still wrapped, in the refrigerator overnight and use it directly from the refrigerator.


Putting It All Together:

1 recipe brioche dough
1 recipe vanilla pastry cream (see end of post for recipe)
8 ounces good quality semi-sweet chocolate chunks

Roll out defrosted or freshly-made (2 rises and deflated) brioche dough into a rectangle about 12" x 18" x ¼" deep on a floured surface.


Spread a ⅛" layer of pastry cream across the top leaving a ½" clean on each 18" side. Sprinkle chocolate chunks, in an even layer on top of the pastry cream. Be sure to leave space between chocolate pieces as too many will make the dough difficult to cut.


Fold dough into thirds along the 18" side, sealing by pressing with fingers along the clean edge. This leaves a 6" x 18" piece of dough with filling inside.


Make baguettes by cutting along the 18" length every 1½" creating 9 or more rectangles depending on the length you rolled the dough. Place on a parchment covered sheet pan, with plenty of room for rising left between the baguettes.


Preheat oven to 375° F. Allow baguettes to rise at room temperature to double their size (about 30 minutes), then bake for 10-15 minutes until lightly brown. Allow to cool for 10 minutes before removing to a wire rack to finish cooling. Store at room temperature and consume within 12 hours of baking.

To freeze and serve up to one month later:
Freeze the filled and cut baguettes immediately (before rising) directly on the parchment-lined sheet tray for about 30 minutes. Once frozen, remove from tray and place in freezer-quality zipper storage bags. When ready to bake, remove as many baguettes as you'd like and place onto a parchment covered sheet tray. Allow the baguettes to fully defrost in the fridge overnight, then bring to room temperature, so that the baguettes rise to double their size. Bake as directed above.


Vanilla Pastry Cream
yield: ~1½ cups
1 cup (240 ml) whole milk
2 TBS (16 g) cornstarch
¾ cup (100 g) granulated sugar
1 large egg
2 large egg yolks
2 TBS (30 g) unsalted butter, at room temperature
1 tsp vanilla bean paste

Dissolve cornstarch in 2 TBS of milk. Combine the remaining milk with the sugar in a saucepan; bring to boil; remove from heat. Beat the whole egg, then the yolks into the cornstarch mixture. Pour a third of the boiling milk into the egg mixture, whisking constantly so that the eggs do not begin to cook. Return the remaining milk to boil. Pour in the hot egg mixture in a stream, continuing whisking. Continue whisking (this is important – you do not want the eggs to solidify/cook) until the cream thickens and comes to a boil. Remove from heat and beat in the butter and vanilla. Pour cream into a bowl. Press plastic wrap firmly against the surface. Refrigerate until chilled, at least 2 hours or up to 2 days. Just before using, whisk by hand until smooth.

Thursday, May 27, 2010

Pièce Montée, it's a showpiece and a lesson in vocabulary

Classic French centerpiece desserts, like the croquembouche, are usually reserved for important occasions, such as weddings or baptisms or communions. But when your favorite hip hop artist, who just happens to adore caramel, invites you to his birthday party, I can think of bringing nothing more appropriate.

The first time I made one of these, I learned that croquembouche meant "crunch in the mouth" since each individual pastry is drenched in hard caramel. This time around I have a new French vocab word to share: pièce montée. Used as a synonym for croquembouche, it translates as "mounted piece". Think pastry architecture, or rather, the deft assemblage of sugar and cream puffs into an impressive, sculpted form.

While a lofty tower of profiteroles is pretty amazing to look at, cutting into one to serve is another challenge entirely. The profiteroles are physically "glued" together with hard candy, making it tough work to gracefully disassemble. Last time, we attacked it rather clumsily with a serrated knife. I've read that others have taken a chisel and hammer to crack the hard surface. YIKES!

This time around, to facilitate sharing as an eat-out-of-hand casual party dessert, I decided to keep the caramel-dipped profiteroles separate (not touching) and flat on a single sheet tray. No sticking together (which, turns out, is pretty hard to unstick)...no montée...just pièce. The height would come, at least I was hoping with fingers crossed, from the fancy sugar work spun on top. I spent a few nights studying sugar techniques in this textbook as preparation, hoping to create something extraordinary.

But when the day came to make this, it rained. That brings me to another vocab word: hygroscopic. Sugar is hygroscopic meaning it will absorb water from the surrounding air. See those beads of liquid on the sugar strands in the photo up above?! It was dissolving faster than I could finish! I decided to cut the decoration short, and instead poured JD's initials with the remaining caramel and sprinkled the finished piece with crystallized lilacs. Not quite the pièce montée I envisioned, but I was told it was delicious all the same.

The May 2010 Daring Bakers’ challenge was hosted by Cat of Little Miss Cupcake. Cat challenged everyone to make a pièce montée, or croquembouche, based on recipes from Peter Kump’s Baking School in Manhattan and Nick Malgieri. Instead of the suggested recipes, I followed closely the instructions in Bo Friberg's The Advanced Professional Pastry Chef with great success. I was particularly proud that my profiteroles did not deflate.

Vanilla Crème Patissiere
yield: ~3 cups

2 cups (480 ml) whole milk
4 TBS (32 g) cornstarch
1½ cups (200 g) granulated sugar
2 large eggs
4 large egg yolks
4 TBS (60 g) unsalted butter, at room temperature
2 TBS vanilla bean paste

Dissolve cornstarch in ¼ cup of milk. Combine the remaining milk with the sugar in a saucepan; bring to boil; remove from heat.

Beat the whole egg, then the yolks into the cornstarch mixture. Pour ⅓ of boiling milk into the egg mixture, whisking constantly so that the eggs do not begin to cook.

Return the remaining milk to boil. Pour in the hot egg mixture in a stream, continuing whisking.

Continue whisking (this is important – you do not want the eggs to solidify/cook) until the cream thickens and comes to a boil. Remove from heat and beat in the butter and vanilla.

Pour cream into a bowl. Press plastic wrap firmly against the surface. Chill immediately and until ready to use.

Pâte à Choux
yield: ~60 (1-inch) profiteroles

2 oz (57.5 g) cake flour
2¾ oz (77.5 g) bread flour
1 cup (240 ml) water
6 TBS (85g) unsalted butter, cut into pieces
¼ tsp (1.25g) salt
5 large eggs (1 cup), at room temperature

Sift the flours together on a sheet of parchment paper and reserve.

In a heavy-bottomed medium saucepan, bring the water, butter, and salt to a full rolling boil so that the butter droplets are dispersed throughout the liquid. Form the ends of the parchment into a funnel/cone shape; use this to pour the flour into the liquid while stirring constantly with a wooden spoon. Add the flour as fast as it can be absorbed, but avoid adding it once, which may create lumps. Continue cooking, stirring vigorously until the mixture forms a smooth, dry mass and pulls away from the sides of the pan, about 2-3 minutes.

Transfer the dough into the bowl of a mixer fitted with a paddle attachment (you can also continue by hand). Let the dough cool while mixing on low for a couple of minutes so that the eggs do not scramble.

Once the dough has slightly cooled, begin to add the eggs one at a time. The dough will separate in the beginning, but it should come back together after the 3rd or 4th egg.

While the dough is still slightly warm, transfer it to a piping bag and pipe onto parchment lined baking sheets into shapes slightly larger than a cherry. Use a finger dipped in warm water to pat down any peaks.

Bake at 425° F until fully puffed and starting to show some color, about 10 minutes. Reduce the heat to 375° F and bake about 10-12 minutes longer or until golden brown and dry. Turn off oven and leave door open with puffs remaining on the oven racks puffs. Allow them to cool completely to room temperature before removing. This should encourage steam to escape and prevent the puffs from deflating.

Once cool, make a small hole in the bottom of each profiterole. Using a pastry bag fitted with a No. 2 tip, fill each with the pastry cream.

Caramelized Sugar
yield: 2¼ cups

1 cup (240 ml) water
2 lbs (910 g) granulated sugar
¼ cup (60 ml) light corn syrup

Fill a bowl large enough to hold the pan used for cooking the sugar with enough cold water to reach halfway up the sides of the pan. Set this aside.

In a medium saucepan, combine 1 cup water and sugar and set over medium-high heat. Stir until the sugar dissolves and use a brush dipped in water to wash down any sugar crystals that stick to the side of the pan. Bring to a rolling boil, add the corn syrup, then lower the heat to medium. Do not stir once the sugar starts boiling. Instead, continue brushing down the sides of the pan with water as needed until the sugar reaches 280° F. Keep boiling until the syrup is amber in color. Quickly remove the pan from heat and dunk the bottom in the bowl of cold water to stop the cooking process.

Using 2 forks, dip the tops and sides of each cream-filled puff into the caramel, and arrange puffs as desired.

To make a spun-sugar web to decorate the croquembouche:
Cut the looped ends of a wire whisk with wire cutters, or use two forks held side by side, and dip the ends into caramel. Wave the caramel back and forth over the croquembouche, allowing the strands to fall in long, thin threads around it. Wrap any stray strands up and around the croquembouche.

Serve within 2 hours.

Monday, May 17, 2010

Chinese Tea Eggs - 茶叶蛋 (cháyèdàn)

I often contribute recipes to the blog of my friends' tea company, Arbor Teas. Here is the latest recipe I developed using one of their teas.

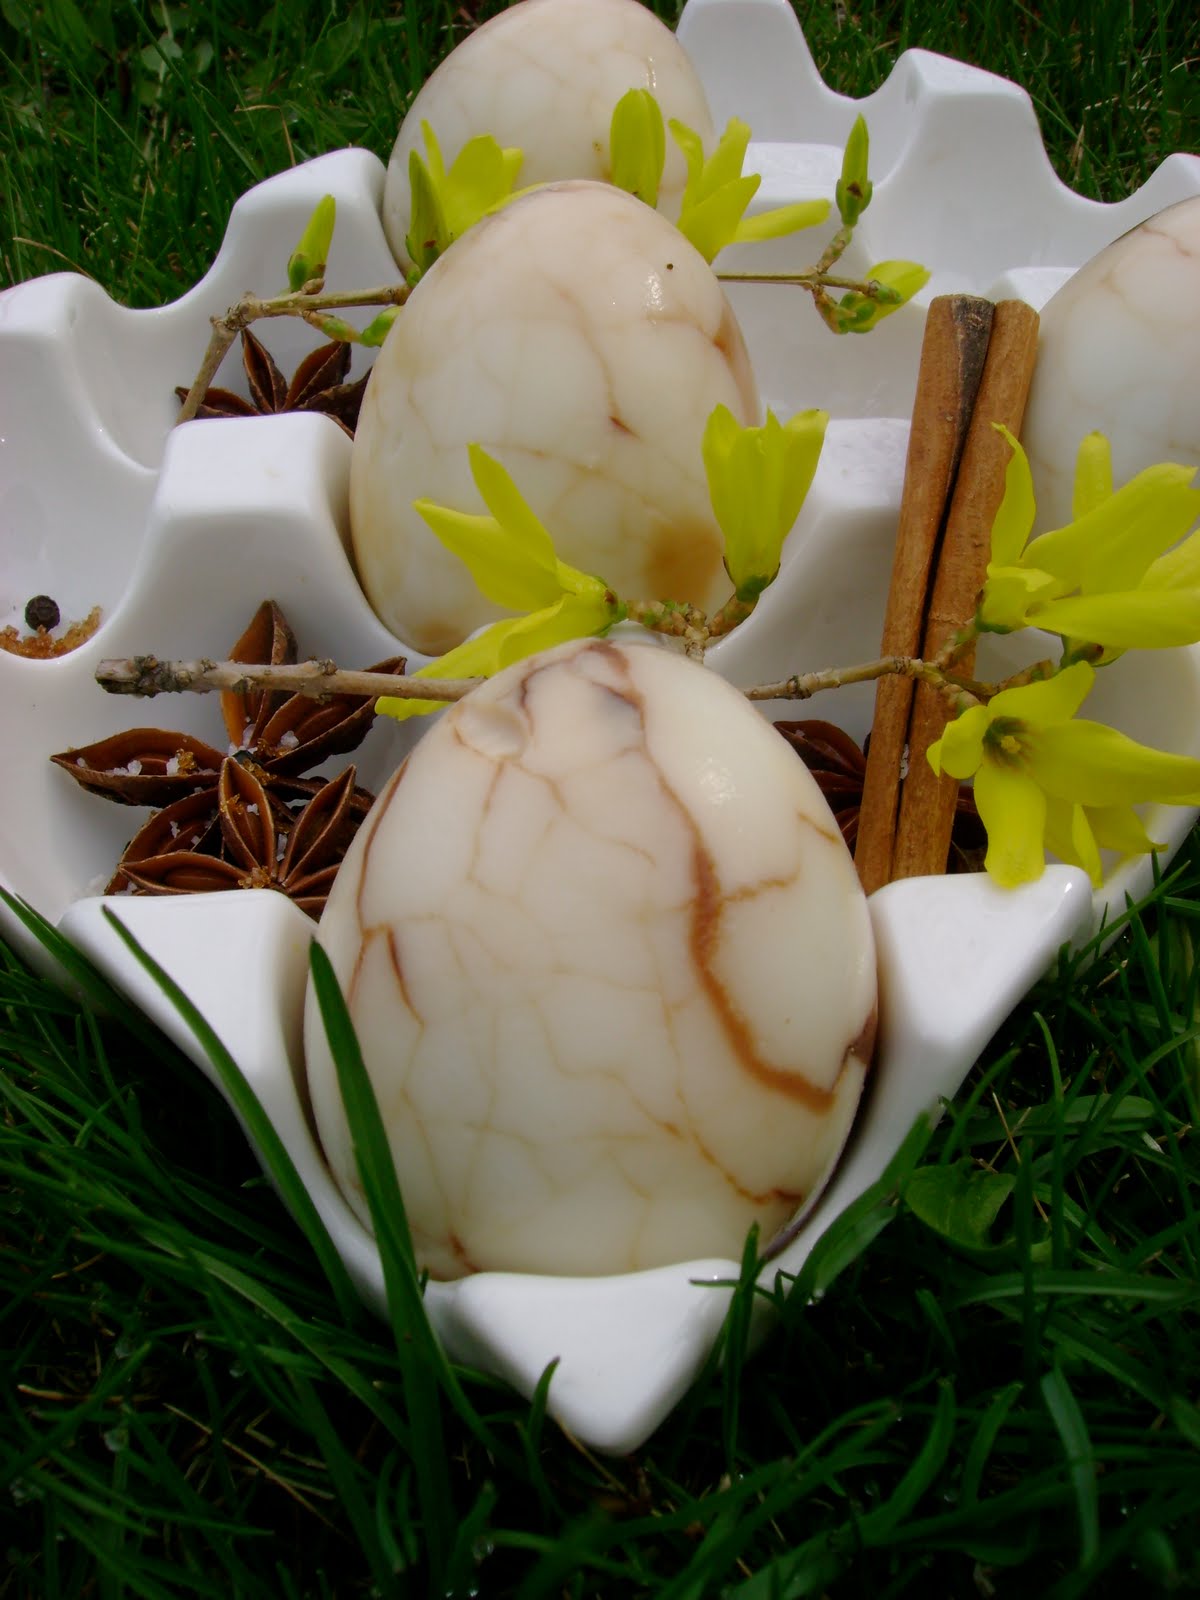
A tea egg is a traditional snack food commonly sold by street vendors or in markets throughout Chinese communities. It's a hard-cooked egg steeped with tea leaves and traditional Chinese spices, which adds a savory, slightly salty tone to a normally neutral flavored source of protein. The shell cracking method is an important feature in this recipe that not only lends to a beautiful design, but allows the tea and spices to seep into the egg white. The tea used for making tea eggs is usually high in dark-brown tannins. Pu-erh is commonly used, but it can be substituted with any black tea leaf. Green tea is often considered too bitter, but may be worth trying if you'd like to explore the effects of the marbling pattern from an entire color palate of organic loose leaf teas from Arbor Teas.

I like the idea of imparting unique flavors directly to a hard-cooked egg, but I'm not one to eat such things directly out of hand. A quick poll of the egg-eating habits of some friends, however, confirms that I seem to be in the minority. In any case, if you're like me and prefer to incorporate hard-cooked eggs into other recipes here are a few suggestions to take tea-steeped eggs to the next level:

  • Sieved over roasted fresh asparagus or a salad of spring greens. Press the eggs through a strainer, or grate on the finest facet of a box grater to create mimosa flower-like bits.
  • Deviled with whole-grain mustard and cream fraiche to serve at you next picnic or barbeque
  • Mashed with olive oil and sea salt. Enjoy as creamy sandwich filling between slices of crusty bread
  • Stirred into a sauce gribiche, a vinaigrette bound with chopped hard-cooked egg, shallots, capers and herbs that makes a fine complement to roasted potatoes or grilled fish

Chinese Tea Eggs

6 eggs
2 TBS organic loose leaf Pu'erh
¾ cup soy sauce
2 tsp sea salt
2 tsp dark brown sugar
4 pieces star anise
1 cinnamon stick
1 tsp cracked black peppercorns
2 strips dried tangerine or mandarin orange peel (optional)

Place the eggs in a medium-sized pot with enough cool water to cover by 1-inch. Bring the water to a boil, then lower heat to simmer for 3 minutes.

Remove the eggs with a slotted spoon and place in a bowl of cool water. Reserve the simmering water in the pot for use in the next step of the recipe. When cool enough to handle, take the back of a spoon and gently crack the eggs evenly all around the shell. Take care when cracking to leave the shell intact. This allows the dark steeping liquid to seep into the egg white, staining it with a marbled design. The more you crack, the more intricate the design will be.

Add the remaining ingredients to the pot of simmering water, stirring to combine. Return the cracked eggs to the pot as well. Bring the liquid to boil again, then reduce the heat to low and simmer for 40 minutes. Turn off the heat and cover the pot with a lid. Let the eggs steep for a few hours to overnight. The longer the eggs steep, the more intense the flavor and color will be.

Drain the eggs, peel and serve. Unpeeled eggs can be refrigerated in a covered container for up to 4 days.

Friday, May 14, 2010

In defense of dried beans… and an ancient recipe

A friend recently said she didn’t see the merits of using dried beans. I used to feel the same way. Mostly I think because cooking beans seemed laborious and intimidating. It was so much easier to hurry the food prep process along by just cranking open a can. Then I stumbled upon Rancho Gordo and their amazing variety of heirloom beans. Almost instantly, I was converted. Yes, yes dried beans are economical and by cooking them yourself you can control the use of additives (like sodium or MSG). But beyond the well-worn black bean and pinto, etc., that are so easy to come by in a can, heirloom varieties offer a unique flavor and visual profile that hasn’t yet made its way to tins on grocery store shelves. If you want to partake in consuming these beauties, you’re gonna have to learn to cook them yourself.

There are many different methods/philosophies for cooking beans. But they all come down to a matter of simmering the pot until the beans are soft. A pre-soak speeds up the process but isn’t absolutely necessary. The cooking time will just take a lot longer. Adding a few savory vegetables, sautéed in some kind of fat or braised in stock, will make them more flavorful. Although, heirloom and heritage varieties really don't need a lot of fussing if they are used fresh. If you do soak the beans, keep the soaking water and continue to use it to cook the beans. It contains vitamins and flavor, leeched from the beans during the soaking period, so it’d be a shame to just throw that down the drain. I usually set the beans to soak overnight and then keep them at a gentle simmer in the background of morning spent doing other things. They hardly need any supervision and fill your house with a welcome, heady aroma. All this for the price of a little pre-planning! I’ve decided it’s completely worth it.

Last week, I cooked up Ayocote Morado beans, a rare Mexican runner bean, for use in a favorite Budín Azteca recipe I clipped from a Martha Stewart magazine several years ago. Budín Azteca, which translates into “pudding or pie of the Aztecs”, is a casserole-type dish that has roots as far back as the 16th century. My version has roasted poblano chiles and fresh, steamed spinach layered between corn tortillas dressed with a homemade salsa verde and bound with Mexican crema and queso fresco. I chose this because the Daring Cooks challenge this month was to make a stacked enchilada with homemade salsa verde:

Our hosts this month, Barbara of Barbara Bakes and Bunnee of Anna+Food have chosen a delicious Stacked Green Chile & Grilled Chicken Enchilada recipe in celebration of Cinco de Mayo! The recipe, featuring a homemade enchilada sauce was found on www.finecooking.com and written by Robb Walsh.

One look at the given recipes for this sent me straight to my personal cookbook shelf. Funny how a picture shapes your perspective on how appetizing food will be. No matter how much cilantro you sprinkle as garnish on top, drab colors just don’t photograph well!

I firmly believe that some things are well-worth bending/breaking the “rules”. So this month, I did things a little differently. Here's my interpretation of the challenge:

Roasted Salsa Verde
makes 3 cups

1 teaspoon dried Mexican oregano
4 fresh Anaheim chiles (about 6 to 8-inches long)
1½ pounds tomatillos, husks intact
1 medium white onion, cut into ¼-inch thick rounds
4 large cloves garlic, unpeeled
2 serrano chiles
1 jalapeno
juice from one lime
salt
cilantro for garnish

In a large dry skillet over medium heat, toast the oregano until fragrant, 1-2 minutes, then remove from skillet and set aside.

To the same skillet, add the tomatillos, onion slices, garlic cloves, and chiles. (If not all fit at once in the same pan, then roast in batches.) Place the garlic at the hottest part of the pan as it will take the longest to cook. Cook slowly, turning occasionally, until soft and aromatic. The timing for each vegetable will be different, so keep a close watch that they don’t burn. As each item is finished remove it from the heat. Once cool enough to handle, peel the garlic cloves, cut the stems from the chiles, leaving the seeds if you prefer a spicy heat to your salsa, and remove the husks from the tomatillos.

Meanwhile, roast the Anaheim chiles over the open flame of a gas burner, under a broiler set close to the element, or on a grill. Turn occasionally until evenly charred. When black and blistered, remove from heat and place in a paper bag. Roll the bag shut and set aside until cool, about 10 minutes. Once cool enough to handle, peel away the skin and remove the ribs and seeds.

Combine the chiles, onion, garlic, tomatillos, and oregano in a food processor or blender or molcajete. Grind until well blended; yet allow some texture to be retained. Add the lime juice and salt to taste.

Budín Azteca (stacked tortilla pie)
serves 8-10

1 lb dried beans, picked over; I used Ayocote Morado but any Mexican-style bean will do
1 small white onion
2-3 garlic cloves

4 fresh poblano chiles
18 (6-inch round) fresh corn tortillas
7 TBS olive oil
10 oz fresh spinach, rinsed and tough stems removed
1 small onion, very thinly sliced
4 garlic cloves, minced
1 cup Mexican crema or sour cream
2¼ cups roasted salsa verde (see recipe above)
1½ cups queso fresco, grated

Rinse the beans in cool water and remove any debris. Place beans in a large pot and cover with several inches of cold water. Set to soak overnight or at least 4-8 hours. When ready to cook, do not drain soaking water, it has a lot of nutrients and flavor. Instead top off with more water to cover the beans by several inches and add a small white onion sliced into 3 parts and 2-3 garlic cloves smashed with the blade of a knife. Bring to a hard boil over medium-high heat. Keep the beans at a steady boil for 5 minutes, then reduce heat to low and cover the pot. Cook beans for 1 or so hours. When you begin to smell them cooking and as they start to soften, gradually add a generous heap (about a teaspoon) of salt to the pot. (Waiting to add the salt midway through cooking prevents the beans from splitting.) It takes awhile for the beans to absorb the salt, so go easy. Cover the pot and continue cooking for about 45 minutes or longer, until desired texture is reached. If the bean water starts to get low, add hot water from a tea kettle. These can be made several days in advance. Keep the cooked beans in their cooking liquid in a covered container in the refrigerator until ready to use.

Roast chiles under broiler or over gas burner flame, until blackened and blistered all over. Transfer to a brown paper bag and roll closed. Set aside for 10 minutes. Peel and discard skins. Remove stems, seeds and ribs. Cut into thin, bite-sized strips and set aside.

Preheat oven to 425°. Brush or spray both sides of tortillas with oil. Arrange on baking sheets and bake just until tortillas begin to bubble, yet still remain soft, 5-7 minutes. Reduce oven to 350°.

Heat a large skillet over medium heat. Wash the spinach and without drying add to skillet. Cover and cook until spinach has wilted, about 2 minutes. Season with a pinch of salt. Remove from heat, let cool slightly, then squeeze out as much liquid as possible. Coarsely chop and then set aside.

Heat about 2 TBS oil in the same skillet over medium heat. Add sliced onion and a generous pinch of salt. Cook stirring occasionally until translucent, about 3 minutes. Stir in poblano chiles cooking 1 minute longer. Transfer to a bowl.

Drain the beans, reserving the cooking liquid. Heat another 2 TBS of oil in the same skillet. Cook garlic for 30 seconds until golden and fragrant. Add beans and a generous pinch of salt. Cook, mashing and turning beans over in the pan to incorporate the garlic for about 2 minutes. If the mixture seems dry, add in a bit of the reserved bean cooking liquid and continue to mash until reaching the desired consistency. Remove the pan from the heat.

Line the bottom of a deep round baking dish with a third of the (~6) tortillas. I like to use two 6-inch round, 3-inch deep cake pans and stack 3 tortillas between each layer. Spread the chili-onion mixture on top of the tortillas, then distribute half of the bean mixture and half of the crema over this. Spread ¾ cup salsa on top and sprinkle with ½ cup of cheese. Repeat for the second layer using spinach instead of the chiles. Top with the remaining tortillas, ¾ cup salsa, and ½ cup of cheese.

Bake until heated through (45 minutes- 1 hour). Cover with foil if browns too quickly or is becoming too dry. Let stand 15 minutes before cutting and serve with extra salsa and crema.