custom cakes/cookies

Saturday, November 27, 2010

Apple Cider and Maple Cream Crostata with Maple-Cranberry Compote

The 2010 November Daring Bakers’ challenge was hosted by Simona of briciole. She chose to challenge Daring Bakers’ to make pasta frolla for a crostata. She used her own experience as a source, as well as information from Pellegrino Artusi’s Science in the Kitchen and the Art of Eating Well.

Crostata is an Italian tart, the base of which is a sweet short crust pastry called pasta frolla. Pasta frolla is versatile. It can be filled with fruit preserves, pastry cream, fresh fruit, ricotta, and other ingredients, and, by itself, it makes very nice cookies. Made with butter, flour, sugar, and eggs, the technique to make this dough is a bit like making pasta though no harder to execute than any other type of pie crust.

I decided to make mine with whole wheat and hazelnut flours, and for the filling, I used this recipe from the October issue of Bon Appetit. Not traditional but definitely seasonal and highly amenable to local ingredients. The custard filling is made with no refined sugar. Instead, it is sweetened with maple sugar and a thick reduction of apple cider. Though humble in appearance, it's a decadent alternative to the usual apple desserts that show up this time of year.

Hazelnut Pasta Frolla

⅓ cup superfine sugar or ½ cup powdered sugar
¾ cup unbleached all-purpose flour
½ cup whole-wheat pastry flour
¼ cup hazelnut flour or meal
a pinch of salt
6 TBS cold unsalted butter, cut into small pieces
1 large egg, lightly beaten
¼ tsp vanilla extract

Put sugar, flours, and salt in the bowl of the food processor and pulse a few times to mix. Add butter and pulse a few times until the mixture has the consistency of coarse meal. Empty food processor's bowl onto your work surface.

Make a well in the center of the mounded flour and butter mixture and pour the beaten egg and vanilla extract into it. Use a fork to incorporate the liquid into the solid ingredients then use your fingertips. Knead lightly just until the dough comes together into a ball. Shape the dough into a flat disk and wrap in plastic wrap. Place the dough in the refrigerator and chill for at least two hours. You can refrigerate the dough overnight.

Roll out the crostata dough, on a work surface lightly dusted with flour. Roll the dough into a circle about ⅛-inch thick. If at anytime the dough becomes too soft to work with, chill in the fridge until firm again.

Ease the dough into the tart pan, centering it, and delicately press it all around so the corners are well covered. Trim the excess dough hanging over the edges of the pan. Press the remaining dough around the border into the sides of the pan making sure the border is an even thickness all the way around.

Roll out remaining scraps of pasta frolla and cut into lattice strips or desired shapes using a cookie cutter.

Cover and chill crust at least 1 hour or up to 2 days.

Maple Cream Filling

½ gallon fresh apple cider or cold-pressed apple juice
½ cup maple sugar
1 cup heavy whipping cream
3 large eggs
¼ tsp coarse kosher salt
⅛ tsp freshly grated nutmeg
2 drops maple extract

Bring apple cider or apple juice to rolling boil in large pot over high heat. Boil until bubbling thickly and reduced to generous ¾ cup, stirring occasionally, 40 to 45 minutes. Transfer to small bowl and cool. DO AHEAD Can be made 2 days ahead. Cover and chill.

Preheat oven to 350°F.

Grind maple sugar to powder in spice mill, blender, or mini processor. Transfer powdered maple sugar to 4-cup glass measuring cup; add cream, eggs, ¼ teaspoon coarse salt, nutmeg, extract, and ¾ cup cooled cider reduction and whisk to blend well.

Place tart pan with crust on baking sheet; set on rack in oven. Pour in filling. Bake tart until filling is puffed and cracked around edges and gently set in center, about 35-40 minutes. Transfer tart to rack and cool to room temperature, 1 to 2 hours.

Push up pan bottom, releasing tart. Cut tart into wedges and serve with compote (recipe below) and if desired, freshly whipped cream.


Maple-Cranberry Compote

2 cups fresh or frozen cranberries, picked over and rinsed
½ cup pure maple syrup (preferably Grade B)
¼ cup (packed) dark brown sugar
¼ cup apple cider
½ tsp finely grated lemon zest

Combine cranberries, maple syrup, brown sugar, apple cider, and lemon zest in heavy medium saucepan. Bring to boil over medium-high heat, stirring until sugar dissolves. Reduce heat to low and simmer until most berries pop and juices thicken slightly, 4 to 5 minutes. Transfer to small bowl. Chill until cold, about 2 hours. DO AHEAD Can be made 3 days ahead. Cover and keep chilled.

Wednesday, November 10, 2010

"Mornin' Mash is the Truth!"


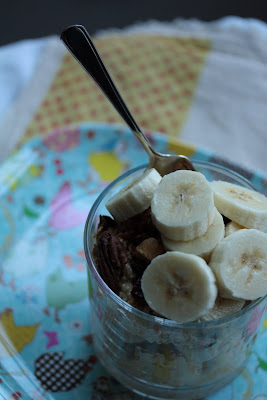
Those words were chatted to me enthusiastically after sharing my new go-to breakfast with my workplace BFF. He was referring to what most of Europe (and beyond) might call Bircher Müesli: a "mash up" of raw oats and raisins softened and plumped by a long soak in citrus juices and/or yogurt (or some other type of dairy), then embellished with endless combinations of fruits, nuts, and natural sweeteners. Absolutely refreshing and perfectly filling (in an appetite-curbing, good way), this is first-meal-of-the-day virtue at its humblest. It resembles a sort of cold oatmeal or soft, chewy granola, but with way, WAY better texture and flavor! I like to mix in mashed banana or homemade jam or applesauce to give it a bit of sweetness. I added mashed pawpaw fruit when that was in season! Pumpkin butter or apple butter or my pear butter would be a nice seasonal choice also. A jar of homemade granola always sits on my kitchen counter, so I sprinkle on a bit of that too for added crunch. If you don't eat breakfast in the car while driving to work like I do each morning, a drizzle of honey would be an excellent touch. I should also mention this is a great make ahead deal that with minimal advanced prep work should see you through a week's worth of breakfasts, helping you get out the door just a wee bit faster. Varying your toppings should keep you from getting bored.

I was introduced to Bircher Müesli several years ago at a hotel breakfast bar in Sydney and was happy to find it again when I traveled this summer to Hamburg and Oslo. European hotels' complimentary breakfasts (even the budget-friendly ones) knock the socks off of what's considered a "continental breakfast" in the States. Across the pond you will find generous spreads with much more healthy, non-processed options. Since returning home, I found a recipe in my Gourmet Magazine cookbook that I've been tweaking here and there and was eager to post my variations. Then David Lebovitz beat me to the punch with a post on Bircher Müesli last week! With that, I almost wasn't going to post my recipe, but then I thought twice. Perhaps ::shudder:: you don't know of his blog or have never heard of this recipe or of Maximilian Bircher-Benner, the Swiss equivalent of the Michigan health-enthusiast/inventor of corn flakes, John Harvey Kellogg. Everyone deserves a little morning goodness. I'm happy to do my part!


Bircher Müesli
makes 16 cups; serves 8-10

1 lemon
1 juicing orange
1 grapefruit
1½ cups steel cut oats (Irish oats)
3 cups old fashioned rolled oats
⅔ cup raisins
1 quart whole milk, plain yogurt

Toppings and Mix-ins:
sliced or mashed banana
granola
coarsely grated apples
toasted nuts
fresh berries
honey
etc...

Finely grate zest from lemon and orange. Squeeze juice from all of the fruits to obtain about 1½ - 2 cups of citrus juice. Combine the zest, juice, oats, raisins, and yogurt in a large re-sealable container. Stir until thoroughly mixed. Refrigerate covered for at least eight hours to allow the oats to soften.

When hungry, portion out servings into individual bowls and top as desired.

Bircher Müesli will keep for about a week, covered tightly and refrigerated.


Wednesday, October 27, 2010

Delicata Squash & Toasted Fennel Seed Doughnuts


I have fond childhood memories of doughnuts. Just ask me about “little girl” doughnuts and you’ll see my face light up about special, perfectly-portioned treats my dad used to bring us from a small neighborhood doughnut shop. It operated out of a trailer parked in the lot of a shopping plaza. (I suppose this was my early introduction to food carts.) The best flavors always seemed to sell-out before sunrise, and the shop never stayed open past late morning. Now that I'm older, for health-conscious reasons, I stopped eating such fried indulgences. And really, most places selling doughnuts around town just don't do justice to my flavor memory anyways.

Although lately, I've been justifying eating “junk food” if I make it myself AND if I turn it into something a little more “high-end”. About this time last year I became very interested in homemade doughnuts. I was inspired by this post from Cannelle et Vanille, and then as the doughnut trend took off, built up momentum in my doughnut-making repertoire trying several different recipes. The recipe below is adapted from Cannelle et Vanille, but it incorporates the flavors I’ve been drawn to this fall: roasted winter squash and toasted fennel seed; warm notes of caramel with cool notes of licorice. To me, that combination tastes like a decadent candy; satisfyingly sweet but not overly saccharin.

I’ve been sampling various squash from my farm share, trying earnestly to learn the differences amongst them. So far, my squash of choice is delicata. A well-ripened one will taste candied when roasted, but not cloying. A moderate-sized one (just under a pound) yields the perfect amount of puree needed to make these doughnuts. Expect about one cup of puree per pound of squash. Sure it’s an extra step of preparation to roast and puree a whole squash instead of mindlessly opening a can of solid packed pumpkin. But branch out a little in your “from scratch” abilities. Try a new flavor. Learn how to circumvent a pumpkin shortage, if the need again arises. Avoid the fallout from what BPA-lined cans might leech into your food. I'll stop. I think you get the point.

Farmer's Market photo by Sarijk.

The October 2010 Daring Bakers challenge was hosted by Lori of Butter Me Up. Lori chose to challenge DBers to make doughnuts. She used several sources for her recipes including Alton Brown, Nancy Silverton, Kate Neumann and Epicurious.

Delicata Squash & Toasted Fennel Seed Doughnuts
makes about 20 doughnut rings plus 20 doughnut holes

Pre-preparation of squash puree and fennel seeds:
1 medium delicata squash (about 12 oz or 350 grams)
1 TBS fennel seeds

Preheat oven to 350° F. Slice the squash in half lengthwise and use a spoon to scoop out the seeds. Roast the halves, cut side down, in a baking dish filled with enough water to come a ½-inch up the sides of the squash. Cook until ultra tender when pierced by a fork, 25-30 minutes.

When sufficiently tender, remove squash from oven and allow to rest until cool enough to handle. Scrape the flesh away from the skin and tranfser to the food processor. Puree until extremely smooth, like baby food. Transfer to a mesh sieve set over a bowl and strain for several hours to remove excess liquid.

Meanwhile, place the fennel seeds in a dry skillet set over medium heat. Toast the seeds for about a minute or two. Tossing the seeds often. When they have turned a few shades darker and begin to smell fragrant, remove from heat and transfer to a spice/coffee grinder. Grind the toasted fennel seeds to a fine powder.

To make the doughnuts:
3 cups (375 grams) all purpose flour
scant ½ cup (55 grams) hazelnut flour
10 grams baking powder
8 grams baking soda
1 tsp cinnamon
1½ tsp freshly ground toasted fennel seed
⅛ tsp ground cloves
10 grams salt
½ cup (110 grams) delicata squash puree
¼ cup (60 grams) whole milk at room temperature
2 TBS (40 grams) sour cream at room temperature
scant ½ cup (100 grams) sugar
2 eggs at room temperature
4 TBS (60 grams) butter, melted

Canola oil, for frying
2 cups (400 grams) sugar
2 tsp freshly ground toasted fennel seed
1 tsp ground cinnamon

In a large bowl whisk together the flour, hazelnut flour, baking powder, baking soda, cinnamon, ground fennel seed, cloves, and salt.

In a separate bowl, mix the squash puree, milk, sour cream, sugar, eggs, and melted butter. Add this wet mixture to the dry ingredients and fold until it starts to come together. Knead lightly with your hands until a cohesive mass forms.

Dust your work surface with a bit of flour and turn out the dough on to this. Dust your hands and the top of the dough mound lightly with flour. Shape and pat the dough gently down into a circle about ½-inch thick. Using a doughnut cutter or two graduated-sized, round cookie cutters, cut out the doughnuts and place them on a sheet pan lined with parchment and dusted with flour.

To fry the doughnuts, fill a pan up to 2" of canola oil. Heat the oil until it reaches 375° F. Do not over-crowd the pan with doughnuts. Fry about 3 at a time (depending on the size of the pan). They will sink to the bottom but then float to the top. Turn them over and let them cook for an additional minute or so.

Drain them on paper towels and while hot, toss them in the cinnamon-fennel seed sugar.

These are best eaten the day they are made, but will last a day or more, loosely covered at room temperature.

Friday, October 15, 2010

Tea-Cured Salmon

I often contribute recipes to the blog of my friends' tea company, Arbor Teas. Here is the latest recipe I developed using a few of their teas.

Last time I was in DC, I made a point to dine at Teaism. If you're not familiar, it's a restaurant and tea shop that offers simple tea cuisine, including Japanese bento boxes, Thai curries and Indian tandoor breads. I ordered a bento box. It provided all of the ingredients necessary to makeshift handroll sushi. Tea-cured salmon was the star of the kit.

Tea-curing was a new concept for me. Something I just had to try for myself when I got back to my kitchen. If you think logistically, it's basically a variation on gravadlax, but with tea leaves instead of dill. Just imagine the flavor potential tea offers! I tried three very different organic loose leaf teas from Arbor Teas collection: a smokey lapsang souchong black tea, a fragrant jasmine green tea, and a citrusy schizandra berry white tea. Samples were offered at a brunch that centered around the task of making homemade bagels. Surprisingly, jasmine yielded the most predominant flavor, and was preferred by all who sampled. The lapsang souchong gave a more traditional lox-like option. For something light and different, schizandra berries, found in Arbor Teas' newest organic loose leaf tea, lent a hint of tangerine.

Though salmon is most common, this method of curing can be applied to any fatty fish. This recent article in the LA Times has plenty of suggestions and champions the return of this ancient form of food preservation. One day, I'd like to try similar methods with pork belly to make bacon, though I get the impression it may be a bit more complicated... If you get to it before me, let me know how it turns out!


Tea-Cured Salmon

1 pound salmon filet, deboned with skin on
1 cup loose leaf tea
½ cup turbinado sugar (granulated will work too)
½ cup kosher salt or flakey sea salt

Mix the tea, salt and sugar in a small bowl. Line a large, non-reactive casserole dish or baking pan with plastic wrap. Pat the salmon filet dry and lay it skin-side down in the pan. Sprinkle the tea-salt-sugar cure mix over the salmon and coat evenly. Fold the edges of the plastic wrap over the salmon (somewhat like a present) to wrap tightly. Use something heavy - about 5-10 pounds - to weigh the salmon down. Refrigerate for 3 days. You must allow up to three days for curing. Remove the salmon from the refrigerator and use cold water to rinse off the cure mixture. Pat the salmon dry with paper towels, then place skin side-down on a cutting board. With a sharp knife, slice the salmon diagonally off the skin. The sliced salmon will keep for about a week in the refrigerator. Layer the slices on sheets of wax paper and store wrapped in plastic.

Thursday, September 30, 2010

Amy Atlas Wannabe


Last week my friend Jo got married. The wedding venue was a spectacular farm, complete with gorgeous barns, rolling hills, and a peaceful lake. Jo hired a super talented florist and one of the best local caterers in town. Heather (Sweet Heather Anne) and I were lucky enough to be asked to do an Amy Atlas-esque dessert table for the reception. Jo was such a laid back bride and gave everyone a lot of creative freedom to work within her vision. Her theme was a series of playful vignettes, packed with the charm and vintage worthy of a photo spread in Once Wed. Here's a peek at her penny candy table. See what I mean? Adorable!


And this is how the dessert table turned out. To pull the look together, Heather and I used various cake stands, jadeite platters, metal canisters, and a lovely floral tablecloth from Jo's collection of vintage treasures.


Heather made the cakes, three total and each a different flavor; I made the pastries; and together, we made 8 dozen painted sugar cookies!


The cake design was inspired by Jo's wedding attire, a striking teal mermaid gown with ruching from bodice to floor and a peacock feather hair piece.


The cake flavors were a ginger sour cream cake layered with apricot-ginger jam and topped with a vanilla buttercream, a caramel cake with praline crunch buttercream, and a rich chocolate cake with mexican-spiced chocolate ganache.


In addition to cake and cookies, beautifully rustic apple and raspberry pies made by Helen and Blake of EAT catering also had prominence on the table.


The pastries included chocolate dulce de leche bars, mexican wedding cookies, and brown butter spoon cookies sandwiched with either my homemade raspberry or apricot jams.


A small detail of which I'm most proud for the display is the signage. I was stumped by how to prop up the labels and disenchanted with the numerous cheesy place card holders available for purchase.


Then DIY inspiration hit. When looking through Jo's vintage tableware collection, I saw these: rusty mattress springs with alligator clips welded to the tips meant to be used to display the table numbers.


I made a miniature version by twisting 18-gauge copper wire into the necessary shape. Then, to eliminate the shiny, new-penny look, soaked the wires in a "tarnishing" solution borrowed from a jewelry-making friend to give the perfect brown/black patina.


Making this table (every step from concept to execution) was so much fun! A perfect use of my interests and talents. It would be a dream to quit my day job and instead do this full time. Watch out Amy Atlas, one day I may just get the courage to take the leap...

Sunday, September 26, 2010

two birds...

I might have a thing for owls...

so naturally, I was super excited when my friend Amanda asked me to make owl-themed sugar cookies for a baby shower. Coincidentally, the daring bakers challenged us to make September-themed sugar cookies. Owls are autumnal...right?


The September 2010 Daring Bakers’ challenge was hosted by Mandy of “What the Fruitcake?!” Mandy challenged everyone to make Decorated Sugar Cookies based on recipes from Peggy Porschen and The Joy of Baking.

Below is my tried and true recipe for sugar cookies. I prefer the flavor and the dough is easy to work. Peggy's recipe doesn't use a leavener, which may be important if you wish to preserve a flat decorating surface or have cookie cutters with intricate edges.

Iced Sugar Cookies
Makes about 6 dozen cookies

3 cups flour
1½ tsp baking powder
½ tsp salt
2 sticks plus 3 TBS unsalted butter, softened
1 scant cup of sugar
1 egg
1 TBS milk
2½ tsp vanilla
¼ tsp lemon zest

Whisk together flour, baking powder, and salt in a large bowl. In a separate bowl, beat together butter and sugar until fluffy and well blended. Add egg and mix until combined. Mix in milk, vanilla, and lemon zest. Gradually stir in flour mixture until well blended. Refrigerate dough until cold (at least one hour or up to several days).

Preheat oven to 375° F.
Roll out dough on floured surface to ⅛-in thickness . Cut out desired shapes and place on parchment-lined baking sheets. Chill cut cookies for ~10 minutes in the refrigerator and then transfer baking sheet to the oven. Bake 8 minutes or until edges are golden. Allow cookies to cool completely before icing.

Royal Icing

4 - 6 cups powdered sugar
4 large egg whites
4 tsp lemon Juice
2 tsp flavored extract, optional
food coloring

Beat egg whites with lemon juice until combined. Sift the icing sugar to remove lumps and add it to the egg whites. Beat on low until combined and smooth. Add desired amount of food coloring and mix until homogenous. Use immediately or keep in an airtight container.

Two amounts of icing sugar are listed. The lesser amount is good for a flooding consistency, and the larger amount is for outlining, but you can add even more for a much thicker consistency good for writing. If you add too much icing sugar or would like to make a thinner consistency, add very small amounts of water, a few drops at a time, until you reach the consistency you need.

Tuesday, September 14, 2010

Million Dollar Butter


Late last summer, I started what I think just may become a tradition. Or ritual? Or right of season's passage? Well, maybe...

I made pear butter.

There's an unkempt pear tree in the field behind my home. The first year I noticed it, I picked so many, climbing first a tall ladder and then higher, straight up the branches. I picked and picked and then fretted each day after. "Are they ripe yet?" Pears ripen best off the tree. The technical term is climacteric. Like waiting for bananas to ripen, this may not seem like a big deal to let your harvest ripen here and there at a snail's pace, especially if you're just consuming out of hand as a snack. If your intention is to can them at peak flavor, though, the trick is to get the bulk to ripen simultaneously, and preferably on a not-so-busy weekend. That wasn't the case my first time around...

The reality for pears: the zenith of perfect ripeness seems to last an all too brief second before rot sets in. The reality of this recipe I'm sharing below: possibly every pot and pan in your kitchen will be used and a vigilant eye and stir-happy hand is required to monitor simmering for a couple of hours.

For the fretting over ripeness, for making this recipe the same day as hosting a largish dinner party, for stemming and quartering a way too ambitious quantity of fruit, for the passing through a food mill, not once, but twice to ensure proper consistency, for the stirring and simmering for hours in a hot kitchen, for the precious pear butter-full half-pint jar that broke irreparably in the hot water bath when being processed for storage and thus had to be thrown out, is why I've started charging $$$$/jar. No other jam has caused me this much hassle....or been received so well by friends!

Nah, I don't really charge. Like most everything else I make in my kitchen, I freely give it away, but I am sure to let its recipients know how much its worth in labor. Thankfully, they're quick to let me know that value I'm estimating matches in flavor.

Hopefully this doesn't deter you from trying to make it yourself. I bet you can find ways to make it less labor intensive! This year's batch went a little smoother, and I've got next year to look forward to further streamlining my technique.


Spiced Pear Butter
make 1½ quarts

6 lbs barlett pears, rinsed, stemmed and quartered, if you plan to use a food mill, don't bother to peel or core
¾ cup pear brandy
the juice of one lemon
1 cup turbinado sugar
6 orange slices
2 lemon slices
2 vanilla beans, split length wise, seed scraped
2 cinnamon sticks
9 cardamom pods
6 whole cloves
2 pinches of sea salt

Combine the pears, brandy, and lemon juice in a large preserve pan. Cover and simmer until the pears are soft, about 25 minutes. Lift the lid to occasionally give the pears a stir and push unsubmerged pears into the liquid. When soft, pass the pears through the coarsest setting of your food mill or coarse sieve to remove the peel. Then pass through the finest setting of the mill or transfer to a food processor to puree.

Return the puree to a large, heavy saucepan. Add remaining ingredients. Stir over low heat until the sugar dissolves. Increase the heat to medium and boil ever so gently until the mixture thickens and mounds slightly on the spoon. This could take 1 to 1½ hours depending on the juiciness of the pears. Stir often to prevent burning the bottom.

Discard fruit slices and spices. Ladle pear butter into hot canning jars, filling only ¼ inch from the top. Using a cloth dipped in hot water, wipe the rim free of drips. Place lids on jars and seal.

Arrange the jars in a pot of boiling water so that at least one inch of water covers the tops. Boil rapidly for 15 minutes. Remove the jars and cool to room temperature. Press the center of each lid. If any lids pop up, store these in the refrigerator. Sealed jars will keep at room temperature for up to one year. Refrigerate after opening.

The September 2010 Daring Cooks’ challenge was hosted by John of Eat4Fun. John chose to challenge The Daring Cooks to learn about food preservation, mainly in the form of canning and freezing. He challenged everyone to make a recipe and preserve it. John’s source for food preservation information was from The National Center for Home Food Preservation.